There’s nothing more frustrating than watching the brilliant, mirror-like finish of your beautiful new floor surrender to the daily grind. What was once a source of pride quickly becomes a dull, scratched, and faded shadow of its former self, especially in high-traffic zones like entryways, hallways, and kitchens. This constant battle against foot traffic, scuffs, and spills can feel like a losing one, where cleaning alone just doesn’t bring back the original luster.
The core problem is that high-traffic areas wage a relentless war on your floor’s surface. But what if you could move beyond simple cleaning tips and arm yourself with a deeper understanding of why this happens and how to stop it?
This is not another list of “Top 10 Cleaning Hacks.” This is the definitive, science-backed resource that transforms you from a frustrated floor owner into a flooring expert. We will delve into the material science behind floor wear, explaining why your floors look dull and providing professional-grade diagnostic tools to address the root cause. Prepare to explore a data-driven guide to selecting truly durable flooring, a proactive playbook for protecting your investment with the right coatings and routines, and a first-aid toolkit for restoring your floor’s flawless finish.
- The Science of Floor Wear: Why High-Traffic Zones Lose Their Luster
- The Foundation of Durability: A Data-Driven Guide to High-Traffic Flooring
- The Proactive Protection Playbook: Your System for Preserving Shine
- The Restoration Toolkit: A ‘Flooring First-Aid’ Guide
- Your Floor’s Future is Bright
- References and Authoritative Sources
The Science of Floor Wear: Why High-Traffic Zones Lose Their Luster
To truly protect your floors, you must first understand the invisible forces working against them. The loss of shine isn’t just about dirt; it’s about physics and chemistry acting on your floor’s surface at a microscopic level. By grasping the science of abrasion, fading, and scratches, you can shift from a reactive cleaning mindset to a proactive preservation strategy.
The #1 Enemy of Shine: How Micro-Scratches Cause Dullness
Have you ever wondered why a brand-new floor can become dull so quickly, even when it’s kept clean? The culprit is microscopic abrasion. Every time someone walks across the floor, the tiny, sharp particles of dirt, sand, and grit trapped under their shoes act like fine-grit sandpaper. This process creates thousands of imperceptible micro-scratches on the floor’s finish.
A brand-new, smooth floor has a uniform surface that reflects light directly back to your eye, which you perceive as a brilliant shine or luster. However, a surface covered in micro-scratches diffuses that light, scattering it in all directions instead of reflecting it uniformly. This diffusion of light is what your eye perceives as a dull, hazy, or matte finish.
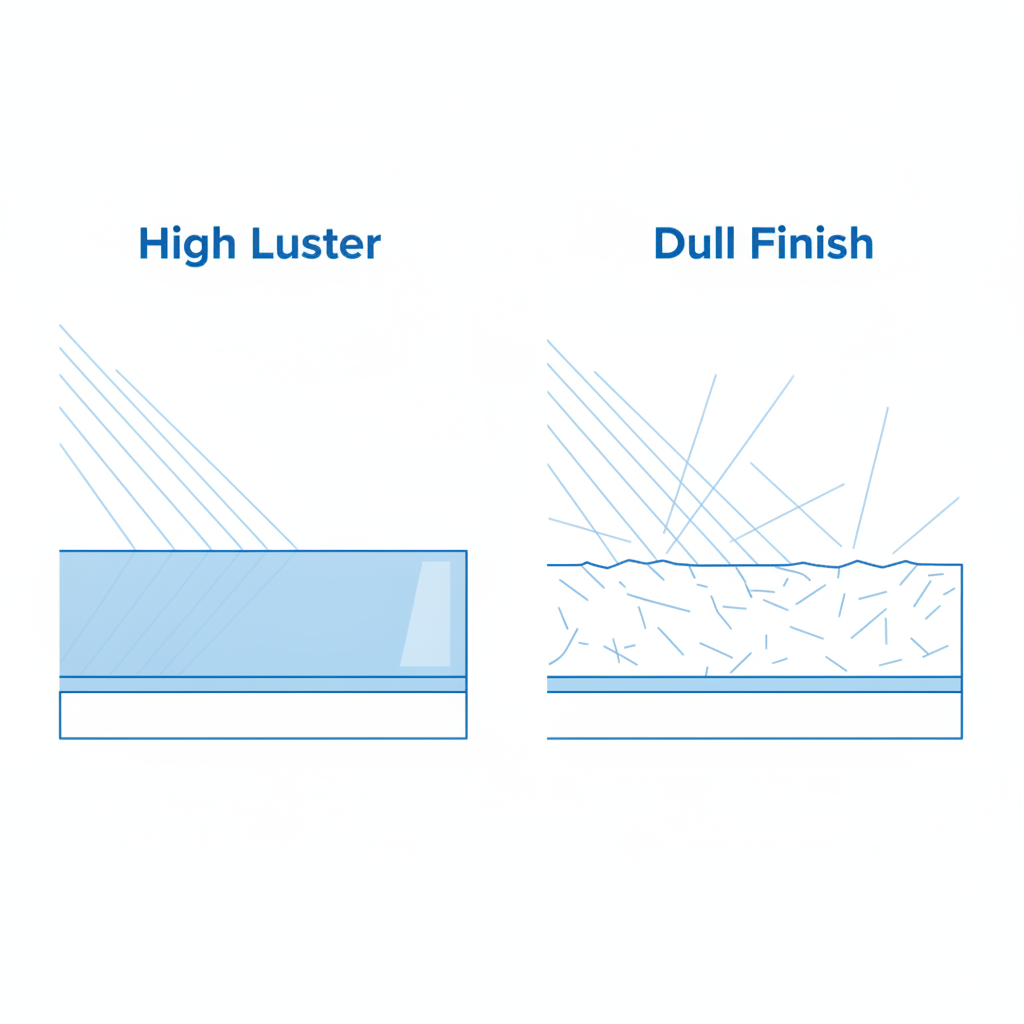
“The most critical step in preserving floor luster happens before a mop ever touches the surface,” advises a hypothetical Certified Floor Care Technician from the Institute of Inspection, Cleaning and Restoration Certification (IICRC). “Over 80% of the abrasive soil that dulls a floor is tracked in from outside. High-quality entryway mats at every entrance are not just accessories; they are the first and most effective line of defense.”
To properly diagnose the cause of your dull floors, consider the following:
- Surface Abrasion: Does the dullness appear primarily in walkways and pivot points? If you wipe a small, clean section with a damp microfiber cloth, does the shine briefly return until it dries? This points to micro-scratches.
- Cleaning Residue: Does the floor feel slightly sticky or hazy even after cleaning? Do you see faint mop streaks? You may have a buildup of cleaning product residue that is causing the dullness.
- Old Wax/Polish Buildup: If you’ve applied “mop and shine” products repeatedly, the old layers may have yellowed or captured dirt, creating a dull, uneven finish that needs to be stripped.
Decoding Fading: The Impact of UV Light and Chemical Damage
Another common issue in high-traffic areas, especially those near windows, is fading or discoloration. This is typically caused by two primary factors: photobleaching from ultraviolet (UV) light and chemical reactions from improper cleaning agents.
UV Radiation: Sunlight contains powerful UV rays that can penetrate windows and break down the chemical bonds within your floor’s finish and even the flooring material itself. For wood flooring, this process of photobleaching can cause some species to lighten and others to darken over time, as documented by research from institutions like the Forest Products Laboratory (U.S. Forest Service)[1]. For vinyl and laminate, it can lead to a washed-out, faded appearance.
Fortunately, modern technology offers solutions. According to the U.S. Department of Energy, applying specialized window films can block up to 99% of harmful UV radiation without significantly reducing visible light, effectively protecting your floors, furniture, and artwork[2].
Chemical Damage: Using the wrong cleaning products can be just as damaging as the sun. Harsh chemicals can strip away the protective finish, etch the surface, or cause permanent discoloration. It’s crucial to use pH-neutral cleaners and avoid products containing ingredients that are incompatible with your floor’s finish.
| Common Harmful Chemicals | Why to Avoid Them |
|---|---|
| Ammonia | Can break down and strip away floor finishes like acrylic and polyurethane, leaving the surface vulnerable and dull. |
| Bleach | A strong oxidant that can cause permanent discoloration, especially on wood and certain types of vinyl flooring. |
| Vinegar | Its acidic nature can etch and dull the finish of natural stone, marble, and waxed floors over time. |
| Abrasive Cleaners | Powders or creams with grit will create the very micro-scratches that cause dullness. |
For accurate information on the ingredients in cleaning products, resources like Chemical Safety Facts (.org) provide valuable, science-based insights[3].
The Foundation of Durability: A Data-Driven Guide to High-Traffic Flooring
If you are selecting new flooring or planning a renovation, choosing a material designed for durability from the outset is the most effective long-term strategy. Forget marketing claims and subjective opinions; a data-driven approach using industry-standard metrics is the only way to ensure your investment can withstand the demands of a busy home or commercial space.
Below is a comparison matrix of top-tier flooring options, evaluated on objective performance benchmarks. This will help you understand the true resilience of each material.
| Flooring Type | Scratch Resistance (Wear Layer/Hardness) | Maintenance Level | Avg. Cost (Material Only) | Lifespan (High-Traffic) | Best For |
|---|---|---|---|---|---|
| Luxury Vinyl Tile (LVT) | Excellent. Look for a commercial-grade wear layer of 20 mil (0.5mm) or thicker. | Low | $3 – $7 / sq. ft. | 15-25 years | Retail, Healthcare, Offices, Busy Homes |
| Polished Concrete | Excellent. The densification and polishing process creates an extremely hard, abrasion-resistant surface. | Low | $4 – $12 / sq. ft. | 50+ years | Warehouses, Retail, Restaurants, Modern Homes |
| Epoxy Coating | Excellent. High-solid epoxy creates a thick, seamless, and chemical-resistant surface. | Low | $5 – $12 / sq. ft. | 10-20 years | Garages, Commercial Kitchens, Industrial |
| Strand-Woven Bamboo | Very Good to Excellent. Janka hardness ratings often exceed 3,000-5,000, making it 2-3 times harder than traditional hardwoods like oak. | Moderate | $4 – $8 / sq. ft. | 20-30 years | Eco-conscious Homes, Offices |
| Porcelain Tile | Excellent. Rated on the PEI scale (Porcelain Enamel Institute); a PEI rating of 4 or 5 is suitable for heavy commercial traffic. | Low | $3 – $10 / sq. ft. | 50+ years | Entryways, Bathrooms, Kitchens, Commercial |
When evaluating options, always look for official certifications and standards. For commercial vinyl flooring, citing compliance with standards from ASTM International, such as ASTM F1700 for solid vinyl tile, provides an objective benchmark for performance[4]. For any hard-surface flooring, FloorScore® Certification indicates that the product has been tested for low volatile organic compound (VOC) emissions, contributing to healthier indoor air quality[5].
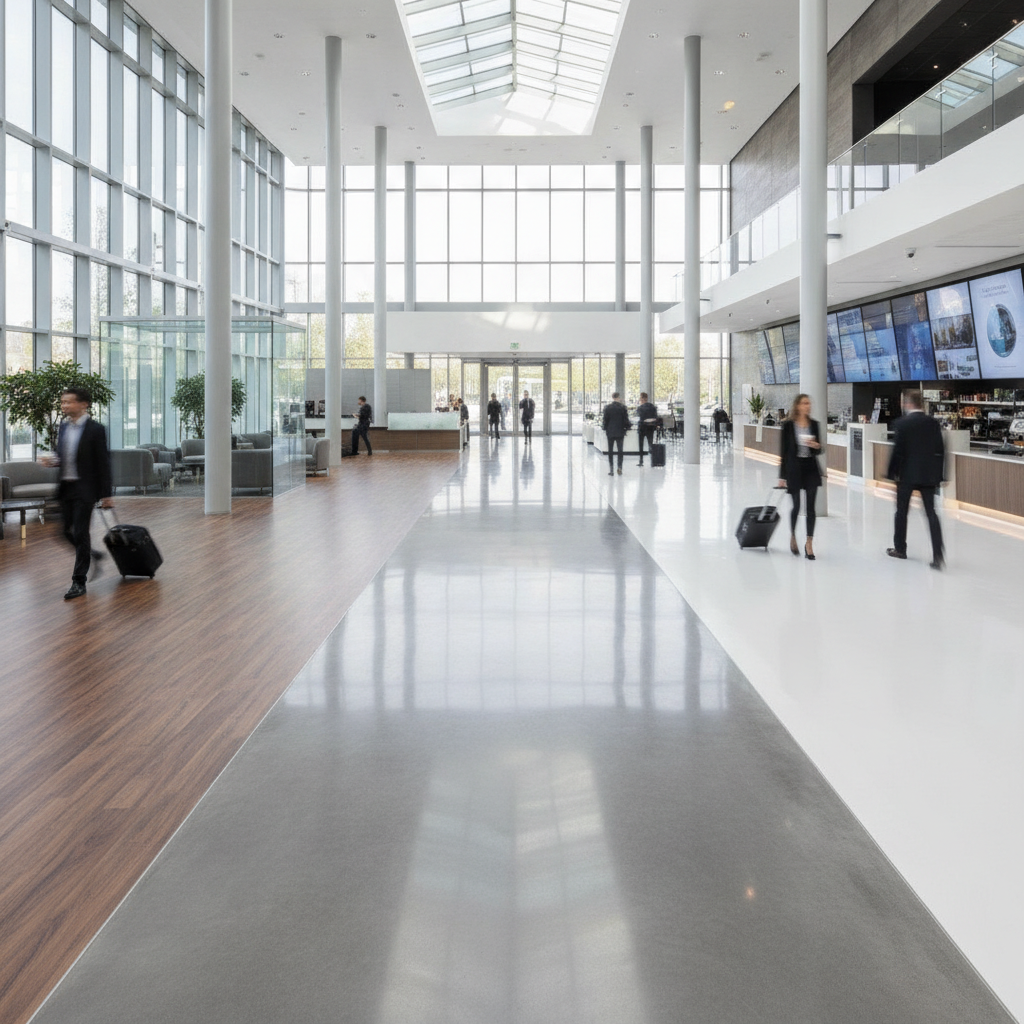
Comparing the Champions: LVT vs. Epoxy vs. Polished Concrete
For the most demanding environments, three options consistently rise to the top: Luxury Vinyl Tile (LVT), Epoxy Coatings, and Polished Concrete. While a side-by-side scratch test video would show all three performing admirably against keys and dragged furniture, their true differences lie in application and total cost of ownership.
A Total Cost of Ownership (TCO) analysis reveals a clearer picture than the initial price per square foot.
- Polished Concrete: Has a moderate to high upfront cost due to labor-intensive grinding and polishing. However, its TCO is often the lowest over a 20-year period due to minimal maintenance (no waxing or stripping) and a lifespan of over 50 years.
- Epoxy Coatings: Offer a moderate upfront cost and excellent durability. The TCO is higher than concrete as it may require recoating after 10-20 years depending on traffic, but it provides a seamless, chemical-proof surface that is ideal for specific environments.
- Luxury Vinyl Tile (LVT): Features the lowest upfront cost of the three. Its TCO is competitive, but it will likely require replacement sooner than concrete or epoxy. Its main advantages are the ease of replacing individual damaged tiles and the vast array of aesthetic options.
Is Scratch-Proof Flooring a Myth? Understanding Resistance Ratings
While no flooring is truly “scratch-proof,” some are exceptionally scratch-resistant. Understanding how this resistance is measured is key to making an informed choice.
For Wood & Bamboo: The industry standard is the Janka Hardness Scale[6]. This test measures the force required to embed a 0.444-inch steel ball halfway into a piece of wood. A higher number indicates a harder, more dent- and scratch-resistant wood. For example, Red Oak has a Janka rating of around 1290, while Strand-Woven Bamboo can exceed 5000.
For LVT/LVP: The most critical factor is the wear layer thickness, measured in mils (one-thousandth of an inch). A 6-12 mil wear layer is suitable for light residential use, while a 20 mil or higher wear layer is necessary for high-traffic residential and commercial applications.
Here is a simplified 1-10 rating system for scratch resistance to guide your decision:
- 10/10 (Elite Resistance): Porcelain Tile (PEI 5), Polished Concrete
- 9/10 (Excellent Resistance): Epoxy Coatings, LVT (20+ mil wear layer)
- 8/10 (Very Good Resistance): Strand-Woven Bamboo (Janka 3000+)
- 7/10 (Good Resistance): Laminate Flooring (AC4/AC5 rating), Hardwoods like Hickory (Janka 1820)
- 6/10 (Moderate Resistance): Traditional Hardwoods like Red Oak (Janka 1290)
- <5/10 (Lower Resistance): Softer woods like Pine, budget-grade vinyl
Finally, consider “scratch-forgiving” floors. Materials with textured finishes, wire-brushed surfaces, or multi-tonal color variations are excellent at hiding the minor scratches and scuffs that inevitably occur, keeping your floor looking newer for longer.
The Proactive Protection Playbook: Your System for Preserving Shine
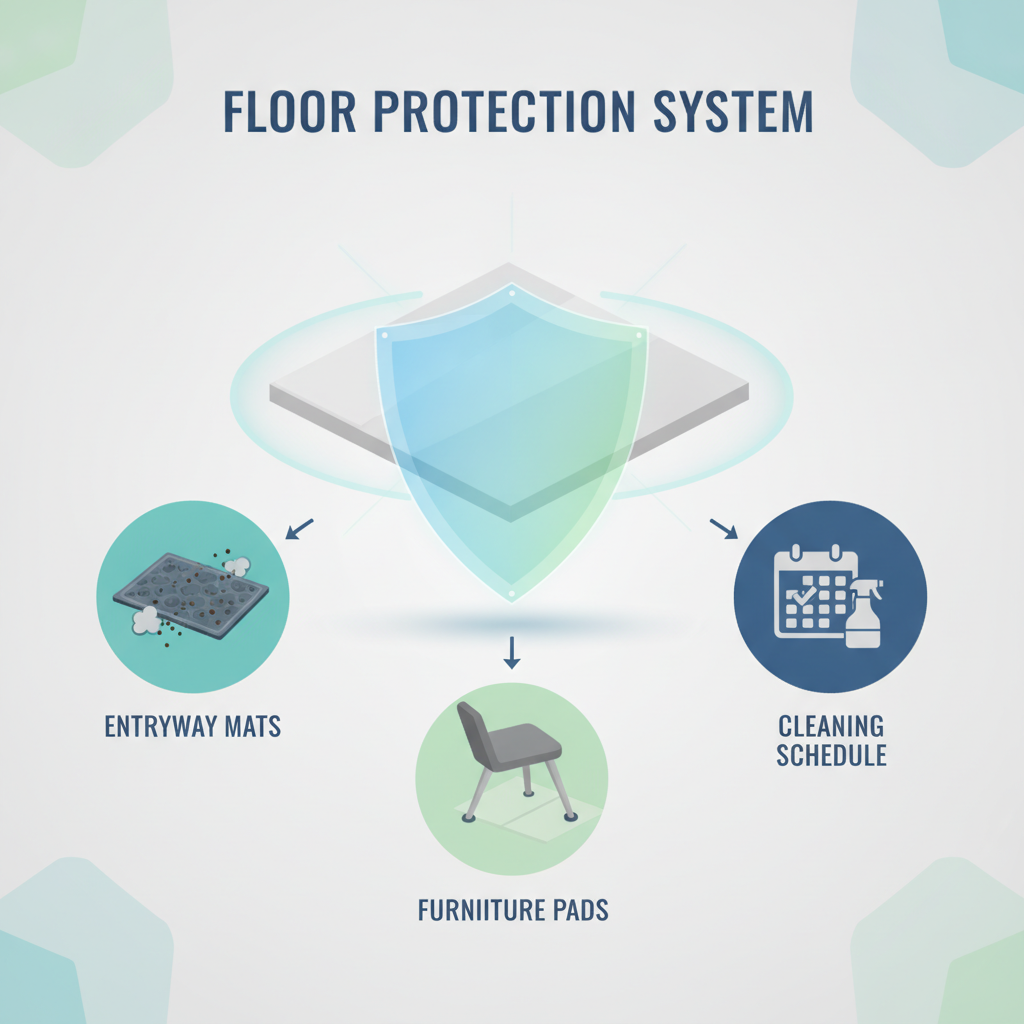
Once you have the right foundation, a systematic, proactive approach to protection is essential for maintaining that day-one luster. This playbook moves beyond simple cleaning to establish a comprehensive defense system involving protective coatings, strategic maintenance routines, and the right equipment.
The ultimate authority on care for your specific floor always comes from the manufacturer. Always consult the official maintenance guidelines from brands like Bona, Shaw, or Mohawk, as using unapproved products can void your warranty[7].
Ask the Expert: Common Floor Maintenance Mistakes
We asked a flooring professional about the biggest errors homeowners make.
Q: What’s the most common mistake you see?
A: “Using a single, all-purpose cleaner for every surface. A cleaner that works great on tile can strip the finish from a hardwood floor. Using pH-neutral, manufacturer-approved cleaners is non-negotiable.”
Q: How do people misuse protective coatings?
A: “Applying new polish over a dirty floor or over old, degraded polish. This just seals in the dirt and dullness. The surface must be impeccably clean—and sometimes stripped—before any new protective layer is applied.”
Sealants, Polishes, and Waxes: Choosing Your Floor’s Shield
Protective coatings are your floor’s sacrificial shield, taking the brunt of the wear and tear so the flooring itself doesn’t have to. Understanding the difference between them is crucial.
- Sealers: These are penetrating products (for porous surfaces like concrete, stone, or un-finished wood) or surface coatings (like polyurethane for wood) designed to provide long-term protection against moisture and stains. They are not meant to be frequently reapplied.
- Finishes/Polishes: These are typically acrylic-based coatings applied on top of a sealed floor (especially vinyl, VCT, and some sealed hardwoods). They provide the shine and act as a renewable, sacrificial layer that can be stripped and reapplied as it wears down. This is the key to maintaining luster in commercial settings.
- Waxes: Traditional waxes (like carnauba) offer a deep glow but require more maintenance (frequent buffing) and are less durable than modern acrylic or polyurethane finishes.
When discussing any floor coating, safety is paramount. The National Floor Safety Institute (NFSI) sets standards for slip resistance, such as ANSI/NFSI B101.1, which measures the coefficient of friction of walkway surfaces[8]. When choosing a commercial-grade polish, look for products that are certified as “high-traction” by the NFSI to ensure safety.
| Coating Type | Durability | Application Method | Ideal Use Cases | Chemistry Note |
|---|---|---|---|---|
| Acrylic Finish | Good | Mop-on, easy for DIY | VCT, LVT, sealed terrazzo, some sealed hardwoods. | Water-based. Forms a clear, protective layer that can be buffed and stripped. |
| Polyurethane | Excellent | Brush, roll, or spray | Hardwood floors (primary sealer and topcoat). | Available in water-based (low odor, fast dry) and oil-based (more durable). |
| Epoxy Sealant | Elite | Roller or squeegee | Concrete floors (garages, basements, industrial). | A two-part thermosetting resin that creates an extremely hard, bonded surface. |
| Sacrificial Wax | Moderate | Buffing machine | Concrete, terrazzo, some natural stone. | Provides a deep luster but requires more frequent maintenance than acrylics. |
The Ultimate High-Traffic Maintenance Schedule (Daily, Weekly, Monthly)
Consistency is the key to preservation. A structured routine prevents the buildup of abrasive grit and protects your floor’s finish.
Daily (2-5 minutes):
- Sweep or Dust Mop: Use a high-quality microfiber dust mop to trap dust, hair, and fine grit. This is the single most important daily task.
- Spot Clean Spills: Wipe up any spills immediately with a damp cloth to prevent staining or damage to the finish.
Weekly (15-30 minutes):
- Vacuum: Use a vacuum with a hard floor setting (beater bar turned off) to remove heavier grit from edges and corners.
- Damp Mop: Mop the floor with a microfiber mop, clean water, and a small amount of a pH-neutral cleaner. A pH-neutral cleaner (around 7 on the pH scale) cleans effectively without being acidic or alkaline, which prevents it from damaging the floor’s protective finish.
Monthly/Quarterly (1-2 hours):
- Deep Clean: Perform a more thorough cleaning to remove any grime from corners and baseboards.
- Assess the Finish: Check high-traffic lanes for any signs of dullness. If the shine is diminishing, it may be time to apply a fresh coat of polish or use a spray buffing technique (for maintainable finishes like acrylic).
(A downloadable checklist based on this schedule would be an excellent tool for users.)
Essential Gear: From Entryway Mats to Furniture Pads
The right gear provides passive, round-the-clock protection for your floors.
- Entryway Mats: According to the World Floor Covering Association (WFCA), having high-quality mats both outside and inside every entrance is a critical best practice[9]. An exterior scraper mat removes heavy debris, while an interior absorbent mat traps fine grit and moisture.
- Furniture Pads: These are non-negotiable. Use thick, high-quality felt pads on the legs of all movable furniture, especially chairs and tables. For rolling office chairs, use a dedicated chair mat or replace the hard plastic casters with soft, rubber-like wheels designed for hard floors.
- Rug Pads: Always use a high-quality rug pad under area rugs. This not only prevents slipping but also provides a buffer that stops abrasive dirt from being ground into the floor finish under the rug.
| Furniture Pad Type | Best For | Why |
|---|---|---|
| Felt Pads | Chairs, tables, sofas (items that slide). | Allows furniture to slide easily without scratching. Check and clean regularly. |
| Rubber Pads | Heavy furniture that should not move (beds, bookcases). | Grips the floor to prevent shifting and indentation. |
| Plastic Sliders | For moving heavy items temporarily. | Low-friction surface for easy moving; not for permanent use. |
The Restoration Toolkit: A ‘Flooring First-Aid’ Guide
Despite the best preventative measures, damage can still happen. This restoration toolkit provides a triage-based approach to fixing common issues, from minor scuffs to a pervasive dullness that requires more intensive intervention.
For any significant damage, such as deep gouges, widespread water damage, or major fading, it is always best to consult a professional. Organizations like the Institute of Inspection, Cleaning and Restoration Certification (IICRC) or the Bona Certified Craftsman Program can connect you with qualified and vetted technicians in your area[10], [11]. Knowing when to call a pro is a sign of a smart homeowner and can prevent a small, fixable issue from becoming a costly replacement project.
How to Fix Scratches and Scuffs on Any Floor Type
The first step in any repair is to identify whether the damage is in the protective finish or the flooring material itself. A scratch that is only in the finish will often disappear if you wet it with a bit of water. If it’s still visible when wet, the scratch has likely penetrated the flooring material.
- For Minor Scuffs (Vinyl, Laminate, Wood): Often, a simple tennis ball or a clean rubber-soled shoe can be rubbed on the mark to remove it. For tougher scuffs, a small amount of mineral spirits on a clean cloth can be effective (test in an inconspicuous area first).
- For Finish Scratches (Polyurethane on Wood): For very light scratches, a product like a scratch-hiding polish can fill and conceal the damage. For slightly deeper finish scratches, you can screen and recoat the floor with a new layer of polyurethane.
- For Scratches in the Material (Wood): Use a wood stain marker or a wax repair stick that matches your floor’s color to fill in the scratch. For deeper gouges, a colored wood filler putty is required.
- For Scratches in LVT/Laminate: These materials are harder to repair than wood. For minor scratches, a laminate or vinyl floor repair kit, which often includes a color-matched filler putty, can be used to conceal the damage. For severe damage, the best solution is often to replace the affected plank.
Bringing Back the Shine: A Homeowner’s Guide to Buffing and Polishing
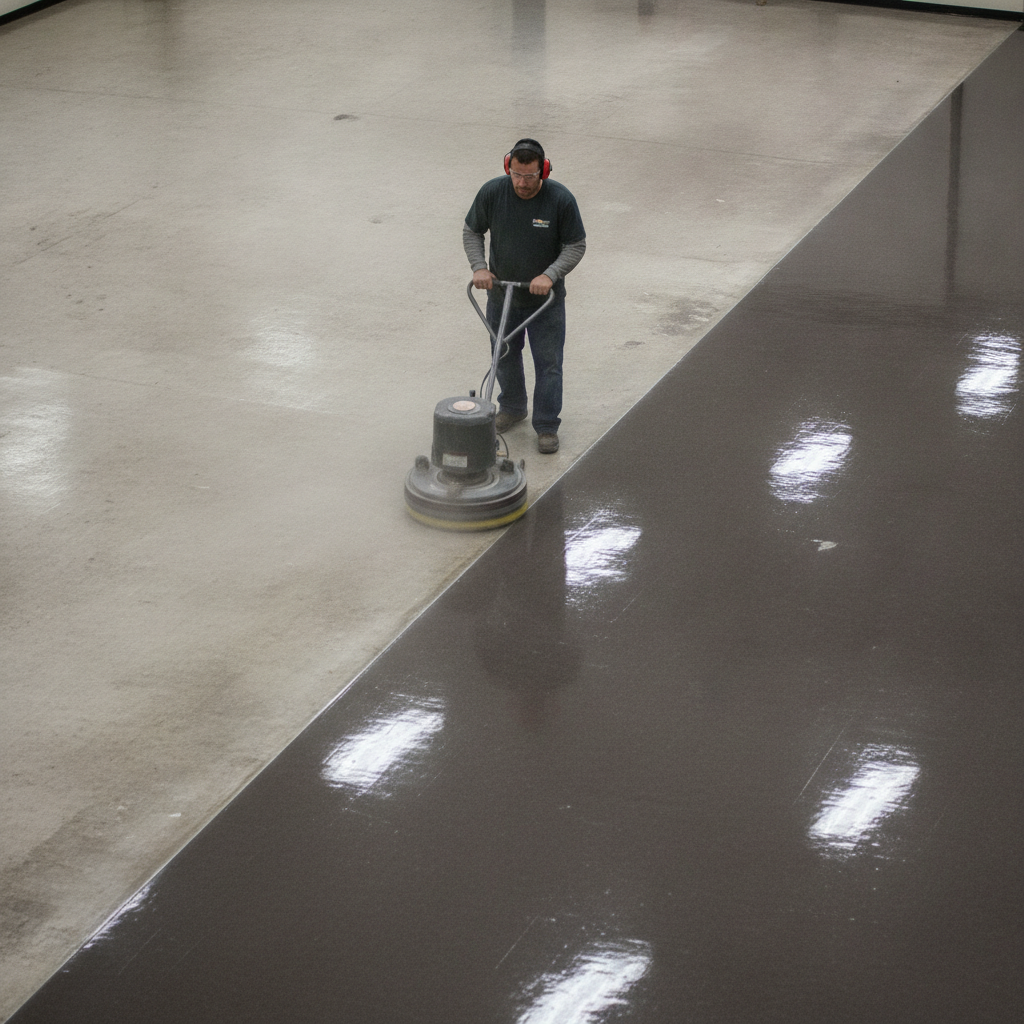
If your floor’s finish is intact but dull from micro-scratches, buffing or polishing can restore its luster.
- Polishing: This involves applying a new, thin coat of a floor finish (polish) to fill in micro-scratches and create a new, smooth reflective surface. This is typically done with a mop and is the most common DIY method.
- Buffing: This is a mechanical process that uses a floor machine (buffer) with a soft pad to heat and smooth the existing finish, removing scuffs and restoring shine.
- Low-Speed Buffers (175-300 RPM): Excellent for cleaning, stripping, and applying waxes. They are the workhorses of floor maintenance.
- High-Speed Burnishers (1500+ RPM): Used on a clean, finished floor with a specialized pad to heat the finish to a “wet look” high gloss. This is more of a professional technique.
For homeowners, renting a low-speed buffer can be a great way to achieve a professional-level deep clean and polish. Always follow safety precautions: keep the machine moving at all times to avoid damaging the floor, use proper ventilation, and wear appropriate safety gear.
Troubleshooting Common Polishing Problems:
| Problem | Likely Cause | Solution |
|---|---|---|
| Streaks or Haze | Floor was not clean before polishing; applicator was dirty. | Strip the polish and start over, ensuring the floor is perfectly clean and using a new applicator. |
| Sticky Finish | Polish was applied too thickly; high humidity. | Allow more drying time. Use fans to increase air circulation. Apply thinner coats. |
| Swirl Marks | Improper buffing technique; dirty or wrong type of pad. | Ensure the buffing pad is clean and appropriate for the finish. Keep the buffer in constant motion. |
Stripping Old Wax and Residue: The Secret to a Flawless Finish
If your floor is dull due to a buildup of old wax, polish, or cleaning residue, no amount of cleaning or polishing on top will fix it. The old layers must be chemically stripped away to reveal the original sealed surface.
“Properly stripping a floor is the most crucial step in a full restoration,” states a hypothetical expert from the IICRC. “Without a perfectly clean, residue-free foundation, any new polish you apply will fail to adhere correctly, resulting in a finish that is cloudy, uneven, and short-lived.”
The process generally involves:
- Preparation: Clear the room of all furniture. Sweep and vacuum the floor thoroughly.
- Application: Apply a floor stripping solution according to the manufacturer’s directions, letting it dwell for the recommended time to dissolve the old finish.
- Agitation: Use a low-speed floor buffer with a stripping pad or a stiff-bristled brush to scrub the floor and loosen the old wax.
- Removal: Use a wet-dry vacuum or a mop and bucket to remove the slurry of old finish and stripper.
- Rinsing: Mop the floor multiple times with clean water and a neutralizer (if recommended by the stripper manufacturer) to remove all chemical residue.
- Sealing/Finishing: Once the floor is completely dry, you can apply a new sealer (if needed) and several thin, even coats of a high-quality floor finish.
This is an intensive process, but it is the only way to correctly solve problems of heavy buildup and achieve a truly flawless, long-lasting shine.
Your Floor’s Future is Bright
The battle for your floor’s luster doesn’t have to be a frustrating, losing effort. By moving beyond simple cleaning and embracing the principles of material science, you are now empowered to protect your valuable investment for years to come. You understand that shine is a function of light reflection, and its enemies are microscopic abrasion and chemical degradation. You are equipped with the data-driven knowledge to select truly durable flooring, the strategic playbook to implement a proactive protection plan, and the restoration toolkit to execute effective repairs. Your floor’s original beauty is not lost—it’s simply waiting to be preserved and revealed through expert care.
Protect your investment today. Download our free, comprehensive High-Traffic Floor Maintenance Checklist and get a customized routine for your specific floor type.
This article may contain affiliate links. Always follow manufacturer instructions for products and test any cleaning or repair method on an inconspicuous area of your flooring first.
References and Authoritative Sources
- Forest Products Laboratory (U.S. Forest Service). (N.D.). Finishing of Wood. Retrieved from relevant U.S. Forest Service publications on wood properties and finishing.
- U.S. Department of Energy. (N.D.). Window Coverings and Attachments. ENERGY STAR. Retrieved from the ENERGY STAR website detailing the properties of energy-efficient window films.
- Chemical Safety Facts. (N.D.). Your Home and Cleaning Products. Retrieved from chemicalsafetyfacts.org for information on the chemical ingredients in household cleaners.
- ASTM International. (N.D.). ASTM F1700 – 20 Standard Specification for Solid Vinyl Floor Tile. Retrieved from astm.org for technical standards on flooring materials.
- SCS Global Services. (N.D.). FloorScore®. Retrieved from scsglobalservices.com for information on the indoor air quality certification standard.
- National Wood Flooring Association (NWFA). (N.D.). Janka Hardness. Retrieved from nwfa.org for industry-standard information on wood hardness testing.
- Bona, Shaw, Mohawk, et al. (N.D.). Official Manufacturer Maintenance Guidelines. These are considered authoritative sources for the care of their specific products and are available on their respective corporate websites.
- National Floor Safety Institute (NFSI). (N.D.). ANSI/NFSI B101.1 Test Method for Measuring Wet SCOF of Common Hard-Surface Floor Materials. Retrieved from nfsi.org for standards related to floor safety and slip resistance.
- World Floor Covering Association (WFCA). (N.D.). Floor Care & Maintenance Guides. Retrieved from wfca.org for industry best practices on floor care.
- Institute of Inspection, Cleaning and Restoration Certification (IICRC). (N.D.). Locate a Certified Professional. Retrieved from iicrc.org for finding certified floor care and restoration technicians.
- Bona. (N.D.). Bona Certified Craftsman Program. Retrieved from bona.com for information on their network of trained and certified flooring professionals.
