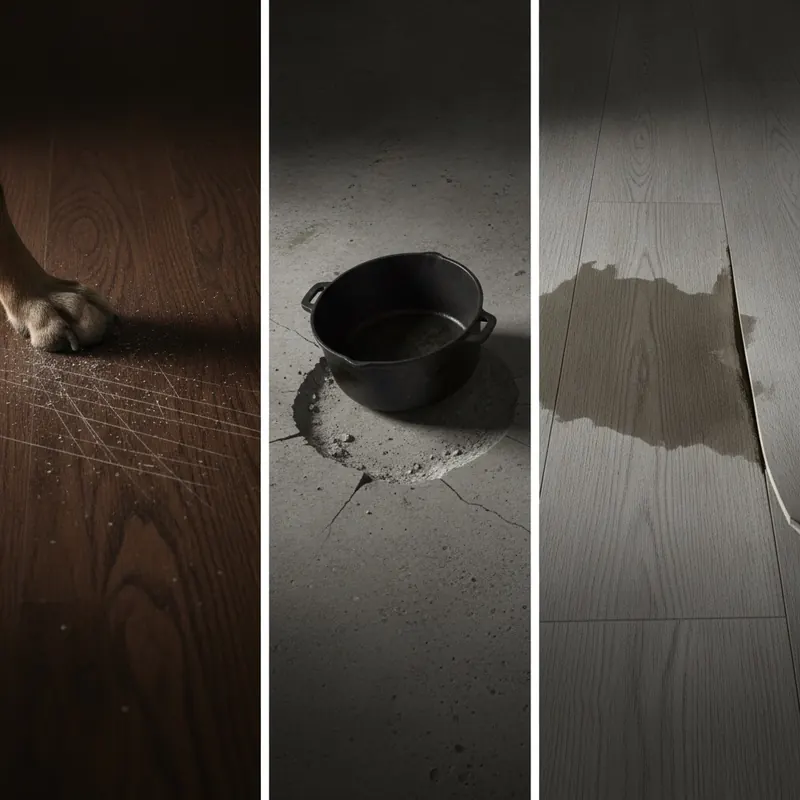
There’s a unique kind of heartache that comes with discovering the first deep scratch on your beautiful, brand-new floor. Suddenly, the pristine surface that tied the room together becomes a source of stress. You bought it for its promise of durability, but now you’re faced with a world of conflicting advice on how to protect it, what to clean it with, and how to fix the inevitable wear and tear. This uncertainty can turn your dream floor into a daily source of anxiety.
This is where the confusion ends. Welcome to the Floor Lifecycle Mastery Guide—your single, comprehensive resource designed to transform you from a worried homeowner into a confident flooring guardian. We’re moving beyond simple lists of “durable” materials to give you a complete system for choosing, protecting, diagnosing, and maintaining your floors for decades of flawless performance.
In this guide, we will walk you through four critical stages:
- Choosing Your Foundation: A deep dive into the data behind long-lasting flooring materials.
- The Science of Protection: A proactive armor system to prevent scratches, fading, and damage before it starts.
- The Visual Diagnostic Guide: How to accurately identify common wear and tear like a pro.
- The Art of Maintenance & Restoration: Actionable schedules and repair guides to preserve a flawless finish for life.
Prepare to master the art and science of flooring. Your journey to a lifetime of beautiful floors starts now.
- Part 1: Choosing Your Foundation: A Deep Dive into Long-Lasting Flooring
- Part 2: The Science of Protection: Your Proactive Floor Armor System
- Part 3: The Visual Diagnostic Guide: Identifying Common Floor Wear and Tear
- Part 4: The Art of Maintenance & Restoration: A Lifetime of Flawless Finish
- Conclusion
- References & Authoritative Sources
Part 1: Choosing Your Foundation: A Deep Dive into Long-Lasting Flooring
Selecting the right flooring is the single most important decision for ensuring long-term satisfaction. It’s not just about color and style; it’s about investing in a foundation that can withstand the rigors of your daily life. This section moves past marketing jargon to give you the objective data and frameworks you need to choose with absolute confidence.
Decoding Durability: The 3 Key Ratings You Must Know

Vague terms like “tough” and “hard-wearing” are meaningless without objective standards. To truly understand a floor’s resilience, you need to speak the language of durability. Industry leaders rely on standardized tests, established by organizations like ASTM International[1], to measure performance. Here are the three ratings every discerning homeowner must know.
- Janka Hardness Test (for Wood): This test measures the force required to embed a 0.444-inch steel ball halfway into a piece of wood. The higher the Janka rating, the more resistant the wood is to denting and wear. For example, Brazilian Cherry has a high rating (around 2350), making it extremely durable, while a softer wood like Douglas Fir (around 660) will dent more easily.
- AC Rating (Abrasion Class for Laminate): This rating, often referenced by the Resilient Floor Covering Institute (RFCI)[3], classifies laminate flooring’s durability on a scale from AC1 to AC5. Each level corresponds to a specific use case:
- AC1: Light residential use (e.g., bedrooms).
- AC2: Moderate residential use (e.g., living rooms).
- AC3: Heavy residential or moderate commercial use (ideal for any room in the home).
- AC4: General commercial use (e.g., small offices, cafes).
- AC5: Heavy commercial use (e.g., department stores).
For most homes, especially those with kids and pets, choosing a laminate with an AC3 or AC4 rating is a wise investment.
- PEI Rating (Porcelain Enamel Institute for Tile): This rating measures the abrasion resistance of a tile’s glaze—its ability to resist wear from foot traffic.
- PEI 1: No foot traffic (wall tile only).
- PEI 2: Light traffic (e.g., bathroom floors).
- PEI 3: Light to moderate traffic (most residential applications).
- PEI 4: Moderate to heavy traffic (suitable for all residential and some light commercial use).
- PEI 5: Heavy to extra-heavy traffic (all residential and heavy commercial use).
When choosing floor tile, a PEI rating of 3 or higher ensures the finish won’t wear away in busy areas.
Head-to-Head: Which Flooring Material Lasts the Longest?
With a clear understanding of durability metrics, we can now compare the most popular long-lasting floor materials. But true longevity isn’t just about surviving; it’s about the ability to be maintained and repaired over its entire lifespan. Studies by the National Association of Home Builders (NAHB) on the life expectancy of home components show that material choice has a profound impact on long-term value[2].
Here’s a head-to-head comparison to help you decide:
| Feature | Porcelain/Ceramic Tile | Luxury Vinyl Plank (LVP) | Laminate Flooring | Solid Hardwood |
|---|---|---|---|---|
| Avg. Lifespan | 50+ years | 15-30 years | 10-25 years | 100+ years (with refinishing) |
| Scratch Resistance | Very High (PEI 3-5) | High (depends on wear layer) | High (AC3-AC5) | Varies (Janka rating) |
| Water Resistance | Waterproof | Waterproof | Water-resistant (can swell) | Poor (will warp) |
| Repairability | Low (replace individual tiles) | Moderate (replace individual planks) | Low (planks must be replaced) | Very High (can be sanded & refinished multiple times) |
| Avg. Cost (Installed) | $8 – $20 / sq. ft. | $5 – $12 / sq. ft. | $4 – $10 / sq. ft. | $10 – $25 / sq. ft. |
Cost-Per-Decade Analysis: While hardwood has a high upfront cost, its ability to be refinished multiple times gives it a potential lifespan of over a century, often resulting in a lower cost-per-decade than materials that need replacement. Conversely, while laminate is cheaper initially, a lower-quality product might need replacing every 10-15 years, increasing its long-term cost. Investing in higher-quality materials often pays dividends in longevity and adds to your home’s resale value, a factor noted in reports by the National Association of Realtors (NAR)[4].
Special Focus: The Truth About Adamantine Flooring’s Long-Term Durability
Brand-specific queries like “Adamantine Flooring long term durability” show that buyers are looking for proven performance. Adamantine Flooring builds its reputation on a multi-layer composition designed for extreme resilience. According to manufacturer technical data[5], its durability stems from a high-density core that resists dents and a commercial-grade wear layer infused with microscopic mineral particles, which provides superior scratch and scuff protection.
This construction allows it to perform exceptionally well against the three main threats:
- Scratches: The robust wear layer achieves a high abrasion rating, making it suitable for high-traffic areas.
- Dents: The rigid core provides better impact resistance than traditional vinyl or softer woods.
- Water: Its composition makes it fully waterproof, ideal for kitchens, bathrooms, and basements.
Here’s how its warranty often compares to leading competitors:
| Warranty Feature | Adamantine Flooring | Leading Competitor A (e.g., Pergo) | Leading Competitor B (e.g., Shaw) |
|---|---|---|---|
| Residential Wear | Lifetime Limited | Lifetime Limited | Lifetime Limited |
| Waterproof | Lifetime Limited | Varies by product | Varies by product |
| Commercial Wear | 15-20 Year Limited | 10-15 Year Limited | 10-15 Year Limited |
Case studies from commercial installations in retail stores and restaurants often showcase Adamantine Flooring’s ability to maintain its fit and finish under constant foot traffic, providing real-world proof of its long-term durability claims.
Best for Real Life: Top Scratch-Resistant Flooring for Pets and Kids
Life with pets and children requires a floor that can handle everything from sliding toys to the clicking claws of a large dog. Here are the top choices for these demanding scenarios:
- Best for Homes with Large Dogs: Porcelain Tile (PEI 4+) is the undisputed champion. It is virtually scratch-proof, waterproof, and easy to clean. For pet joint health, consider a tile with a subtle texture to provide better grip. High-Quality Laminate (AC4+) is a close second, offering excellent scratch resistance and a warmer feel underfoot.
- Best for Kids’ Playrooms: Luxury Vinyl Plank (LVP) is a fantastic choice. It’s highly durable, waterproof (perfect for spills), and its resilient construction is slightly softer than tile or laminate, providing a more forgiving surface for tumbles. Look for LVP with a thick wear layer (20 mil or higher) for maximum protection.
Buyer’s Checklist for Scratch Resistance:
- Ask for the laminate’s AC Rating (look for AC3 or higher).
- Ask for the tile’s PEI Rating (look for PEI 3 or higher).
- For LVP, check the wear layer thickness (aim for 12 mil for moderate use, 20 mil+ for heavy use).
- For hardwood, check the Janka rating and ask about the factory finish (many modern finishes include aluminum oxide for extra hardness).
Part 2: The Science of Protection: Your Proactive Floor Armor System

Choosing a durable material is only half the battle. The other half is prevention. A proactive protection strategy can dramatically extend the life of your floor’s finish, keeping it looking new for years. This multi-layer defense system addresses the primary sources of damage before they occur.
Your First Line of Defense: Choosing the Right Mats and Furniture Pads
The vast majority of scratches and finish degradation comes from two sources: abrasive grit tracked in from outside and unprotected furniture legs.
Walk-Off Mats: According to The Carpet and Rug Institute (CRI), a proper walk-off mat system can trap up to 90% of the dirt, moisture, and grit before it ever reaches your floor[6]. For maximum effectiveness, use a dual-mat system: a coarse, scraping mat outside the door and a softer, absorbent mat inside.
Furniture Pads: This is the single most important step to prevent scratches. Hard plastic or metal-tipped furniture legs will grind away any finish.
- For chairs and tables that move often: Use thick, high-quality felt pads.
- For heavy, stationary furniture (sofas, beds): Use non-staining rubber or hard plastic cups to distribute the weight and prevent denting.
Common Mistakes to Avoid:
- Using cheap, thin felt pads that wear out quickly.
- Forgetting to clean the pads periodically, as grit can become embedded in them.
- Using adhesive pads on chair legs without ensuring the leg bottom is clean and smooth.
Sun-Proof Your Floors: How to Prevent Fading and Discoloration
Have you ever moved an area rug and seen a perfect, dark rectangle of flooring underneath, surrounded by a lighter, faded area? This is the result of photodegradation. Ultraviolet (UV) rays from the sun act like tiny scissors, breaking down the chemical bonds in your floor’s color and finish. This process, as detailed in materials science publications like Chemical & Engineering News, is relentless and affects almost all flooring types, from hardwood to vinyl[8].
Here’s how to build your defense against the sun:
- Window Treatments: The most effective solution. Blinds, curtains, and shades allow you to control sun exposure during the brightest parts of the day.
- Low-E Window Film: According to the U.S. Department of Energy, modern Low-E (low-emissivity) coatings on windows or applied as a film can block up to 99% of harmful UV rays without significantly reducing visible light[7]. This is a fantastic investment for rooms with large, sun-facing windows.
- Strategic Furniture Placement: Regularly rotate area rugs and furniture to ensure the floor ages evenly. This prevents the tell-tale “shadows” from forming.
- Choose UV-Resistant Flooring: When buying new floors, ask about UV-inhibitors in the finish. Many modern LVP and laminate products are specifically designed to resist fading for longer.
Part 3: The Visual Diagnostic Guide: Identifying Common Floor Wear and Tear
Understanding the type of damage your floor has sustained is the first step toward a successful repair. Is it a minor scuff in the finish or a deep gouge into the material itself? This visual guide, incorporating insights from certified professionals at organizations like the Institute of Inspection, Cleaning and Restoration Certification (IICRC)[9], will help you diagnose problems like an expert.
Scuff, Scratch, or Gouge? How to Identify the Damage Severity

Not all damage is created equal. Knowing the difference will determine your repair strategy.
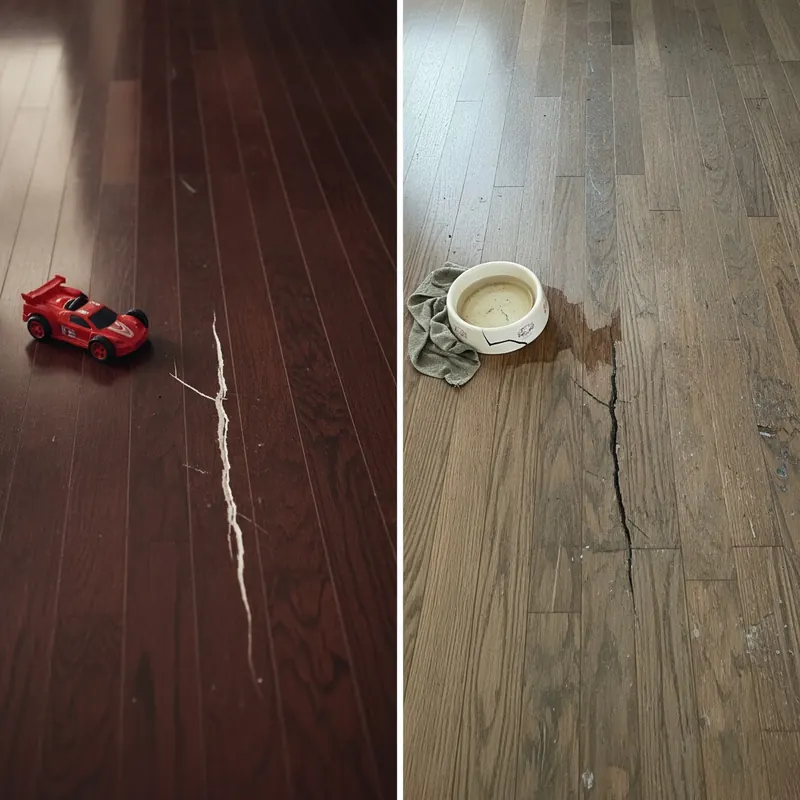
- Scuff: This is a surface-level mark, often from a shoe sole or plastic toy. The finish is not broken. It often looks like a faint, dull line that can only be seen from certain angles.
- Finish Scratch: This is a fine line that has cut into the top protective layer (e.g., polyurethane) but has not reached the wood or design layer below. If you run your fingernail across it, you’ll feel a slight catch, but the color of the line is often white or gray, not the color of the underlying material.
- Gouge (Deep Scratch): This is a severe scratch that has cut through the finish and into the core material of the flooring (the wood itself, or the printed design layer of laminate/LVP). The color inside the scratch will be that of the raw material. This requires a more intensive repair.
Expert Tip: A certified floor inspector’s trick is to use a flashlight. Hold it at a low angle to the floor. The light will catch the edges of a scratch, making its depth and length much more visible.
Decoding the Damage: Why is My Floor Peeling, Bubbling, or Fading?
Beyond scratches, other issues can arise. Here’s a quick diagnostic chart for common problems.
- Problem: Peeling or “flaking” on laminate or engineered wood.
- Likely Cause: Moisture intrusion. As trade publications like Wood Floor Business Magazine often detail, the core of these products is typically a fiberboard that swells when wet, causing the top layers to delaminate[10]. This is often caused by improper cleaning (like using a steam mop or soaking wet mop) or unaddressed spills.
- Solution: The damaged plank(s) must be replaced. Prevention involves using only manufacturer-approved cleaning methods.
- Problem: Bubbles or blisters forming under vinyl flooring.
- Likely Cause: This can be caused by excess moisture coming up from the subfloor or an issue with the initial adhesive application. Trapped air or solvent from the adhesive can also cause bubbling.
- Solution: A small bubble can sometimes be fixed by making a tiny incision with a utility knife, pressing the air out, and injecting new adhesive with a syringe. Larger issues may require professional repair.
- Problem: Uneven fading or yellowing.
- Likely Cause: As discussed in Part 2, this is almost always due to uneven UV exposure. According to the National Wood Flooring Association (NWFA), some species of wood are also naturally more photosensitive than others[11]. Certain oil-based finishes can also yellow over time, especially in areas protected from light.
- Solution: Prevention is key. For existing damage, the only way to fully correct it on hardwood is to sand and refinish the entire floor.
Part 4: The Art of Maintenance & Restoration: A Lifetime of Flawless Finish
With a durable floor chosen and protected, the final piece of the puzzle is a consistent maintenance and restoration plan. This is how you preserve that “day one” fit and finish for the long haul. This section provides the actionable routines and repair guides to make it happen.
The Definitive Floor Maintenance Schedule: Daily, Weekly, and Annual Care
Consistency is more important than intensity. A simple, regular cleaning routine is far more effective than occasional, aggressive deep cleans. Here is a schedule you can adapt to your specific floor type.
Daily:
- Sweep or Dust Mop: Use a microfiber dust mop or a broom to remove grit and dust. This is the most crucial step in preventing fine scratches.
- Wipe Up Spills Immediately: Never let liquid sit on any floor, especially hardwood and laminate.
Weekly:
- Vacuum: Use a vacuum with a hard floor setting. Crucially, turn off the beater bar/brush roll, as the stiff bristles can scratch and dull the finish over time.
- Damp Mop: Clean with a pH-neutral cleaner recommended for your floor type. The key is “damp”—your mop should be well wrung-out, never dripping wet. The NWFA specifically advises against using water alone on hardwood, as it doesn’t effectively clean and can damage the finish over time[11].
Annually / As Needed:
- Deep Clean: Use a recommended deep cleaning product to remove built-up residue.
- Re-coat or Polish: For some floor types like hardwood, a maintenance coat (a light sanding and new layer of finish) can be applied every 3-5 years to refresh the protection without a full refinish. Always consult finish manufacturers like Bona or DuraSeal before applying any polish, as some products can prevent future refinishing[12].
What NOT to Use on Most Floors:
- Vinegar and ammonia-based cleaners (can dull the finish)
- Oil soaps (leave a residue that attracts dirt)
- Steam mops (can force moisture into seams of laminate/wood)
- Abrasive scrubbers or powders
We’ve compiled this information into a convenient checklist.
Download The Ultimate Floor Maintenance Checklist by Floor Type.
The 3-Level Scratch Repair Guide: From Quick Fixes to Calling a Pro
When a scratch inevitably happens, don’t panic. Use this tiered approach to address the damage correctly.
Level 1: Fixing Minor Scuffs
For marks that are on top of the finish, not in it, a simple solution often works. Try rubbing the scuff with a clean tennis ball or a microfiber cloth with a bit of water and a drop of neutral cleaner. This gentle friction is often enough to lift the mark.
Level 2: DIY Repair for Finish Scratches
For scratches that have broken the surface of the finish, you’ll need a dedicated repair kit.
- For Hardwood: Use a stain marker or wax repair stick that matches your floor’s color. Clean the scratch, apply the product as directed, and buff away the excess.
- For Laminate/LVP: Use a laminate-specific repair kit, which often includes a colored putty that you mix to match your floor’s pattern.
- Before & After: A successful repair should make a shallow, light-colored scratch virtually disappear from a normal standing view. The goal is to blend the damage, not erase it completely.
Safety Warning: When using repair kits, pens, or putties, always work in a well-ventilated area and test the product in an inconspicuous spot first (like inside a closet or under a large piece of furniture) to ensure the color match is correct.
Level 3: When to Call a Professional
It’s time to call a certified professional if you encounter:
- A deep gouge that goes through to the raw wood or core.
- Widespread scratching across a large area.
- Water damage, cupping, or peeling planks.
- Any damage you don’t feel confident repairing yourself.
When vetting a pro, ask them for proof of certification (e.g., from the IICRC or NWFA), check their references, and get a detailed, written estimate before any work begins.
Conclusion
Your floors are more than just a surface to walk on; they are the foundation of your home’s beauty, value, and comfort. By moving beyond guesswork and embracing a lifecycle approach, you have fundamentally changed your relationship with them. You are no longer a passive owner worried about damage, but an empowered guardian equipped with a system for success.
You now understand the four pillars of floor mastery: selecting the right material based on objective data, implementing a proactive protection system, accurately diagnosing wear and tear, and executing a proper maintenance and restoration plan. This knowledge is your key to maximizing your investment and enjoying decades of flawless performance.
Your journey to a lifetime of beautiful floors starts now. Download our free, printable ‘Ultimate Floor Maintenance Checklist’ to put these expert strategies into practice today and keep your floors looking flawless for years to come.
This article provides general advice. Always consult your specific flooring manufacturer’s guidelines before applying any cleaning products or attempting repairs. Test all solutions in an inconspicuous area first. This post may contain affiliate links.
References & Authoritative Sources
- ASTM International. (N.D.). ASTM International – Standards Worldwide. Retrieved from https://www.astm.org/
- National Association of Home Builders. (N.D.). Study of Life Expectancy of Home Components. Retrieved from NAHB research sources.
- Resilient Floor Covering Institute. (N.D.). RFCI and ASTM Standards. Retrieved from RFCI official publications.
- National Association of Realtors. (N.D.). Remodeling Impact Report. Retrieved from NAR research publications.
- Adamantine Flooring. (N.D.). Technical Specifications and Warranty Information. Retrieved from the official manufacturer’s website and product data sheets.
- The Carpet and Rug Institute. (N.D.). Seal of Approval Program: Reducing Soil. Retrieved from CRI official publications on cleaning science.
- U.S. Department of Energy. (N.D.). Energy Performance Ratings for Windows, Doors, and Skylights. Retrieved from https://www.energy.gov/
- Chemical & Engineering News. (N.D.). Scientific articles on the photodegradation of polymers and dyes. Retrieved from C&EN archives.
- Institute of Inspection, Cleaning and Restoration Certification. (N.D.). IICRC Global Standards. Retrieved from https://www.iicrc.org/
- Wood Floor Business Magazine. (N.D.). Technical articles on wood floor science and degradation. Retrieved from the publication’s archives.
- National Wood Flooring Association. (N.D.). Technical Guidelines for Wood Flooring Maintenance. Retrieved from https://www.nwfa.org/
- Bona, Minwax, DuraSeal. (N.D.). Official Maintenance and Repair Guidelines. Retrieved from the respective manufacturer websites.