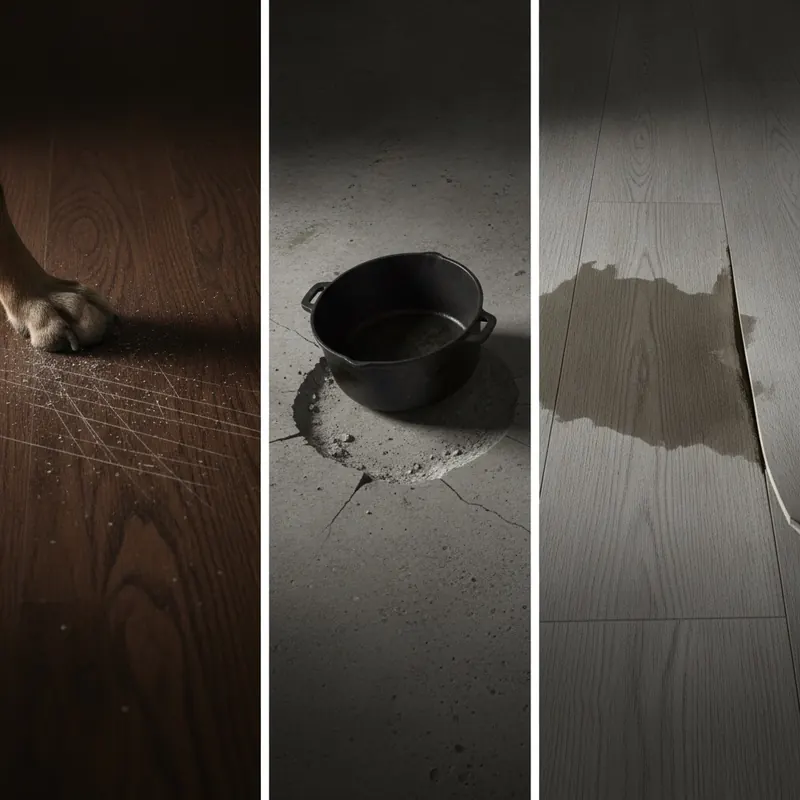
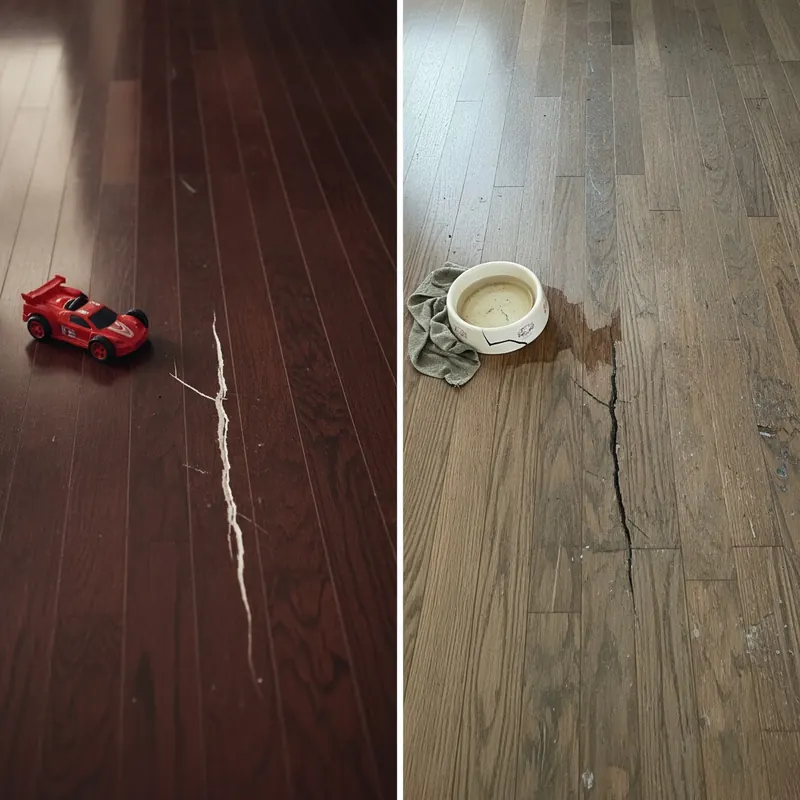
That faint, musty smell in the basement. The persistent dampness in the air after a heavy rain. These are the subtle warnings that a homeowner’s worst nightmare might be growing, unseen, right under their feet. The real enemy isn’t just a stained floorboard; it’s moisture, the lifeblood of mold and mildew that can compromise your home’s structure and your family’s health. Many believe that simply choosing a “waterproof” plank is enough, but this is a dangerous misconception.
This guide offers a different approach. We believe in creating a complete, bulletproof flooring system that permanently defeats water damage. This is your definitive resource for moving beyond the plank and building a true fortress against moisture. We will guide you through diagnosing the root causes of dampness, selecting the ideal mold-resistant materials like Adamantine Flooring, and mastering the critical installation techniques that guarantee a dry, healthy, and beautiful home for years to come.
- Understanding the Enemy: The Root Causes of Mold, Mildew, and Water Damage
- The Ultimate Solution: A Deep Dive into Adamantine Waterproof Flooring
- Choosing Your Armor: How to Select the Best Mold-Resistant Flooring
- The Critical Foundation: Mastering Subfloor Prep and Installation
- Beyond the Floor: A Whole-Home Strategy to Prevent Mold & Mildew
- Frequently Asked Questions (FAQ)
- Conclusion
- References
Understanding the Enemy: The Root Causes of Mold, Mildew, and Water Damage
Before you can solve a problem, you must understand it. Mold and mildew are not just cosmetic issues; they are biological organisms that thrive in specific conditions. According to the U.S. Environmental Protection Agency (EPA), mold requires three things to grow: a food source (like the paper on drywall, wood, or even dust), a suitable temperature, and, most importantly, moisture [1]. Control the moisture, and you control the mold. This is the foundational principle of a healthy home.
A basement mold problem or a persistent mildew smell in the house is a symptom of a deeper issue. Moisture can infiltrate your home through various pathways, especially in below-grade areas like basements. These pathways can include:
- Hydrostatic Pressure: Groundwater pushing through tiny cracks in the foundation walls or floor.
- Leaks: Water from burst pipes, faulty appliances, or cracked window wells.
- Condensation: Warm, moist indoor air coming into contact with cool surfaces like concrete floors or foundation walls, causing water droplets to form.
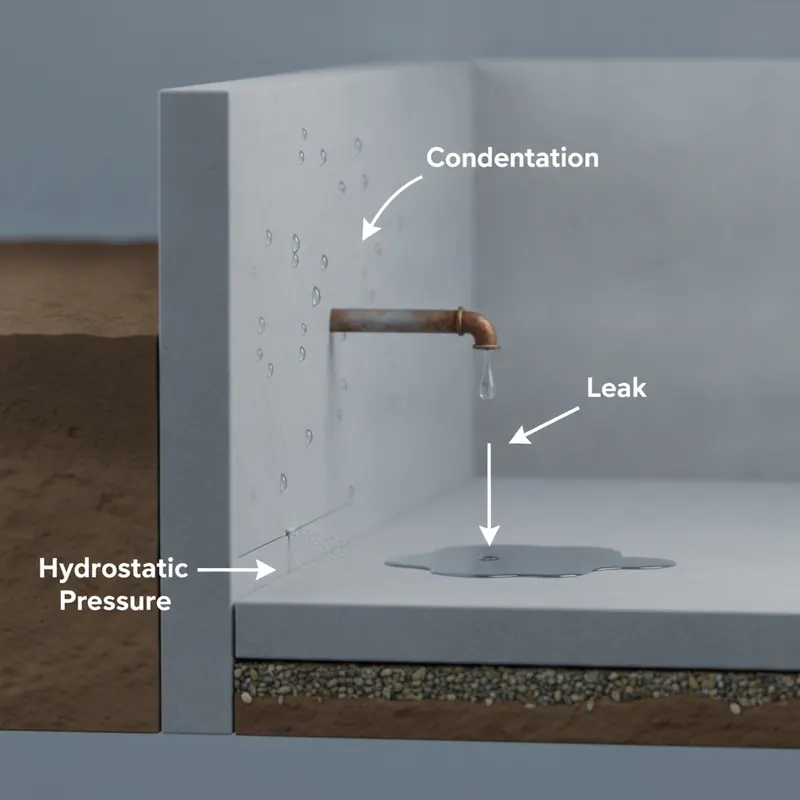
Ignoring these root causes is like bailing out a boat without plugging the leak. To truly solve flooring water damage, you must first stop the water at its source.
As our Certified Pro Panel industrial hygienist explains, “The health risks associated with indoor mold exposure are not to be taken lightly. For sensitive individuals, it can trigger allergic reactions, asthma attacks, and other respiratory issues. The Centers for Disease Control and Prevention (CDC) has linked indoor mold exposure to upper respiratory tract symptoms in otherwise healthy people [2].”
What’s That Smell? Differentiating Mold vs. Mildew
Many homeowners use the terms “mold” and “mildew” interchangeably, but they are different. Understanding the distinction can help you assess the severity of your problem.
Mildew is a specific type of mold that tends to grow on the surface of materials in high-humidity areas like bathrooms.
- Appearance: Typically looks flat, with a powdery or downy texture. It often starts as white or gray and may turn yellowish-brown over time.
- Smell: A musty, slightly damp odor, often described as smelling like old, wet socks.
Mold, on the other hand, is a much broader category of fungi.
- Appearance: Often appears fuzzy or slimy and can be a wide range of colors, including black, green, blue, or white. Mold is known for penetrating beneath the surface of materials.
- Smell: A stronger, more pungent, and earthy odor, often described as smelling like rotting wood or damp soil.
While mildew is easier to clean, both can negatively impact respiratory health, especially for those with allergies or asthma, as noted by the American Lung Association [3].
First Signs of Trouble: How to Spot Hidden Water Damage
Water damage isn’t always as obvious as a puddle on the floor. It often starts subtly, and catching it early can save you thousands in repairs. Here’s a checklist of early warning signs to look for:
- Visual Cues:
- Discoloration: Dark stains or water spots on flooring, baseboards, or nearby walls.
- Peeling or Bubbling: Paint or vinyl flooring that is lifting or blistering.
- Warping: Wood or laminate planks that are “cupping” (edges are higher than the center) or “crowning” (center is higher than the edges).
- Physical Cues:
- Spongy or Soft Spots: A floor that feels unusually soft or bouncy when you walk on it.
- Loose Planks or Tiles: Flooring that has separated from the subfloor.
- Sensory Cues:
- Musty Odors: That persistent mildew smell that doesn’t go away with cleaning.
Our Certified Pro Panel home inspector advises, “Always check the most common hidden moisture spots. Look under sinks in kitchens and bathrooms, around the base of toilets, near appliance water lines, and along the bottom of foundation walls in the basement. A small, slow leak is often the culprit behind major flooring water damage.”
The Ultimate Solution: A Deep Dive into Adamantine Waterproof Flooring
When you’re ready to replace damaged flooring or proactively upgrade a moisture-prone area, you need a solution built for the task. Adamantine Flooring is engineered from the ground up to be 100% waterproof, providing an impenetrable barrier against spills, leaks, and ambient moisture. It’s not just water-resistant; it’s completely immune to water damage, making it an ideal choice for basements, bathrooms, kitchens, and laundry rooms.
Here’s a look at the value proposition of Adamantine Flooring:
| Feature | Adamantine Flooring |
|---|---|
| Material Cost (per sq. ft.) | $4.50 – $6.50 |
| Estimated Installation Cost (per sq. ft.) | $2.00 – $4.00 |
| Long-Term Value | Excellent. 100% waterproof core prevents costly water damage repairs. High durability reduces replacement frequency. Backed by a lifetime residential warranty. |
Based on the manufacturer’s official specifications, Adamantine Flooring is backed by a comprehensive lifetime residential warranty, giving you peace of mind that your investment is protected against manufacturing defects and wear.
What Makes Adamantine Flooring Different?
The secret to Adamantine Flooring’s performance lies in its advanced material composition. Unlike traditional laminate or engineered wood, which have cores made of wood fibers that swell and disintegrate when wet, Adamantine features a Stone-Polymer Composite (SPC) core. This core is made from a combination of natural limestone powder, polyvinyl chloride, and stabilizers. The result is a material that is incredibly dense, stable, and completely impervious to water.
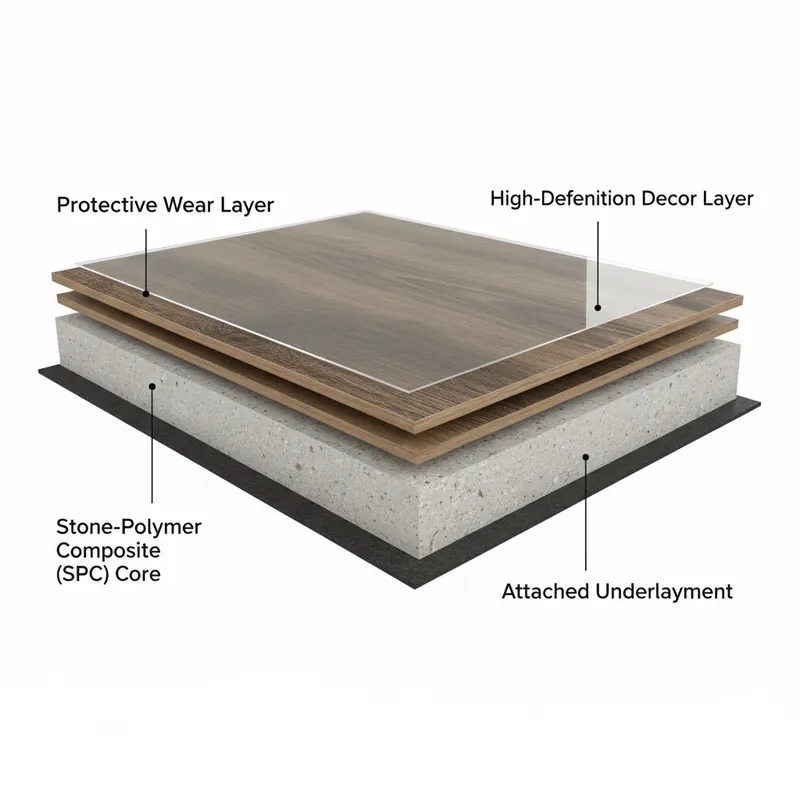
Furthermore, Adamantine Flooring is rigorously tested to meet or exceed industry standards for performance. Its inorganic composition makes it an inhospitable environment for mold and mildew growth, a claim often verified by tests like ASTM G21, an industry-standard method for determining the resistance of synthetic materials to fungi [4].
Adamantine Flooring vs. The Competition: A Head-to-Head Comparison
How does Adamantine stack up against other popular waterproof flooring brands? Our proprietary scorecard breaks it down.
| Feature | Adamantine Flooring (SPC) | Standard LVP (WPC/SPC) | Ceramic/Porcelain Tile |
|---|---|---|---|
| Waterproof Core | 5/5 | 5/5 | 5/5 |
| Mold-Resistant Material | 5/5 | 5/5 | 5/5 |
| Seam/Grout Vulnerability | 4/5 (Tight locking seams) | 4/5 (Tight locking seams) | 2/5 (Grout is porous) |
| System Forgiveness | 4/5 (Can bridge minor flaws) | 3/5 (Requires very flat subfloor) | 2/5 (Requires perfect subfloor) |
| Overall Mold Resistance | Excellent | Very Good | Good (If Grout is Sealed) |
Our Certified Pro Panel flooring installer adds, “From an installation perspective, high-quality SPC products like Adamantine are fantastic. The rigid core is more forgiving over minor subfloor imperfections compared to some flexible LVP, and the click-lock systems are fast and secure. For a homeowner, this means a more reliable, long-lasting installation. While tile is also 100% waterproof, the process is far more labor-intensive, and the grout lines will always be a potential weak point for moisture and mildew if not meticulously maintained.”
Choosing Your Armor: How to Select the Best Mold-Resistant Flooring
While Adamantine Flooring represents a top-tier solution, understanding the broader landscape of anti-mold flooring options empowers you to make the best choice for your budget and project. The key is to select materials that are inorganic and non-porous. Mold needs organic material to feed on; remove the food source, and you remove the risk.
Before any flooring is installed, especially in a basement, it’s critical to know the moisture level of the subfloor. The National Wood Flooring Association (NWFA) provides industry standards for testing moisture content in both wood and concrete subfloors, a critical step professionals never skip [5]. Any reading above the acceptable threshold must be addressed before proceeding.
Here’s a comparison of the top choices for mold-resistant flooring:
Top Contender: Luxury Vinyl Plank/Tile (LVP/LVT)
Luxury vinyl is arguably the most popular choice for basements and bathrooms today, and for good reason. It’s made from 100% inorganic materials, making the plank itself completely waterproof and mold-proof. However, a common question arises: “Can mold grow under vinyl plank flooring?” The answer is yes. While the plank won’t support mold growth, if moisture gets trapped between the vinyl and the subfloor due to improper preparation or a persistent leak, mold can grow on the subfloor or on the dust and debris underneath. This highlights why the entire flooring system is so important.
The Classic Champion: Porcelain & Ceramic Tile
Tile has been the go-to waterproof flooring for centuries. The tile itself is virtually impenetrable to water and completely immune to mold. Its primary vulnerability, however, lies in the grout lines. Standard cement-based grout is porous and can absorb water, leading to discoloration and mildew growth.
According to a tile installation expert from our network, “The secret to a truly waterproof and mold-proof tile installation is using a high-performance, mold-resistant grout, like an epoxy or advanced polymer-modified grout. Additionally, applying a quality grout sealant adds another layer of protection, making routine cleaning easier and preventing moisture from seeping through.”
The Critical Foundation: Mastering Subfloor Prep and Installation
You can buy the best waterproof flooring in the world, but if it’s installed improperly over a damp or uneven subfloor, it will fail. This stage is non-negotiable and is the single most important factor in preventing mold under flooring and ensuring a long-lasting installation. The goal is a subfloor that is clean, flat, and, above all, dry.
When dealing with a subfloor that has experienced previous water damage, it’s essential to follow professional standards for drying. The Institute of Inspection, Cleaning and Restoration Certification (IICRC) sets the guidelines that certified professionals use to ensure a structure is fully and properly dried before any rebuilding or new flooring installation occurs [6].
Step 1: Achieving the Perfect Subfloor (The Most Important Step)
Before a single plank is laid, your subfloor needs rigorous preparation.
- Clean: Scrape away any old adhesive, paint, or debris. Sweep and vacuum the entire surface until it is perfectly clean. Dust and dirt can feed mold and prevent a solid installation.
- Level: Check for high and low spots using a long, straight level. Most waterproof plank flooring requires the subfloor to be flat within 3/16 of an inch over a 10-foot span. Use a self-leveling compound for low spots and grind down high spots.
- Moisture Test: This is the most critical step. For concrete subfloors, professionals use methods like the Calcium Chloride test to measure the moisture vapor emission rate, following NWFA guidelines [5]. A simple DIY method is to tape a 2’x2′ square of clear plastic sheeting to the floor, sealing all four edges. After 24-48 hours, check for condensation on the inside of the plastic. Any sign of moisture means you have a problem that must be addressed before installation.
Our Certified Pro Panel installer’s top pro-tip: “The biggest mistake DIYers make is getting impatient. They don’t wait for the self-leveling compound to cure fully, or they see a ‘dry-looking’ slab and skip the moisture test. This is a recipe for disaster. Taking an extra day or two on subfloor prep will save you from having to tear out your entire floor in a year.”
Step 2: The ‘Flooring System’ – Underlayments and Vapor Barriers
These terms are often confused, but they serve different purposes.
- Vapor Barrier (or Moisture Barrier): A plastic sheet (typically 6-mil polyethylene) laid directly over the subfloor. Its sole purpose is to stop moisture vapor from rising from the subfloor (especially concrete) and reaching your flooring. A vapor barrier is essential for installations over concrete slabs on or below grade.
- Underlayment: A thin layer of foam or felt that goes between the vapor barrier and the flooring. It provides cushioning, sound absorption, and can help smooth over tiny subfloor imperfections. Many modern waterproof floors, including Adamantine Flooring, come with a pre-attached underlayment, simplifying installation.
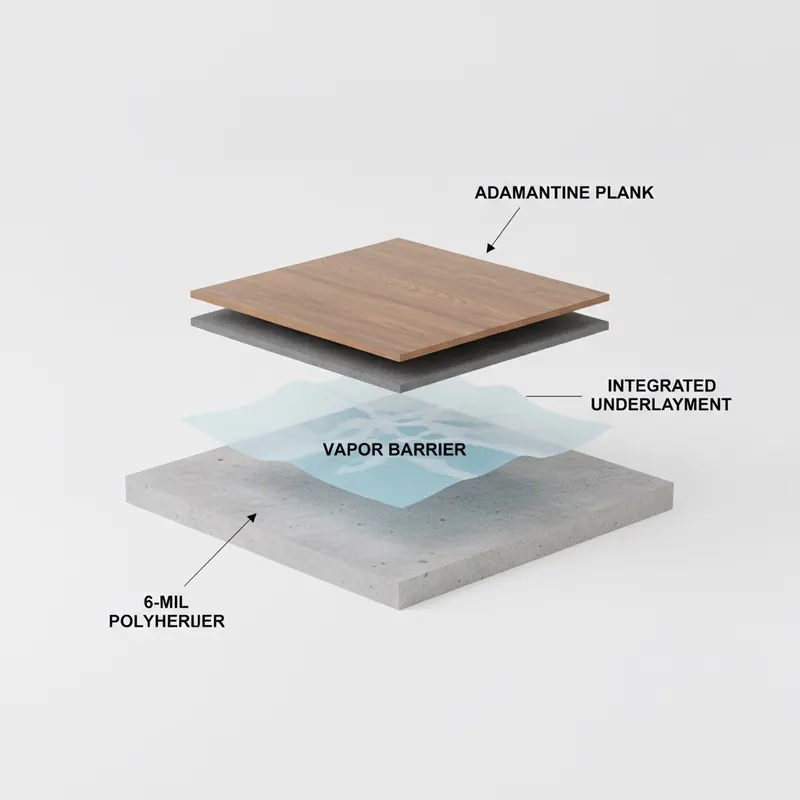
Step 3: Laying Adamantine Flooring Like a Pro
With a prepared subfloor, the final step is the installation itself. Always read the manufacturer’s specific installation guide before you begin. For a click-lock product like Adamantine Flooring, the general process is:
- Acclimate: Let the unopened boxes of flooring sit in the room for at least 48 hours to acclimate to the temperature and humidity.
- Plan Your Layout: Start your first row along the longest, most visible wall. Use spacers to maintain the required expansion gap (usually 1/4 inch) around the entire perimeter of the room.
- Click and Lock: Engage the tongue of the new plank into the groove of the previously laid plank at a slight angle, then lower it to lock it into place.
- Cutting: To cut waterproof vinyl, simply score the surface with a sharp utility knife and snap it. For more complex cuts around door jambs or vents, a jigsaw or multi-tool is effective.
Beyond the Floor: A Whole-Home Strategy to Prevent Mold & Mildew
A waterproof floor is your last line of defense, not your only one. To truly protect your home from mildew and mold, you need a holistic strategy that manages moisture from the outside in. This involves controlling humidity, ensuring proper ventilation, and managing exterior water.
According to the U.S. Department of Energy, proper home ventilation is key to controlling moisture and maintaining healthy indoor air quality [7]. Stagnant, humid air is a breeding ground for mildew.
Here are key strategies for a mold-proof home:
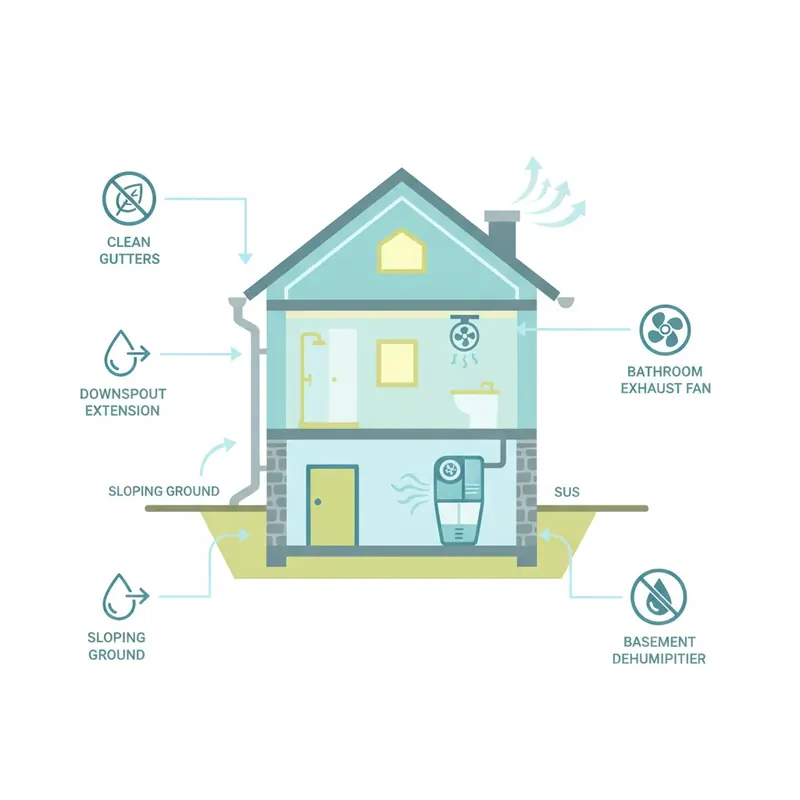
- Control Humidity: Keep indoor humidity levels between 30% and 50%. Use a dehumidifier in basements and crawlspaces, and always run exhaust fans in bathrooms and kitchens.
- Improve Ventilation: Ensure your attic and crawlspace are well-ventilated. In bathrooms, consider an exhaust fan with a timer to ensure it runs long enough to clear all moisture after a shower.
- Manage Exterior Water: This is critical. Our home inspector expert emphasizes, “Clean your gutters regularly. Ensure downspouts extend at least 4-6 feet away from your foundation. Check that the soil around your house slopes away from the foundation, not towards it. These simple exterior maintenance tasks prevent the vast majority of basement water intrusion.”
Frequently Asked Questions (FAQ)
What is the most durable waterproof flooring for basements?
For ultimate durability and water protection in a basement, porcelain tile is a top choice due to its hardness and impermeability. However, high-quality, rigid-core LVP like Adamantine Flooring offers comparable waterproof performance with added benefits of being warmer, softer underfoot, and much easier and less expensive to install, making it the best all-around choice for most basement renovations.
Can water damaged laminate or wood flooring be saved?
Unfortunately, in most cases of significant water exposure, the answer is no. The core of laminate and engineered wood is made of wood fibers (MDF or HDF), which act like a sponge. Once saturated, they swell, warp, and lose their structural integrity permanently. According to IICRC standards, such materials are typically considered unsalvageable after water damage and must be removed and replaced [6].
Does homeowners insurance cover flooring water damage?
Coverage depends entirely on the source of the water. The Insurance Information Institute clarifies that standard homeowners policies typically cover damage from sudden and accidental events, like a burst pipe or a washing machine overflow [8]. However, they generally do not cover damage from gradual leaks, seepage from the foundation, or flooding from outside sources (which requires separate flood insurance). Always check your specific policy and consult with your agent.
Conclusion
Creating a truly mold-proof home goes far beyond choosing a flooring product off the shelf. It requires a strategic, system-based approach. By understanding and eliminating the root causes of moisture, preparing your subfloor foundation with meticulous care, and installing a complete flooring system with a 100% waterproof product like Adamantine Flooring at its core, you build a lasting defense.
You are now equipped not just with product knowledge, but with a complete strategy to protect your home’s value and, more importantly, your family’s health. You have the blueprint to turn a vulnerable space into an impenetrable fortress against water, mold, and mildew.
Ready to build your fortress against mold and moisture? Explore the Adamantine Flooring collection to find the perfect style for your home, or download our free Seasonal Moisture Prevention Checklist to start protecting your home today.
Disclaimer: This article provides informational guidance. For severe mold issues or complex installations, consult with certified professionals like IICRC-certified remediators or licensed flooring installers. This content may contain affiliate links.
References
- U.S. Environmental Protection Agency. (N.D.). A Brief Guide to Mold, Moisture, and Your Home. Retrieved from https://www.epa.gov/mold/brief-guide-mold-moisture-and-your-home
- Centers for Disease Control and Prevention. (N.D.). Mold: Basic Facts. Retrieved from the CDC website on mold health effects.
- American Lung Association. (N.D.). Mold and Dampness. Retrieved from the American Lung Association website regarding indoor air quality.
- ASTM International. (N.D.). ASTM G21 – 15(2020) Standard Practice for Determining Resistance of Synthetic Polymeric Materials to Fungi. Retrieved from the ASTM International standards database.
- National Wood Flooring Association. (N.D.). Installation Guidelines. Retrieved from the NWFA technical resources on subfloor preparation and moisture testing.
- Institute of Inspection, Cleaning and Restoration Certification. (N.D.). IICRC S500 Standard for Professional Water Damage Restoration. Retrieved from the IICRC standards publications.
- U.S. Department of Energy. (N.D.). Ventilation. Retrieved from https://www.energy.gov/energysaver/weatherize/ventilation
- Insurance Information Institute. (N.D.). Understanding water damage and your homeowners insurance. Retrieved from https://www.iii.org/article/understanding-water-damage-and-your-homeowners-insurance