Is there anything more frustrating than investing in a beautiful new floor, only to see it marred by scratches, scuffs, and dents within months? The daily challenges of dropped toys, shifting furniture, and pet claws can quickly turn a dream renovation into a source of constant worry. You’re left wondering if you made a costly mistake, choosing a surface that simply can’t keep up with your life.
What if you could choose a floor with the confidence that it would stand the test of time? Imagine a surface so resilient, so flawlessly flat, and so easy to maintain that it becomes a permanent, worry-free foundation for your home. This is the ideal of Adamantine Flooring—not a specific brand, but a gold standard of unyielding strength and durability.
This is not just another “best of” list. This is your complete lifecycle guide to achieving that adamantine standard. We will empower you to move beyond brand names and material types to understand the core principles of durability. You will learn how to choose the right floor based on objective data, maintain it for maximum longevity, and confidently repair common damage. By the end of this guide, you’ll have a practical framework to invest in a floor that delivers a lifetime of value.
- What is Adamantine Flooring? Defining the Gold Standard of Durability
- Decoding Durability: How to Measure a Floor’s True Strength
- The Ultimate Durable Flooring Showdown: Best Low-Maintenance Options
- The Homeowner’s Flooring First-Aid Kit: A Diagnostic & Repair Guide
- The Lifetime Maintenance Blueprint: How to Maintain a Flat, Flawless Floor
- The High-Maintenance Flooring Hall of Shame: What to Avoid
- Conclusion: Your Investment in Lasting Value
- References
What is Adamantine Flooring? Defining the Gold Standard of Durability
The term “adamantine” comes from “adamant,” an ancient word for a legendary, unbreakably hard substance, often associated with diamonds. When we talk about “Adamantine Flooring,” we are not referring to a single product you can buy off the shelf. Instead, it’s a benchmark—a way of thinking about flooring that prioritizes ultimate performance. It represents the pinnacle of resilience, a perfectly flat surface that resists the daily onslaught of wear and tear with minimal maintenance.
Evaluating a floor against the adamantine standard means looking past simple aesthetics and asking critical questions: How does it handle impact? How does it resist scratches? Will it remain stable and flat for decades?
According to materials science experts, modern flooring durability is a result of advanced composite engineering. It’s not just about the core material anymore; it’s about a layered system where each component serves a specific purpose. From protective topcoats that deflect scratches to rigid cores that prevent dents, the goal is to create a synergy of materials that performs better than any single substance could. Achieving an “adamantine” quality in the real world is about selecting a product where this engineered system is perfectly matched to your specific lifestyle and environment.
Decoding Durability: How to Measure a Floor’s True Strength
To choose a floor that meets the adamantine standard, you need to speak the language of durability. Manufacturers use several key performance indicators (KPIs) and industry tests to quantify a floor’s strength. Understanding these metrics allows you to cut through marketing hype and make a decision based on verifiable data. Many of these tests are standardized by organizations like the American Society for Testing and Materials (ASTM), providing an objective basis for comparing products.
The Wear Layer: Your Floor’s First Line of Defense
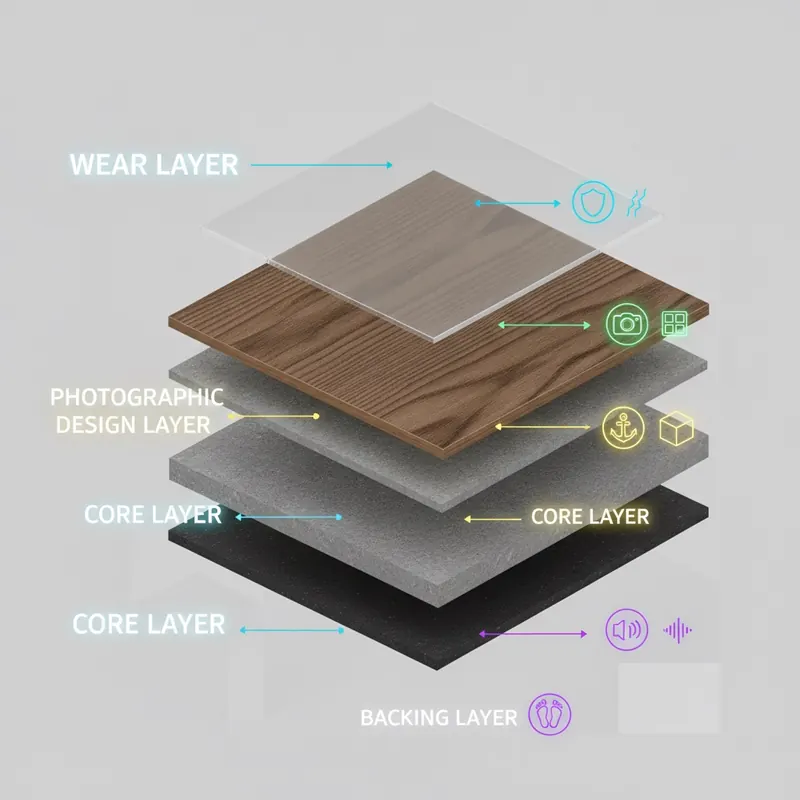
For resilient flooring like Luxury Vinyl Tile (LVT) and laminate, the wear layer is the most critical component for durability. This is a transparent top coating that protects the photographic design layer from scratches, scuffs, and stains. Its thickness is the primary indicator of how well the floor will hold up in the long run.
Wear layer thickness is measured in mils (one-thousandth of an inch) or millimeters (mm). The thicker the wear layer, the more durable the floor. According to commercial flooring experts, here are the general guidelines:
- 12 mil (0.3 mm): Good for light residential use (e.g., bedrooms, closets).
- 20 mil (0.5 mm): Excellent for heavy residential use (kitchens, hallways) and light commercial applications.
- 30 mil (0.7 mm): The standard for heavy-traffic commercial environments, offering maximum protection.
When evaluating LVT, always ask for the wear layer thickness. A floor with a 20-mil wear layer will significantly outlast one with a 12-mil layer in a busy family home.
AC Rating (Abrasion Class): Grading Scratch Resistance
For laminate flooring, the key durability metric is the Abrasion Class or AC Rating. This system rates a floor’s resistance to abrasion, impact, stains, and burns on a scale from 1 to 6. Each level is designed for a specific traffic environment.
- AC1: Suitable for very light residential traffic, like a bedroom.
- AC2: Designed for general residential use, such as living rooms or dining rooms.
- AC3: Built for heavy residential traffic and can also handle light commercial use. This is a great all-around choice for a busy home.
- AC4: Designed for general commercial use, like small offices or cafes.
- AC5 & AC6: Built for heavy commercial traffic, such as public buildings and department stores.
For most homeowners, choosing a laminate with an AC3 rating or higher ensures it can withstand the rigors of daily life.
Impact & Load Resistance: From Dropped Toys to Heavy Furniture
A floor’s ability to resist dents from dropped objects and support heavy loads without compressing is crucial. This is where the trade-off between hardness and resilience becomes important. Hard surfaces like tile are extremely scratch-resistant but can crack from a severe impact. Resilient floors like LVT absorb impact but can be dented.
One key metric is the Static Load Limit, measured in pounds per square inch (PSI). This test, defined by ASTM F970, determines how well a floor resists indentation under a heavy, stationary object like a piano or a refrigerator. According to data from leading commercial manufacturers like AHF Contract, an LVT with a static load limit of ≥ 1000 PSI is considered solid, while top-tier products can exceed 3000 PSI[1]. For industrial settings, high-performance systems like epoxy and polyurethane flooring are engineered specifically to handle extreme impacts and chemical spills, as noted by specialists like Stonhard[2].
The Ultimate Durable Flooring Showdown: Best Low-Maintenance Options
Now that you understand the metrics, let’s see how real-world materials stack up against the adamantine ideal. The “best” flooring is always a matter of matching the right material to the right environment. Here’s a breakdown of the top contenders for durable, low-maintenance flooring.
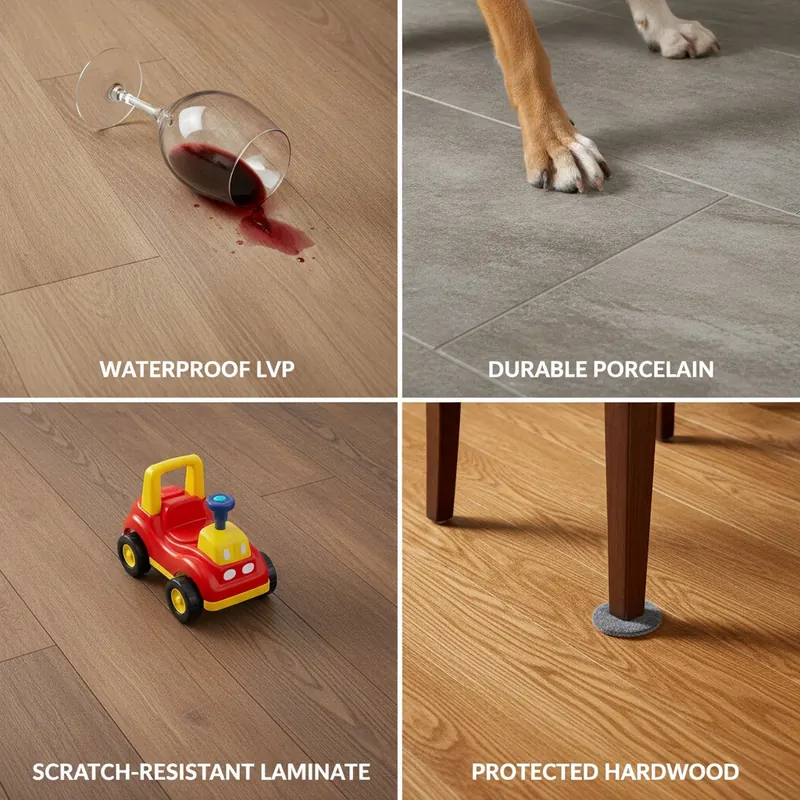
| Flooring Type | Water Resistance | Scratch Resistance | Impact Resistance | Ease of Cleaning |
|---|---|---|---|---|
| Luxury Vinyl (LVP/LVT) | Excellent (Waterproof) | Very Good (20+ mil) | Good | Excellent |
| Porcelain Tile | Excellent (Waterproof) | Excellent | Fair (Can crack) | Very Good |
| Laminate | Fair (Water-resistant) | Excellent (AC3+) | Good | Very Good |
| Hardwood | Poor (Vulnerable) | Fair (Can scratch) | Fair (Can dent) | Good |
Luxury Vinyl Plank/Tile (LVP/LVT): The All-Around Champion
Is LVP truly low maintenance? The answer is a resounding yes. Modern LVP is arguably the best all-around performer for a busy household. It is typically 100% waterproof, making it a perfect choice for kitchens, bathrooms, and basements. Its durability comes from a thick wear layer (aim for 20 mil or more) that resists scratches and scuffs. Flooring retailers like Flooring 101 often recommend LVP to customers with pets and kids precisely because it combines toughness with easy cleanup[3].
Porcelain & Ceramic Tile: The Long-Lasting Classic
When it comes to sheer longevity, it’s hard to beat tile. As flooring experts at Phil’s Carpets and Flooring Inc. note, porcelain tile is incredibly hard and dense, making it one of the most scratch- and wear-resistant materials available[4]. It’s also completely waterproof and won’t be damaged by spills. Authoritative sources like The Spruce consistently rank tile as a top choice for durable surfaces[5]. The primary downsides are its hardness underfoot and the need to maintain grout lines, which can stain if not properly sealed.
Laminate Flooring: The Budget-Friendly Contender
Laminate offers fantastic scratch resistance for its price point, thanks to the AC rating system. A laminate floor with an AC3 or AC4 rating can easily handle high traffic, pets, and kids. Compared to vinyl, laminate often provides a more realistic wood look and feel. However, its core is typically made of wood fiber, making it vulnerable to water damage. While many modern laminates are “water-resistant” and can handle topical spills, they are not waterproof and should be avoided in areas with high moisture, a point often highlighted in assessments by sources like Consumer Reports[6].
Hardwood: The Refinishable Investment
While hardwood may seem less durable on the surface—it can scratch and dent more easily than its engineered counterparts—its greatest strength is its longevity. Unlike other floors that must be replaced when worn, a solid hardwood floor can be sanded and refinished multiple times, essentially giving it a new life. This unique quality makes it a true long-term investment. Market research from firms like Grand View Research indicates that well-maintained wooden floors can have a working lifecycle of 40-plus years[7]. Experts at specialty shops like Ralph’s Hardwood Floors emphasize that this ability to be renewed is what gives hardwood its incredible lifetime value[8].
The Homeowner’s Flooring First-Aid Kit: A Diagnostic & Repair Guide
Even the most durable floor can suffer damage. The good news is that many common problems can be fixed without a full replacement. In fact, industry data from providers like Centricity shows that over half of homeowners report surface damage like scratches and dents to their flooring[9]. This section is your go-to guide for diagnosing and repairing these issues.
Diagnosing & Fixing Uneven Floors: Beyond a Cosmetic Issue
An uneven or sloping floor is more than just an aesthetic problem; it can be a red flag for serious underlying issues. Before you even think about installing a new floor, you must address the subfloor.
According to structural engineering experts, ignoring an uneven floor can lead to costly and dangerous consequences. While minor settling is normal, significant slopes or dips can indicate foundation problems, water damage to joists, or termite damage. Authoritative sources on foundation repair, such as VFS Works, stress that these root causes must be professionally evaluated and fixed first[10].
Self-Assessment Checklist: Is Your Uneven Floor a Major Problem?
- The Marble Test: Place a marble on the floor. Does it roll quickly in one direction? This indicates a slope.
- Check Doors and Windows: Are there doors that stick at the top or bottom, or cracks in the drywall around frames? These are classic signs of structural shifting.
- Look for Exterior Cracks: Inspect your home’s foundation for significant cracks, especially those that are horizontal or wider than a quarter-inch.
- Feel for Sponginess: Does the floor feel bouncy or soft when you walk on it? This could indicate rotted or damaged subflooring or joists.
If you answered “yes” to any of the last three points, it is crucial to consult a qualified structural engineer before proceeding with any flooring work.
The Ultimate Guide to Self-Leveling Compounds
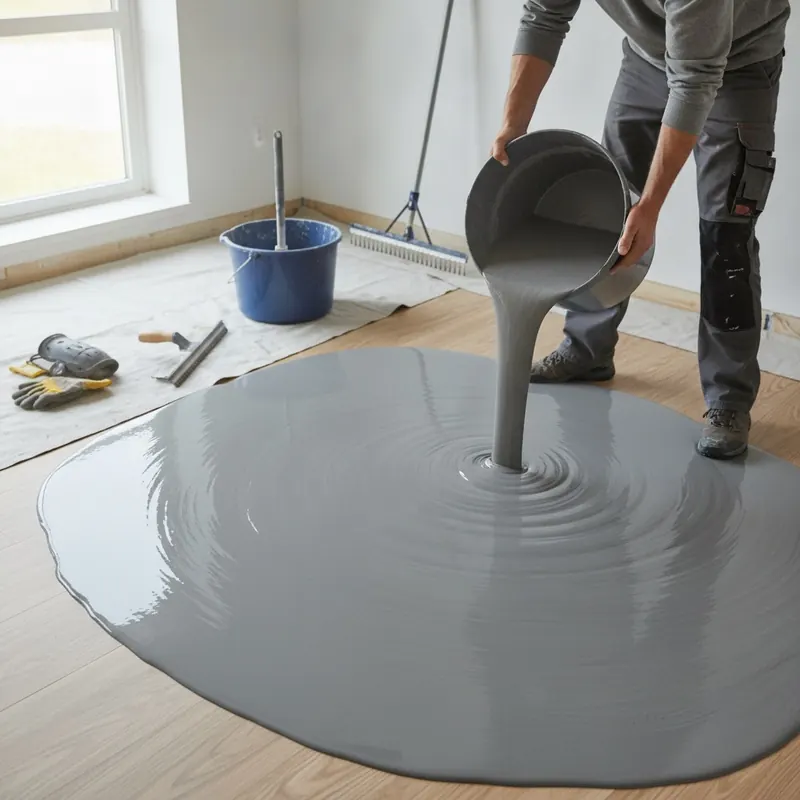
For minor dips and unevenness in a structurally sound subfloor, self-leveling compound is a fantastic DIY-friendly solution. This polymer-modified cement flows into low spots to create a perfectly flat, smooth surface ready for new flooring.
How to Use Self-Leveling Compound:
- Preparation is Key: The subfloor must be completely clean, free of dust, grease, and debris. Seal any cracks or holes where the compound could leak. Prime the surface with a manufacturer-recommended primer to ensure proper adhesion.
- Product Selection: Not all levelers are the same. Experts at CustomCrete, who have extensive experience with brands like Ardex, Mapei, and Sika, advise choosing a product based on the required thickness and cure time[12]. Leading manufacturers like Sika offer products such as SikaLevel® Self Leveling Underlayment, which can be applied in thicknesses from 1/8 to 2 inches[11].
- Mixing and Pouring: Follow the package directions precisely, mixing the powder with water to a lump-free, pancake-batter consistency. Pour the mixture onto the lowest part of the floor and gently spread it with a gauge rake or smoother. The compound will naturally seek its own level.
- Safety First: As identified in our research, a critical step often overlooked is safety. Always wear a respirator or mask to avoid inhaling cement dust, along with safety glasses and gloves. Ensure the area is well-ventilated.
- Curing: Allow the compound to cure for the time specified by the manufacturer before walking on it or installing flooring.
Repairing Scratches and Dents on Any Surface
For everyday surface damage, a few simple techniques can make your floors look new again.
For Light Scratches on Hardwood:
- The Walnut Trick: For very minor scuffs, rubbing the meat of a walnut over the scratch can often hide it. The oils from the nut darken and fill the scratch.
- Stain Pens & Markers: For slightly deeper scratches, use a stain-matching touch-up marker. Apply it carefully within the scratch and wipe away any excess immediately.
For Deeper Scratches or Dents on Hardwood:
- Wood Filler: Use a stainable wood filler that matches your floor. Overfill the scratch or dent slightly, let it dry completely, then sand it perfectly smooth with fine-grit sandpaper.
- Stain Matching: This is the trickiest part. Test your matching stain on a spare piece of wood or an inconspicuous area first. Apply it carefully with a small artist’s brush, then seal with a matching polyurethane finish (e.g., satin, semi-gloss).
For Scratches on LVT or Laminate:
- These surfaces cannot be refinished, so repair is about concealment. Use a floor repair kit designed for laminate/vinyl. These kits often come with colored putties that you can blend to perfectly match your floor’s pattern.
What Not To Do:
- Never use steel wool on laminate or vinyl; it will dull the finish.
- Avoid using “mop and shine” products to hide scratches; they can cause a waxy buildup that is difficult to remove.
- Don’t try to sand a deep area of LVT or laminate; you will sand right through the design layer.
For these tips, hands-on advice from experienced installers like California Renovation is invaluable, as they often have practical, field-tested solutions[13].
The Lifetime Maintenance Blueprint: How to Maintain a Flat, Flawless Floor
The secret to a long-lasting floor isn’t just choosing a durable material; it’s consistent, proper maintenance. A simple routine can prevent the vast majority of damage and keep your floor looking pristine for decades.
Daily & Weekly Care Routines
The number one enemy of any hard-surface floor is grit. Tiny particles of sand and dirt act like sandpaper underfoot, creating microscopic scratches that dull the finish over time.
- Daily: Sweep or dry mop with a microfiber mop to remove dust and grit. This is the single most effective thing you can do.
- Weekly: For a deeper clean, damp mop with a pH-neutral cleaner. According to commercial maintenance experts at Mannington Commercial, it’s crucial to use the right product[14]. Harsh cleaners can strip the floor’s finish. They recommend using a neutral cleaner with a dilution of 1 ounce per gallon of water or less for safe, effective cleaning[14]. For a simple, DIY solution, home improvement guru Bob Vila suggests a mixture of water and a small amount of white vinegar for many floor types, though this should be used with caution on natural stone[15].
Preventative Measures: Your Best Defense Against Damage
Prevention is always better than repair. Implement these strategies to protect your investment.
- Furniture Pads: Place high-quality felt pads on the bottom of every piece of furniture, especially chairs and tables that are moved frequently. This is a non-negotiable step to prevent scratches.
- Doormats: Use high-performance doormats at every exterior door to trap dirt, water, and de-icing salts before they are tracked into the house.
- Manage Environment: As flooring retailers like Flooring 101 often advise customers, environmental factors matter[3]. Direct sunlight can fade many types of flooring over time, so use curtains or blinds during peak hours. For hardwood, maintaining stable indoor humidity (35-55%) is critical to prevent planks from gapping or cupping.
The High-Maintenance Flooring Hall of Shame: What to Avoid
To appreciate low-maintenance flooring, it helps to know what to avoid. If you hate cleaning and constant upkeep, steer clear of these options.
- High-Gloss, Dark-Colored Floors: While stunning, a dark, glossy finish acts like a mirror for every speck of dust, footprint, and pet hair. It is a constant battle to keep clean, turning a durable material into a high-maintenance headache.
- Soft Hardwoods (e.g., Pine, Fir): These woods dent and scratch very easily. They are beautiful but are best reserved for low-traffic areas if you can’t tolerate a “distressed” look.
- Natural Stone (e.g., Marble, Travertine): Many types of natural stone are porous and must be sealed regularly (sometimes annually) to prevent staining. They are also susceptible to etching from acidic substances like lemon juice or wine.
- Carpet (Especially Light Colors): While soft underfoot, carpet traps allergens and requires frequent, deep cleaning to prevent stains and odors from setting in.
Authoritative sources like Consumer Reports and The Spruce often provide unbiased assessments that can help guide you away from materials that don’t fit a low-maintenance lifestyle[6], [5].
Conclusion: Your Investment in Lasting Value
Choosing a floor is one of the most significant investments you’ll make in your home. By moving beyond simple material names and embracing the concept of “Adamantine Flooring,” you are equipped to make a truly informed decision. It’s about matching objective performance metrics—like a 20-mil wear layer or an AC3 rating—to the unique demands of your life.
You now have the tools to decode durability, compare the top contenders, and select a surface that offers the best long-term value. More importantly, you have a complete lifecycle plan. You know that proper maintenance is the key to longevity and that with the right techniques, you can confidently tackle common repairs yourself. You have been empowered to invest not just in a floor, but in a permanent, worry-free foundation for your home—a surface that is truly built to last.
Feeling confident about your next flooring project? Share your biggest takeaway in the comments below, or explore our other guides on home renovation to continue your journey.
Disclaimer: This article provides general advice and DIY instructions. For significant issues like structural unevenness or deep floor damage, please consult a qualified structural engineer or professional flooring contractor. Always follow manufacturer instructions for products mentioned.
References
- AHF Contract. (n.d.). Technical Specifications. Retrieved from ahfcontract.com.
- Stonhard. (n.d.). High Performance Flooring Systems. Retrieved from stonhard.com.
- Flooring 101. (n.d.). Blog & Resources. Retrieved from flooring101.com.
- Phil’s Carpets and Flooring Inc. (n.d.). Why Tile is So Durable. Retrieved from philscarpets.com.
- The Spruce. (n.d.). Flooring Guides. Retrieved from thespruce.com.
- Consumer Reports. (n.d.). Flooring Buying Guides. Retrieved from consumerreports.org.
- Grand View Research. (N.D.). Wood Flooring Market Size, Share & Trends Analysis Report. As cited by flooringdesmoines.com.
- Ralph’s Hardwood Floors / FlooringDesMoines.com. (n.d.). Blog. Retrieved from ralphshardwood.com or flooringdesmoines.com.
- Centricity. (n.d.). Home Services Data & Insights. Retrieved from centricity.com.
- VFS Works. (n.d.). Understanding the Causes of Uneven Floors. Retrieved from vfsworks.com.
- Sika USA. (n.d.). SikaLevel® Self Leveling Underlayment Product Data Sheet. Retrieved from usa.sika.com.
- CustomCrete. (n.d.). Comparing Top Self-Leveling Brands. Retrieved from customcrete.net.
- California Renovation / Chico Carpet One. (n.d.). DIY Floor Repair Tips. Retrieved from californiarenovation.com.
- Mannington Commercial. (n.d.). Maintenance & Cleaning Guides. Retrieved from blog.manningtoncommercial.com.
- Bob Vila. (n.d.). DIY Cleaning Solutions. Retrieved from bobvila.com.