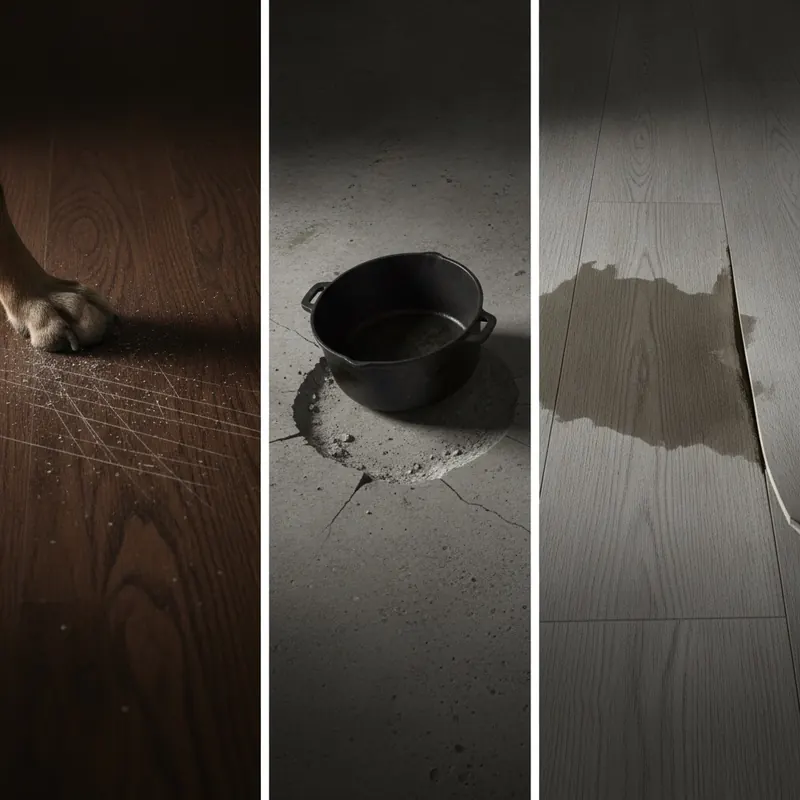
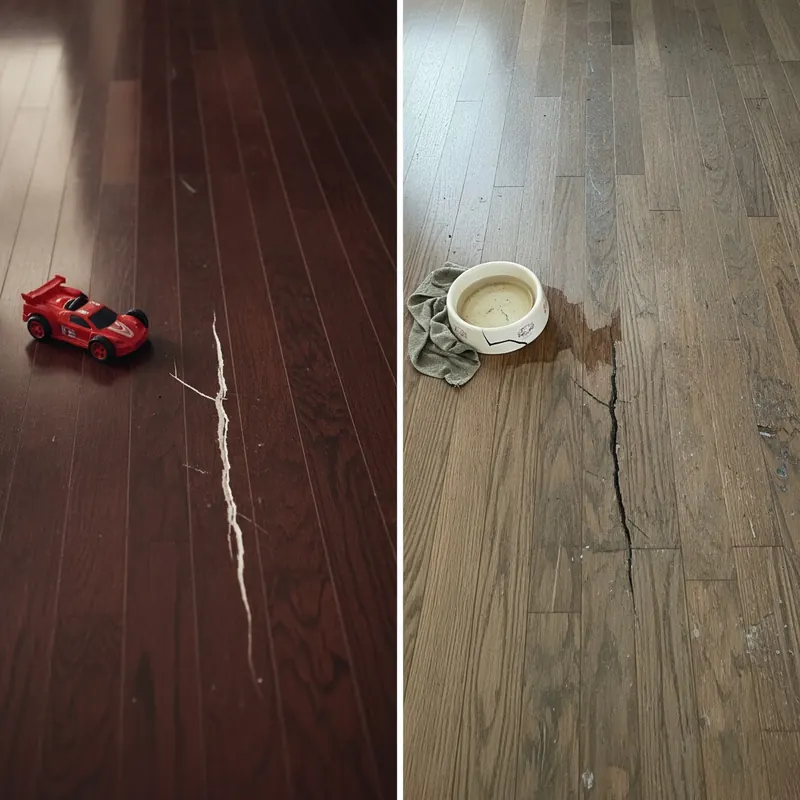
That tiny gap between your beautiful Adamantine floor planks… is it getting bigger? The slight lift you feel underfoot at a seam… is it a sign of something serious? You invested in a durable, stunning floor, and seeing these imperfections can be frustrating and worrisome. You’re right to be concerned; the integrity of your entire floor lies in the perfection of its seams.
Generic advice won’t do. You need a comprehensive resource that respects your investment and empowers you with real, actionable knowledge. This is that resource. Consider this your ultimate bible for Adamantine flooring seams—a pro-level guide to preventing issues before they start, accurately diagnosing any problem that arises, and confidently fixing it the right way.
We will walk you through the entire lifecycle of your floor’s seams, starting with the fundamentals. You’ll learn the critical installation steps that guarantee a flawless foundation, master a long-term maintenance plan to keep seams pristine, become an expert at diagnosing the root cause of gaps or lifting, and finally, arm yourself with a repair manual for every common seam issue.
- Understanding Your Adamantine Floor: The Anatomy of a Perfect Seam
- Prevention First: How to Guarantee Flawless Seams from Day One
- The Long-Term Care Plan for Pristine Adamantine Seams
- Diagnostic Hub: A Visual Guide to Why Your Floor Seams are Failing
- The Homeowner’s Repair Manual: Actionable Fixes for Every Seam Problem
- Conclusion: Your Foundation for a Flawless Floor
- References & Authoritative Sources
Understanding Your Adamantine Floor: The Anatomy of a Perfect Seam
Before you can maintain or repair your floor’s seams, it’s essential to understand what you’re working with. This section breaks down the technology behind Adamantine flooring and explains why its seams are the most critical component for long-term performance and beauty.
What Exactly is Adamantine Flooring?
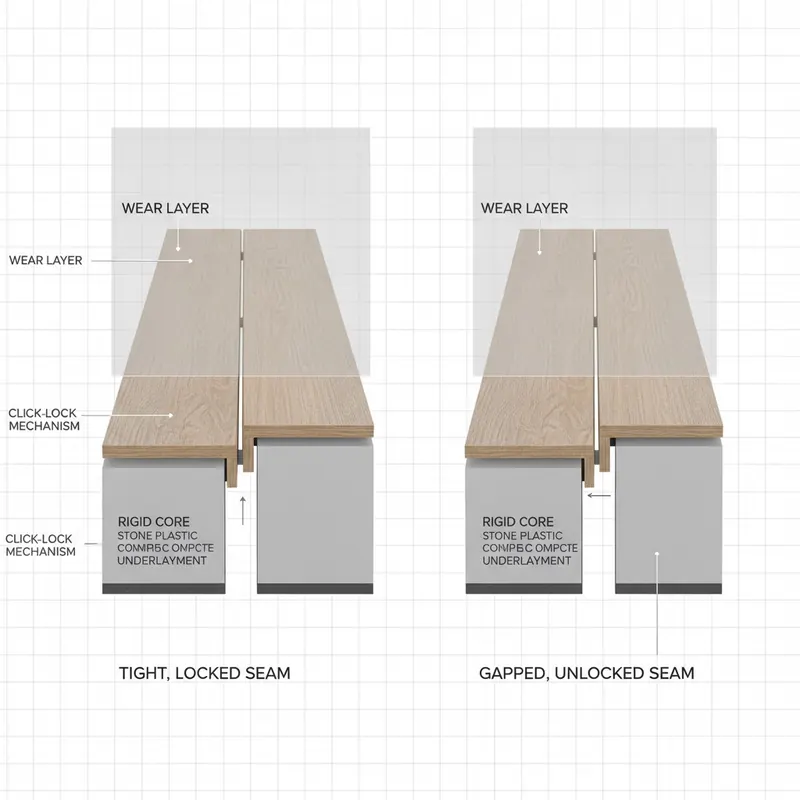
Adamantine flooring is a premium brand name for a type of Luxury Vinyl Plank (LVP) flooring, sold primarily through retailers like Floor & Decor.4 It’s not a new type of material but rather a high-end version of LVP, engineered for exceptional durability. Like other LVP products, it’s constructed in layers: a protective wear layer, a design layer (which gives the wood or stone look), a rigid core, and often an attached underlayment.
What sets brands like Adamantine apart are their specifications, which directly impact performance:
- Wear Layer Thickness: This is the top, clear coating that resists scratches and scuffs. Adamantine products typically feature a robust wear layer ranging from 12 mil to 22 mil, making them suitable for high-traffic residential and even light commercial use.4
- Waterproof Claims: The rigid core is designed to be 100% waterproof, meaning the planks themselves won’t swell or warp when exposed to topical moisture. However, this doesn’t mean the seams are impervious to all water-related issues, a crucial point we’ll cover later.
- Cost and Warranty: As a premium product, Adamantine flooring generally costs between $3.50 and $5.50 per square foot. This investment is often protected by a limited lifetime residential warranty, which underscores the importance of proper installation and maintenance.4
Why Seam Integrity is Everything for a Floating Floor
Adamantine flooring is a “floating floor,” which means the planks are not nailed or glued to the subfloor. Instead, they connect to each other using a sophisticated click-lock or tongue-and-groove system. This creates a single, unified surface that “floats” over the subfloor.
This design is brilliant because it allows the entire floor to expand and contract as a single unit in response to changes in temperature and humidity. According to the National Wood Flooring Association (NWFA), this ability to move is fundamental to the long-term health of any plank floor.1 The seams are the lynchpin of this system.
- A Good Seam: A properly installed seam on a new floor should be incredibly tight. The acceptable gap tolerance is typically less than the thickness of a credit card (about 0.76mm). You should see a clean, consistent micro-bevel line but feel a smooth, level surface.
- A Bad Seam (Gapped): Visible gaps between planks are a clear sign of a problem. They collect dirt, compromise the floor’s unified strength, and indicate an underlying issue with installation or the home’s environment.
- A Bad Seam (Peaked/Lifting): Seams that are pushing upward, creating a small ridge, are a serious red flag. This issue, known as “peaking” or “buckling,” signals that the floor is under immense compression and has nowhere to go but up.
When the locking mechanisms in the seams are compromised, the entire floating system fails, leading to the gaps, lifting, and separation that homeowners dread.
Prevention First: How to Guarantee Flawless Seams from Day One
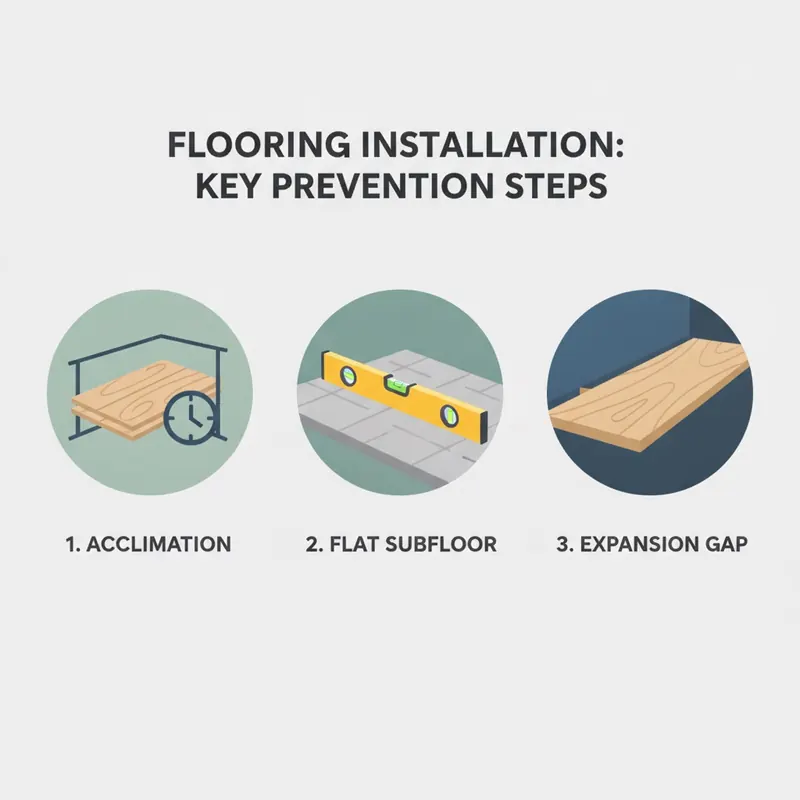
The absolute best way to fix seam problems is to prevent them from ever happening. Over 70% of flooring failures, including gapping and lifting, are attributed to improper subfloor preparation and installation errors. Whether you’re hiring a professional or tackling a DIY project, understanding these three non-negotiable steps will empower you to ensure your floor is set up for a lifetime of success.
Pro Tip: The ‘Ask Your Installer’ Checklist
- How long will you acclimate the flooring in my home?
- How will you measure and ensure the subfloor is flat?
- What size expansion gap will you leave around the perimeter?
The Non-Negotiable Step: Proper Acclimation
You wouldn’t install a guitar in a sauna and expect it to stay in tune. Similarly, flooring planks must be given time to adjust to their new environment before they are installed. This process is called acclimation. It allows the planks to physically stabilize to your home’s unique temperature and humidity levels.
- Why it Matters: Skipping acclimation is a primary cause of future gaps. If you install planks that were stored in a cold, dry warehouse directly into a warm, humid home, they will expand after installation, potentially causing them to buckle. Conversely, installing planks from a humid environment into a dry one will cause them to shrink, creating gaps between the seams.
- The Rule: Adamantine planks must be placed in the installation room for a minimum of 48-72 hours before being installed.
- The Ideal Environment: To prevent seasonal gapping, maintain a stable indoor environment. According to building science experts, the ideal indoor humidity range for most plank flooring is between 35% and 55%.2
Your Floor’s Foundation: The Critical Role of a Flat Subfloor
A floating floor is only as good as the foundation it rests on. An unlevel subfloor with high and low spots puts constant, uneven stress on the plank locking mechanisms. As you walk on the floor, the planks flex up and down over these imperfections, slowly wiggling the seams apart or causing them to break over time.
- Why it Matters: An unlevel subfloor is a leading cause of separating floor planks, squeaks, and a “bouncy” feeling underfoot. It’s a problem that cannot be fixed with a simple repair later on.
- The Standard: The industry standard for subfloor flatness, as defined by the NWFA, is that it must not have any variations exceeding 3/16 of an inch over a 10-foot span.1
- How to Check: This is typically checked by laying a long, straight edge on the subfloor and looking for gaps between it and the floor. High spots must be sanded down and low spots filled with a leveling compound before a single plank is laid.
Giving Your Floor Room to Breathe: Expansion Gaps
As mentioned, your floating floor needs to expand and contract. To allow for this movement, installers must leave a small gap between the edge of the flooring and all vertical surfaces, including walls, door jambs, and kitchen islands. This “expansion gap” is then hidden from view by baseboards or quarter-round molding.
- Why it Matters: This is the #1 defense against lifting and buckling seams. Without this gap, as the floor expands due to a natural increase in temperature or humidity, it will press directly against the walls. With nowhere to go, the pressure builds until the floor is forced to buckle upwards at its weakest points—the seams.
- The Rule: Flooring manufacturer installation guides universally require an expansion gap of 1/4 to 3/8 of an inch around the entire perimeter of the installation.
- The Pinch Point: Even a single point where the floor is “pinched” (e.g., a cabinet screwed down through the floating floor) can restrict movement and cause peaking across an entire room.
The Long-Term Care Plan for Pristine Adamantine Seams
Once your floor is installed correctly, a consistent and proper maintenance routine is the key to preserving its seams for decades. The goal is to prevent the two biggest enemies of floor seams: abrasive grit that wears down edges and excessive moisture that can compromise the core and subfloor.
Adamantine Flooring Seams: Do’s and Don’ts
| Do | Don’t |
|---|---|
| Do use a vacuum with a hard floor setting or a soft-bristle brush. | Don’t use a vacuum with an aggressive, rotating beater bar. |
| Do use a pH-neutral cleaner specifically designed for vinyl floors. | Don’t use ammonia, bleach, wax, or abrasive cleaners. |
| Do use a microfiber mop that is damp, not soaking wet. | Don’t flood the floor with water or let spills sit. |
| Do place felt pads under all furniture legs. | Don’t use a steam mop, as high heat can damage the vinyl. |
| Do clean up spills immediately. | Don’t apply topical “seam sealers,” as this will void the warranty. |
Daily & Weekly Cleaning: Protecting Seams from Grit and Grime
Fine particles of dirt, sand, and grit are like sandpaper for your floor’s finish. When tracked around, they can wear down the protective layer on the edges of your planks, making the seams more visible and susceptible to damage.
- Sweeping and Vacuuming: The best defense is to remove grit regularly. Use a vacuum cleaner with the beater bar disengaged (or on a hard floor setting) or a soft-bristle broom. Pay special attention to the micro-bevels in the seams where dirt can collect. A soft brush attachment on your vacuum is perfect for cleaning these grooves.
- Mopping: For deeper cleaning, use a pH-neutral cleaner recommended for LVP floors. The Institute of Inspection, Cleaning and Restoration Certification (IICRC) advises against harsh chemicals which can degrade the floor’s finish.3 Always use a microfiber mop that is well wrung-out until it is merely damp. A mop that is too wet can push dirty water into the seams.
Moisture and Spills: Your Seams’ Greatest Enemy
While Adamantine planks are waterproof, the seams are not hermetically sealed. Excessive water can seep through the seams to the subfloor, potentially causing mold, mildew, and subfloor damage over time.
- Spills: Clean up all spills immediately with a dry cloth.
- Steam Mops: A common question is, “Can I use a steam mop on Adamantine flooring?” The answer from virtually all manufacturers is a definitive no. The combination of high heat and pressurized steam can damage the vinyl wear layer, weaken the adhesive layers within the plank, and potentially warp the locking mechanism.
- Seam Sealers: You may see products marketed as “LVP seam sealers.” Do not use them. Applying any kind of topical sealer or glue to the seams of a floating floor will void the manufacturer’s warranty. It “glues” the floor together, preventing the necessary expansion and contraction and leading to buckling.
Annual Inspection and Deep Cleaning
Once a year, take a closer look at your floor to catch any potential issues early.
Annual Seam Health Inspection Checklist:
- Get down at eye level and inspect high-traffic areas. Are there any chipped or worn seam edges?
- Are any hairline gaps beginning to appear, particularly at the ends of planks?
- Walk the entire floor. Do you feel any new “spongy” spots or notice any seams that feel slightly raised?
- Check the areas around pet water bowls or entryways for any signs of discoloration that might indicate moisture intrusion.
For a deep clean, you can use your approved pH-neutral cleaner, perhaps working in smaller sections with a soft-bristle brush to gently scrub the micro-bevels before mopping. For homes with pets, enzymatic cleaners designed for vinyl floors can help address accidents without damaging the finish.
Diagnostic Hub: A Visual Guide to Why Your Floor Seams are Failing
If you’re already seeing problems with your seams, don’t panic. The first step to a proper fix is an accurate diagnosis. Use this guide to identify the root cause of your specific issue.

- What is the problem?
- If Gaps/Separation, go to Question 2.
- If Lifting/Peaking, go to Question 3.
- Are the gaps only visible in the winter and seem to close in the summer?
- If Yes, this is likely Seasonal Gapping due to low indoor humidity.
- If No, the gaps are present year-round, it is likely an Installation Error (unlevel subfloor, initial plank damage).
- Has the floor recently been exposed to a leak, flood, or excessive moisture?
- If Yes, this is likely Moisture-Related Buckling.
- If No, this is almost certainly Compression Buckling due to an insufficient expansion gap.
Problem: Gaps & Separation
When you see planks pulling apart, it’s typically due to one of two causes: environmental changes or installation failure.
- Seasonal Gaps (Environmental): This is most common in climates with cold, dry winters. As you run your furnace, the indoor humidity level plummets. Just as a wooden door might shrink in winter, the materials in your floor planks can contract slightly, causing thin, hairline gaps to appear between the planks. As humidity returns in the spring and summer, these gaps often close up on their own. As noted by Building Science Corporation, maintaining stable humidity is key to preventing this.2
- Persistent Gaps (Installation Error): If gaps appear shortly after installation or don’t close seasonally, the cause is likely a flaw in the installation. This could be an unlevel subfloor causing the locking mechanisms to fail, or the installer may have damaged the tongue or groove while tapping the planks into place. Gaps at the ends of planks (end-gapping) are a classic sign of an unlevel subfloor.
Problem: Lifting, Peaking, or Buckling Seams
This is a more serious issue that requires immediate attention. Think of it like a bridge buckling under pressure. The force causing the planks to lift is immense.
- Compression Buckling (No Expansion Gap): This is the most common cause. The floor has expanded due to a change in temperature or humidity, but it has no room to move because it’s pressed tight against the walls. The pressure builds until it finds the path of least resistance, forcing two planks to pop up at their seam. To diagnose this, you can carefully remove a piece of baseboard or quarter-round molding and see if the flooring is pushed tight against the wall.
- Moisture-Related Buckling: If your floor has been exposed to a significant water event (like a dishwasher leak), water can get through the seams and be absorbed by the subfloor or the core of the planks (if it’s a wood-based product). This swelling creates the same type of expansion pressure, causing the floor to buckle. The IICRC provides standards for diagnosing this type of water damage, which often requires professional assessment.3
The Homeowner’s Repair Manual: Actionable Fixes for Every Seam Problem
Once you’ve diagnosed the cause, you can choose the right solution. Some fixes are simple DIY tasks, while others require professional help. Always start with the least invasive method first.
Method 1: Tightening Gaps with Leverage (Non-Invasive)
- Difficulty Rating: Intermediate
- Best For: Closing persistent gaps in a floating floor without having to disassemble it.
This technique uses friction and leverage to slide the planks back together. It works best when the root cause (like an unlevel subfloor) has been addressed or if the gapping is minor.
- Required Tools & Materials: Heavy-duty suction cup floor gap fixer tool OR a block of wood, construction adhesive, and a rubber mallet; wood glue (optional).
- The Process:
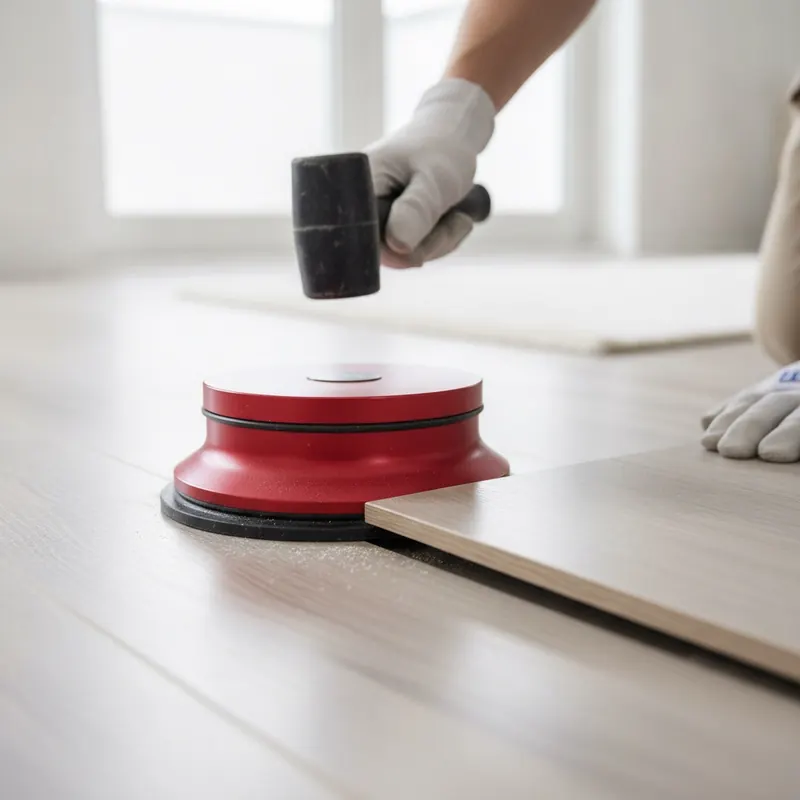
- Clean the floor and the gap thoroughly.
- Suction Cup Method: Place the suction cup tool on the plank you want to move, several inches from the gap. Engage the suction levers. Tap the tool’s handle with a rubber mallet, driving the plank forward to close the gap.
- Friction Block Method: Temporarily glue a small block of wood to the surface of the plank you need to move (using a releasable construction adhesive). Let it set. Gently tap the block with a mallet to slide the plank and close the gap. Once closed, carefully pry the block off and clean any adhesive residue.
- Securing the Fix (Optional): For a more permanent fix on the final plank near a wall, you can apply a small bead of wood glue to the tongue before tapping it closed. Use sparingly.
Method 2: Filling Gaps (Cosmetic Repair)
- Difficulty Rating: Easy
- Best For: Minor, seasonal hairline gaps that you want to make less noticeable. This is a cosmetic fix, not a structural one.
Crucial Warning: Never use a hard-setting filler like wood putty or wood filler on a floating floor like Adamantine. The floor needs to move, and a hard filler will crack, crumble, and look worse over time.
| Filler Type | Flexibility | Best For | Durability |
|---|---|---|---|
| Color-Matched Caulk | High | Floating floors (LVP, Laminate) | Good |
| Wood Putty/Filler | None | Nailed-down hardwood floors, furniture repair | Poor (will crack) |
- Required Tools & Materials: Flexible, color-matched flooring caulk; painter’s tape; putty knife; damp cloth.
- The Process:
- Clean the gap meticulously.
- Apply painter’s tape to both sides of the gap to protect the plank surfaces.
- Apply a small, continuous bead of the flexible caulk into the gap.
- Smooth the bead with a putty knife or your finger, ensuring it’s flush with the floor surface.
- Immediately remove the painter’s tape, pulling it away at an angle.
- Clean up any excess with a damp cloth before it dries.
Method 3: Advanced Repairs (Chipped Edges & Plank Replacement)
- Difficulty Rating: Professional
- Best For: A single, badly damaged plank; severely chipped seam edges; or fixing buckling caused by an insufficient expansion gap.
These repairs often require specialized tools and a deep understanding of flooring systems.
- Fixing Buckling: The fix for compression buckling involves removing the baseboards and using a multi-tool or circular saw to cut the required expansion gap around the perimeter. This releases the pressure, and the floor can often be pressed back down into place.
- Plank Replacement: Replacing a single plank in the middle of a room without disassembling the entire floor is a complex task that involves precisely cutting out the old plank and carefully modifying and gluing in a new one.
For these issues, the risk of causing more damage is high. We strongly recommend calling a certified flooring professional.
Conclusion: Your Foundation for a Flawless Floor
Your Adamantine flooring seams are the key to its longevity and beauty. As you’ve learned, their perfection is not a matter of luck, but a direct result of two key principles: a correct, meticulous installation and a consistent, gentle maintenance routine. By understanding the critical roles of acclimation, subfloor flatness, and expansion gaps, you have the power to prevent the vast majority of seam issues from ever beginning.
You are now equipped with the pro-level knowledge to protect your investment. You can diagnose the difference between a minor seasonal gap and a serious compression issue. You know which repairs are safe to tackle yourself and, just as importantly, when to call in a professional. By applying these insights, you can ensure your Adamantine floor remains a seamless, stunning foundation for your home for years to come.
We invite you to share your own floor seam challenges or successes in the comments below. Your experience could help another homeowner protect their investment.
Disclaimer: This article provides general advice. Always consult your specific Adamantine flooring warranty and installation guide before performing any maintenance or repairs. If you are unsure, contact a certified flooring professional.
References & Authoritative Sources
- National Wood Flooring Association (NWFA). (N.D.). Installation Guidelines. Retrieved from nwfa.org.
- Building Science Corporation. (N.D.). Understanding Humidity and Building Materials. Retrieved from buildingscience.com.
- Institute of Inspection, Cleaning and Restoration Certification (IICRC). (N.D.). IICRC Standard for Professional Cleaning of Textile Floor Coverings (IICRC S100). Retrieved from iicrc.org.
- Floor & Decor. (N.D.). Adamantine Product Specifications and Care Guides. Retrieved from flooranddecor.com.