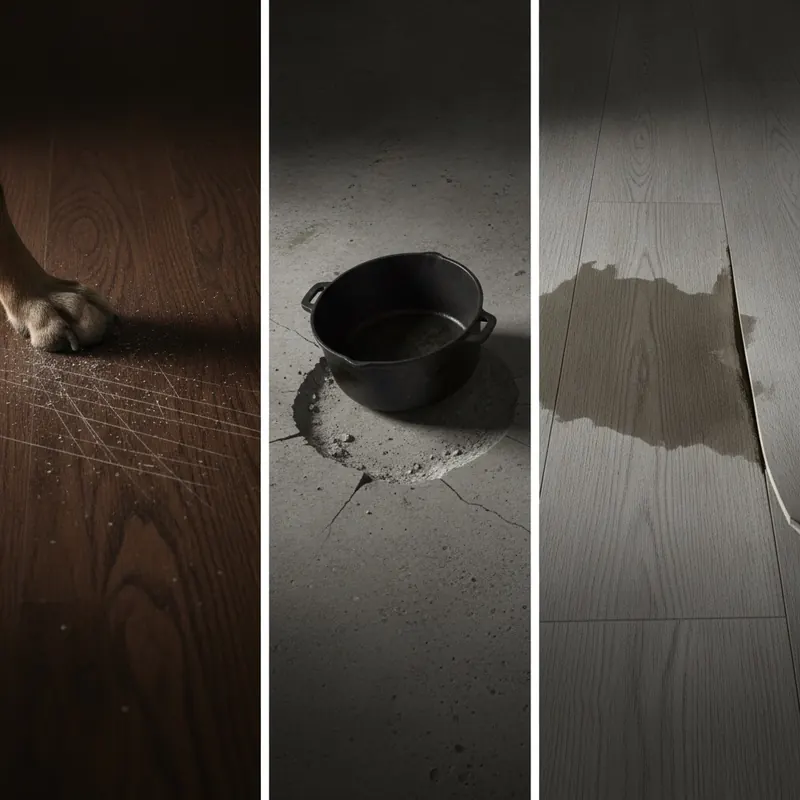
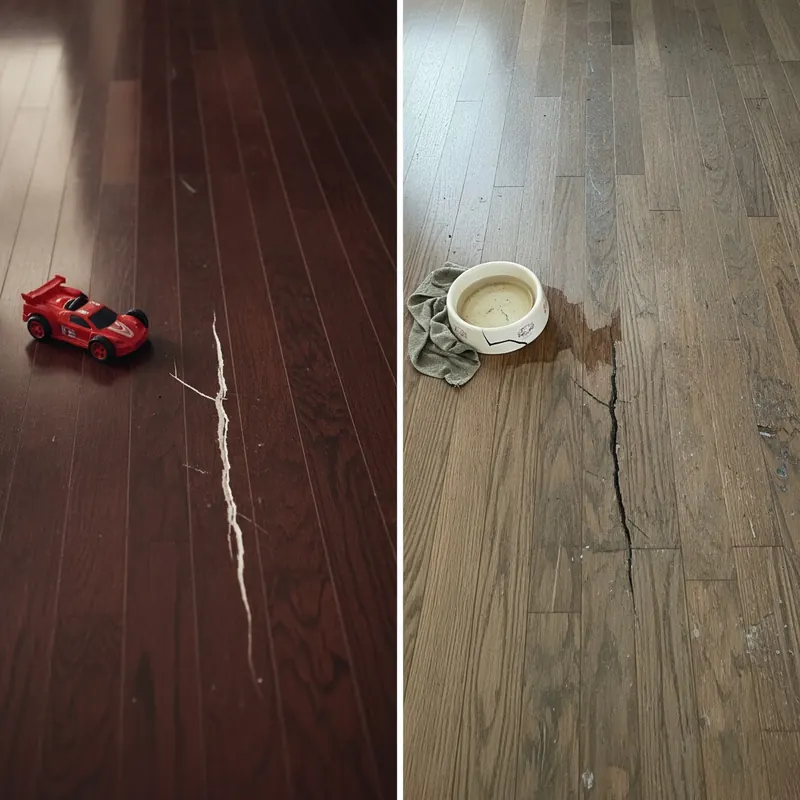
There’s nothing more frustrating than seeing the beautiful, lustrous floor you invested in become dull, cloudy, or covered in a web of tiny scratches. What was once the centerpiece of your room now looks tired and dirty, even right after you’ve cleaned it. You’re left wondering: What went wrong? And more importantly, how can you fix it without causing more damage?
This is not just another list of generic cleaning tips. This is your definitive diagnostic guide—a “Floor Doctor” approach to Adamantine flooring care. We’ll empower you to move beyond guesswork, accurately identify the root cause of any issue, and apply the correct, material-safe solution. We will walk you through understanding the unique properties of your floor, diagnosing the true source of dullness, implementing a multi-layered protection strategy, mastering the official maintenance routine, and finally, restoring that showroom shine. Prepare to become the expert in preserving your investment for a lifetime of beauty.
- What is Adamantine Flooring? Understanding Its Unique Properties
- The ‘Floor Doctor’ Diagnostic Guide: Why Your Floor Looks Dull or Scratched
- Proactive Protection: Your Multi-Layered Defense System
- The Official Adamantine Floor Care Routine: Daily, Weekly, and Annual Tasks
- How to Restore Shine and Repair Micro-Scratches
- Frequently Asked Questions (FAQ) about Adamantine Floor Care
- Conclusion
- References and Authoritative Sources
What is Adamantine Flooring? Understanding Its Unique Properties
Before you can properly care for your floor, it’s essential to understand what makes it unique. Adamantine flooring is a premium surface engineered for exceptional durability and aesthetic appeal. While the exact composition can be proprietary, it typically involves a high-density core topped with advanced polymer wear layers. This construction gives it a significant advantage in the world of flooring.
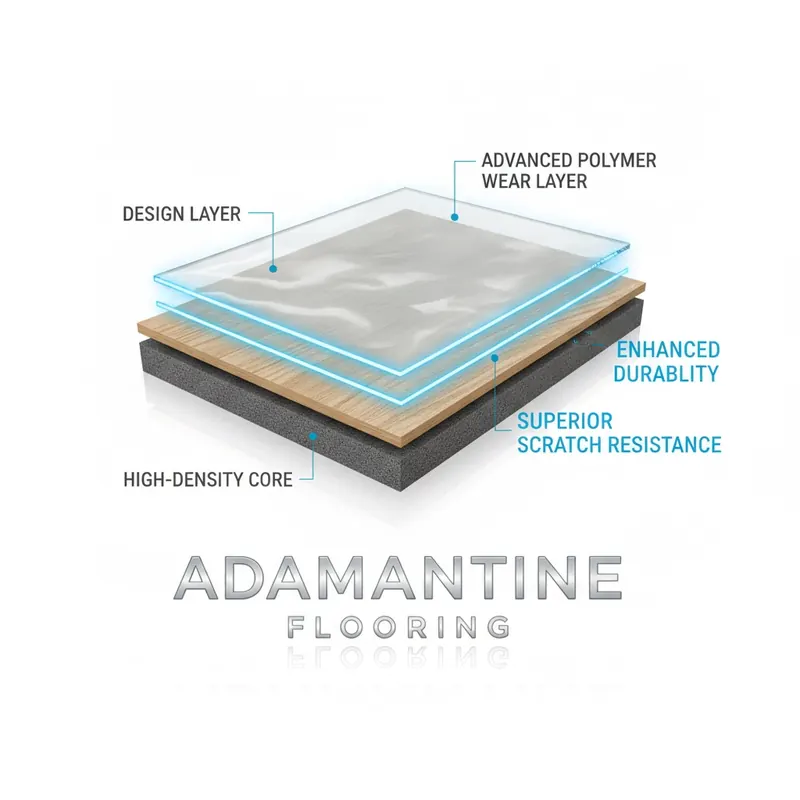
Compared to traditional hardwood, which is susceptible to dents and scratches, or some luxury vinyl tiles (LVT), Adamantine flooring is designed for superior resistance to daily life. Its hardness and resilience are not just marketing claims; they are measurable. In material science, hardness can be rated on scales like the Mohs scale (for mineral content) or the Janka scale (for wood). Adamantine’s composition is engineered to rank highly on these metrics, making it less prone to damage from dropped objects or heavy furniture.
Furthermore, its resistance to surface wear is often quantified by industry standards. The American Society for Testing and Materials (ASTM) sets benchmarks for product performance, and a key test for flooring is ASTM D4060, which measures abrasion resistance.[1] A high rating in this test indicates that the surface can withstand significant friction and traffic before showing signs of wear. Always refer to the official manufacturer’s documentation for the specific technical data and properties of your particular Adamantine floor, as this remains the ultimate source of truth for its composition and performance characteristics.
The ‘Floor Doctor’ Diagnostic Guide: Why Your Floor Looks Dull or Scratched
Applying a polish to a dirty floor or using a harsh cleaner on a scratched surface can make the problem worse. The first and most critical step is to correctly diagnose the issue. Use this guide to identify the true culprit behind your floor’s lackluster appearance.
Your 30-Second Floor Diagnosis:
- After cleaning a small section with a manufacturer-approved pH-neutral cleaner and letting it dry, does it still look dull?
- Yes: The problem is likely not surface dirt. Proceed to question 2.
- No: Your issue might be an ineffective cleaning routine or the wrong daily cleaner.
- Kneel down and look at the dull area from a low angle with a bright light source (like a flashlight) shining across the surface. Do you see a network of countless fine lines and a scattered, hazy reflection?
- Yes: You are likely dealing with micro-scratches.
- No: The surface looks smooth but cloudy. Proceed to question 3.
- Lightly scrape the cloudy area with your fingernail. Does a waxy or filmy substance come off?
- Yes: You have residue and buildup from cleaning products or old polishes.
- No: The finish itself looks worn thin, especially in a distinct path where people walk most often. You are seeing natural wear and tear on the finish.
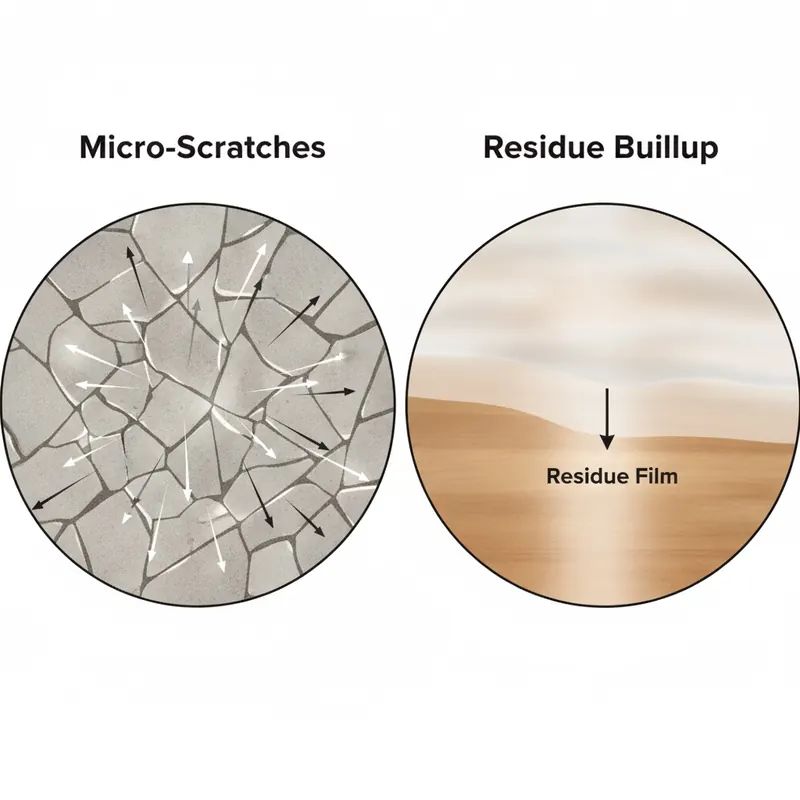
This simple diagnostic process, recommended by experts at organizations like the Institute of Inspection, Cleaning and Restoration Certification (IICRC), helps prevent misapplication of treatments.[2] Now, let’s explore each cause in detail.
Cause #1: The Light-Refracting Effect of Micro-Scratches
The most common reason a durable floor loses its shine is the accumulation of thousands of microscopic scratches. While individually invisible, together they create a rough surface that diffuses and scatters light rather than reflecting it uniformly. This is what your eye perceives as dullness.
The primary cause is abrasive grit. Common household dust contains particles of silica (sand) and quartz. On the Mohs scale of mineral hardness, silica is a 7, while most floor finishes are much softer. This means every time you walk across a floor with even a small amount of grit on your shoes, you are essentially sanding it with microscopic sandpaper. This principle is well understood in the automotive detailing industry, where experts spend hours polishing clear coats to remove identical micro-scratches and restore a deep, wet-look shine. The same physics applies to your floor.
Cause #2: Residue and Buildup from Cleaning Products
Does your floor look cloudy or streaky right after you mop it? The culprit is almost certainly residue. This film can come from several sources:
- Using the Wrong Cleaner: All-purpose cleaners, oil soaps, or vinegar-based solutions can react with the floor’s finish, leaving a dulling film.
- Using Too Much Product: More is not better. Excess cleaner that isn’t fully rinsed away dries into a sticky, dirt-attracting layer.
- Old Wax or Polish: “Quick shine” products can look great initially, but over time, layers can build up, yellow, and trap dirt, leading to a grimy, dull appearance.
- Hard Water Minerals: If you live in an area with hard water, the mineral deposits (calcium and magnesium) left behind after mopping can create a cloudy film on the surface. This is a frequently overlooked cause of floor dullness.
To avoid this, stick to pH-neutral cleaners and consider using products designated by the EPA’s Safer Choice program, which are formulated to perform well while containing ingredients that are safer for families and the environment.[3]
Cause #3: Natural Wear and Tear on the Finish
Even the toughest floors have a finite lifespan. Modern resilient flooring like Adamantine is protected by a transparent “wear layer.” This top coating is what takes the brunt of all foot traffic, furniture movement, and daily abrasion. According to the Resilient Floor Covering Institute (RFCI), the thickness and quality of this wear layer are the most important factors in a floor’s long-term durability.[4]
Over years of use, this layer can gradually wear thin, particularly in high-traffic paths—from the front door to the kitchen, for example. When the wear layer is compromised, the floor in that area will look inherently duller and more scuffed than less-trafficked areas, as the underlying layers are now being exposed. To assess the severity, try the fingernail test: gently run your fingernail across a scratch. If it doesn’t catch, it’s likely a surface-level scuff in the finish. If your nail catches in the groove, the scratch is deeper and may require professional attention.
Proactive Protection: Your Multi-Layered Defense System
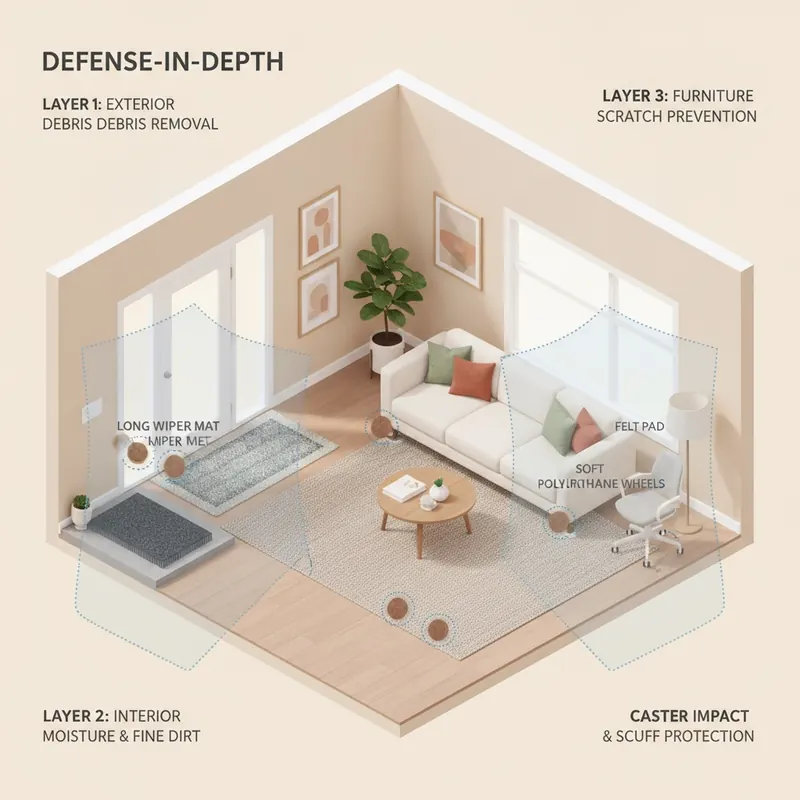
The best way to care for your Adamantine flooring is to stop damage before it starts. Think of floor protection not as a single action, but as a “defense-in-depth” system with multiple layers working together. As one professional flooring installer puts it, “I can install the most durable floor in the world, but 90% of its lifespan is determined by what the homeowner does in the first week. An entryway mat and furniture pads are the cheapest insurance you can buy.”
The First Line of Defense: Strategic Entryway Matting
The single most effective thing you can do to prevent scratches is to stop abrasive grit at the door. An ideal system involves two mats. First, a coarse “scraper” mat outside the door to remove large debris and mud. Second, a long “wiper” mat inside to absorb moisture and trap the fine, sand-like particles that do the most damage. The Carpet and Rug Institute (CRI) confirms that a proper matting system can trap up to 95% of soil and moisture that would otherwise be tracked throughout the home.[5]
Furniture and Feet: Choosing the Right Protective Pads
Every time a chair is pushed back or a table is bumped, it grinds any trapped debris into your floor’s finish. Using the correct protective pads is non-negotiable.
- Felt Pads (Good): Ideal for stationary furniture like sofas and tables. They allow for easy sliding when needed but can collect dust and wear out, requiring regular checking and replacement.
- Silicone or Rubber Cups (Better): Excellent for furniture that you don’t want to move, like heavy cabinets or bed frames. They grip the floor, preventing any movement and associated scratching.
- Hard Plastic Sliders (For Occasional Moving): Best for very heavy items you need to move occasionally, like a refrigerator. They are not meant for everyday use like on dining chairs.
- Specialty Chair Casters (Best for Office Chairs): Standard hard plastic office chair wheels are notorious floor killers. Replace them with soft polyurethane or rubber-style wheels designed for hard surfaces. Leading furniture manufacturers like Herman Miller often provide guidance on selecting floor-safe casters.[6]
Mitigating High-Traffic Wear with Area Rugs and Runners
In areas where foot traffic is constant, such as hallways, living room pathways, or in front of the kitchen sink, an area rug or runner provides a sacrificial layer of protection. It absorbs the wear and tear that would otherwise be inflicted directly on your floor. When choosing a rug, ensure you use a high-quality rug pad underneath. This not only prevents slipping but also provides a breathable cushion. Always check your Adamantine flooring manufacturer’s guidelines to ensure the rug pad material is non-staining and won’t react with the floor’s finish.
Sunlight and Fading: The Hidden Threat of UV Damage
Flooring surface wear isn’t just about scratches; it’s also about color degradation. Over time, direct exposure to the sun’s ultraviolet (UV) rays can cause your flooring to fade, discolor, or become brittle. This is a form of surface wear that is often overlooked until visible fading patterns appear where a rug used to be. Authoritative bodies like the Window Film Association of Australia and New Zealand (WFAANZ) note that professionally installed window films can block up to 99% of harmful UV rays without significantly reducing visible light, making them an excellent investment for protecting floors and furniture.[7]
The Official Adamantine Floor Care Routine: Daily, Weekly, and Annual Tasks
Consistency is key to long-term floor beauty. Following a simple but structured routine based on manufacturer guidelines will keep your Adamantine flooring looking its best.
(For your convenience, consider printing this section as a ‘cheat sheet’ to keep with your cleaning supplies.)
Daily Care: Sweeping and Spot Cleaning
The goal of daily care is to remove the abrasive grit that causes micro-scratches.
- Sweep or Dust Mop: Use a broom with soft bristles or, even better, a microfiber dust mop. Microfiber pads use static electricity to attract and trap fine dust, dirt, and pet hair far more effectively than a traditional broom.
- Spot Clean Spills: Clean up spills immediately using a soft cloth and water. For sticky spills, use a small amount of manufacturer-recommended pH-neutral cleaner on the cloth.
Weekly Cleaning: The Right Way to Mop
A weekly wet cleaning removes accumulated grime that sweeping leaves behind.
- Vacuum or Sweep First: Always remove all loose debris before mopping.
- Choose the Right Cleaner: Use a pH-neutral, film-free cleaner specifically formulated for resilient or hard-surface flooring. Avoid all-purpose cleaners, oil soaps, or products that promise to add a shine, as they can leave residue.
- Use Two Buckets (Optional but Recommended): Have one bucket with your cleaning solution and a second with clean rinse water. This prevents you from putting dirty water back on the floor.
- Damp, Not Wet: Wring out your mop (a flat-head microfiber mop is ideal) until it is just damp to the touch. Excessive water can damage the floor’s core over time.
- Mop and Dry: Mop a section at a time, rinsing the mop head frequently. If your floor looks very wet, follow up with a dry microfiber cloth to absorb excess moisture.
Top 5 Mistakes to Avoid with Adamantine Flooring
Protecting your floor is as much about what you don’t do as what you do. Avoid these common mistakes:
- Never Use a Steam Mop: The high heat and pressure can force moisture into the seams of the flooring, potentially causing delamination, warping, and damage to the finish.
- Avoid Abrasive Cleaners and Tools: Do not use scouring powders, steel wool, or abrasive scrubbing pads. They will permanently scratch and dull the finish.
- Steer Clear of Oil Soaps and Wax Polishes: These products leave a residue that builds up over time, dulling the finish and attracting more dirt.
- Don’t Use a Vacuum with a Beater Bar: The stiff, rotating bristles of a beater bar (designed for carpets) can scratch and abrade the surface of hard flooring. If using an upright vacuum, ensure the beater bar is turned off or use the bare floor attachment.
- Never Let Water Pool on the Surface: While Adamantine flooring is water-resistant, it is not waterproof. Wipe up spills immediately and avoid flooding the floor when mopping.
How to Restore Shine and Repair Micro-Scratches
If your floor is already suffering from dullness or fine scratches, a restorative process can bring back its luster. Follow these steps in order.
(For a visual guide, search for video tutorials demonstrating how to apply floor polish with a microfiber applicator pad.)
Step 1: Deep Cleaning to Strip Away Residue
Before you can add shine, you must remove anything that’s causing dullness. If you suspect a buildup of old cleaner, wax, or polish, you need to perform a deep clean.
- Purchase a floor stripping or deep cleaning solution specifically designed for resilient flooring and approved by your floor’s manufacturer.
- Following the product’s instructions, apply the solution to a small section of the floor.
- Allow it to sit for the recommended time to dissolve the old buildup.
- Gently agitate with a soft-bristled brush or non-abrasive pad.
- Thoroughly remove the solution and dissolved residue with a clean, damp mop, rinsing frequently with fresh water.
- Allow the floor to dry completely. It may look dull at this stage, which is normal. The surface is now clean and ready for polishing.
Step 2: Buffing and Polishing to Conceal Fine Scratches
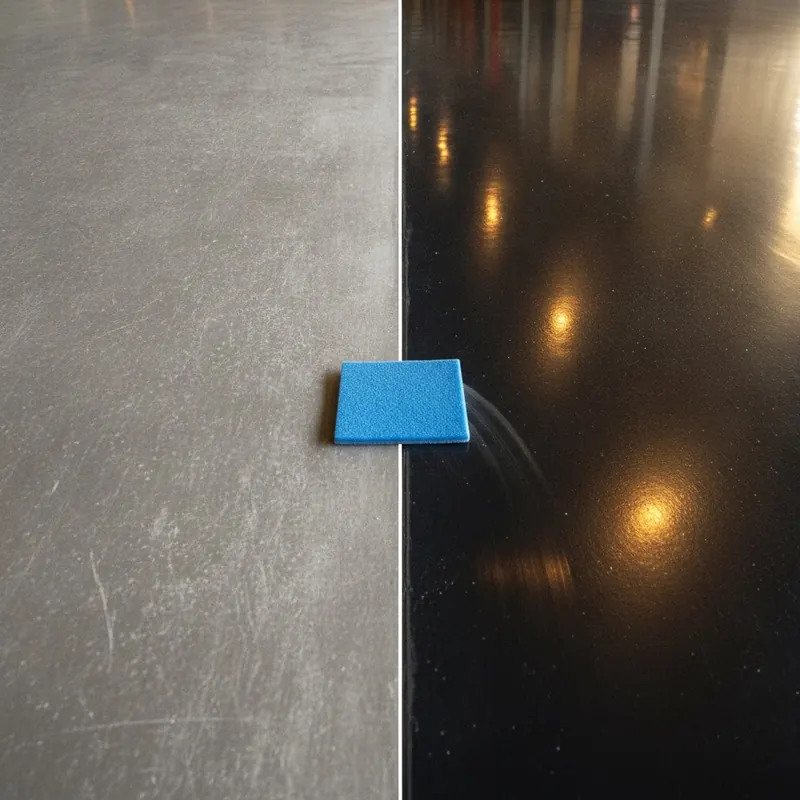
For floors suffering from micro-scratches, a high-quality floor polish or restorer is the answer. These products, often acrylic-based polymers, work by filling in the microscopic scratches and creating a new, uniform surface that reflects light evenly. Look for products from reputable floor care brands like Bona or Zep.[8]
- Ensure the floor is perfectly clean and dry.
- Apply the polish in a thin, even coat using a clean, flat-head microfiber mop or applicator pad.
- Work in small, manageable sections, applying the product in the direction of the flooring planks, if applicable.
- Allow the polish to dry completely according to the manufacturer’s instructions. Do not walk on it while it’s drying.
- For a higher gloss or to address more significant dullness, a second coat may be applied after the first is fully cured.
Knowing Your Limits: When to Call a Flooring Professional
DIY methods are effective for micro-scratches and dullness, but some issues require an expert. Call a certified flooring professional if you see:
- Deep Scratches or Gouges: Scratches that catch your fingernail and have penetrated the wear layer.
- Chips or Peeling: Areas where the top layers of the flooring are physically damaged or peeling away.
- Widespread, Severe Wear: If the wear layer is completely gone in large areas.
- Water Damage: Signs of swelling, cupping, or discoloration from prolonged water exposure.
Organizations like the International Certified Flooring Installers Association (CFI) can be a resource for finding qualified and reputable professionals in your area.[9]
Frequently Asked Questions (FAQ) about Adamantine Floor Care
Can pets’ nails scratch Adamantine flooring?
Yes. While Adamantine flooring is highly scratch-resistant, it is not scratch-proof. Sharp, untrimmed pet nails can still cause scratches, especially if the pet is running and sliding. Keeping your pet’s nails regularly trimmed and filed is the best way to prevent this type of damage. Check your manufacturer’s warranty, as damage from pets is often not covered.
How often does Adamantine flooring need to be sealed or polished?
This depends entirely on the level of foot traffic and how well the floor is maintained, not on a fixed schedule. A high-traffic entryway may benefit from a new coat of polish annually, while a low-traffic bedroom may go for many years without needing it. The best indicator is the floor’s appearance. When you notice the shine beginning to dull in traffic areas despite regular cleaning, it’s time to consider applying a fresh coat of polish. Always follow the manufacturer’s specific guidelines.
What should I do if I spill something acidic on my Adamantine floor?
Act quickly. Acidic substances like wine, citrus juice, or vinegar can chemically etch or dull the polymer finish of the floor. Blot the spill immediately with a clean, dry cloth—do not wipe, as this can spread the spill. Clean the area with a cloth dampened with water and a small amount of pH-neutral cleaner. Rinse with a clean, water-dampened cloth and dry the area thoroughly.
Conclusion
Your Adamantine floor is a significant investment designed for years of service. By shifting your mindset from simply cleaning to a comprehensive framework of Diagnose, Protect, Maintain, and Restore, you are now fully empowered to preserve its beauty and durability. You can confidently identify the true cause of any dullness, proactively defend against scratches and wear, and apply the correct maintenance and restoration techniques with expert precision.
Bookmark this guide for future reference and share it with anyone who wants to keep their floors looking beautiful for years to come. Have a specific question we didn’t cover? Ask us in the comments below!
Disclaimer: This article provides general advice. Always test cleaning products or restoration methods on a small, inconspicuous area first. For significant damage or if you are unsure, consult a professional flooring expert. Product recommendations are not endorsements.
References and Authoritative Sources
- ASTM International. (N.D.). ASTM D4060 – Standard Test Method for Abrasion Resistance of Organic Coatings by the Taber Abraser. ASTM International.
- Institute of Inspection, Cleaning and Restoration Certification. (N.D.). IICRC Technical Resources for Floor Care. IICRC.
- United States Environmental Protection Agency. (N.D.). Safer Choice Program. Environmental Protection Agency.
- Resilient Floor Covering Institute. (N.D.). Technical Information on Resilient Flooring Wear Layers. Resilient Floor Covering Institute.
- Carpet and Rug Institute. (N.D.). The Science of Entryway Matting. Carpet and Rug Institute.
- Herman Miller. (N.D.). Caster and Glide Reference Guide. Herman Miller.
- Window Film Association of Australia and New Zealand. (N.D.). UV Protection and Fading. Window Film Association of Australia and New Zealand.
- Bona US. (N.D.). Floor Polish Application Guides. Bona US.
- International Certified Flooring Installers Association. (N.D.). Find a Certified Installer. International Certified Flooring Installers Association.