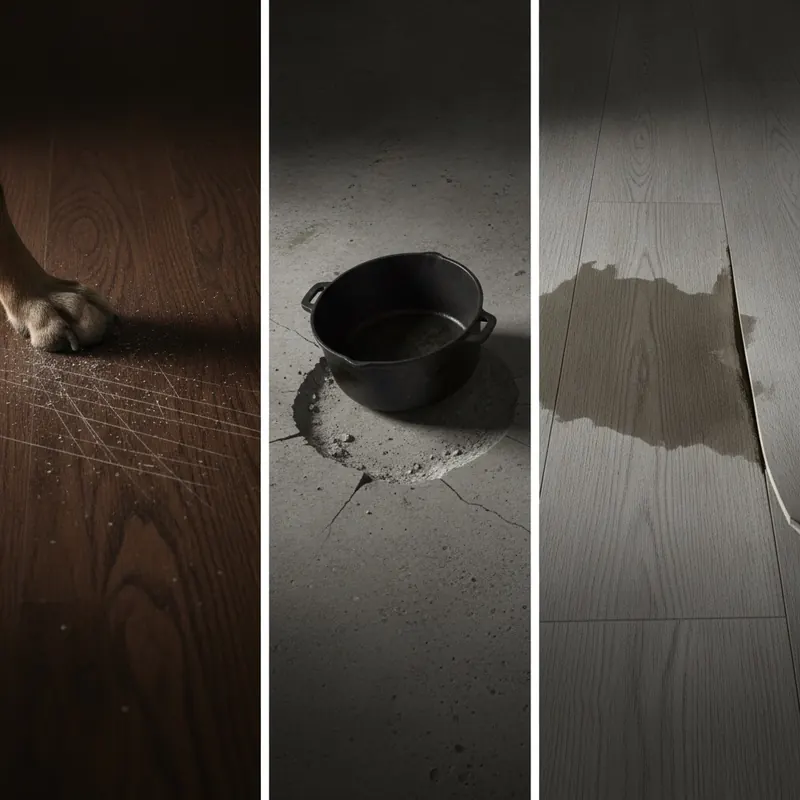
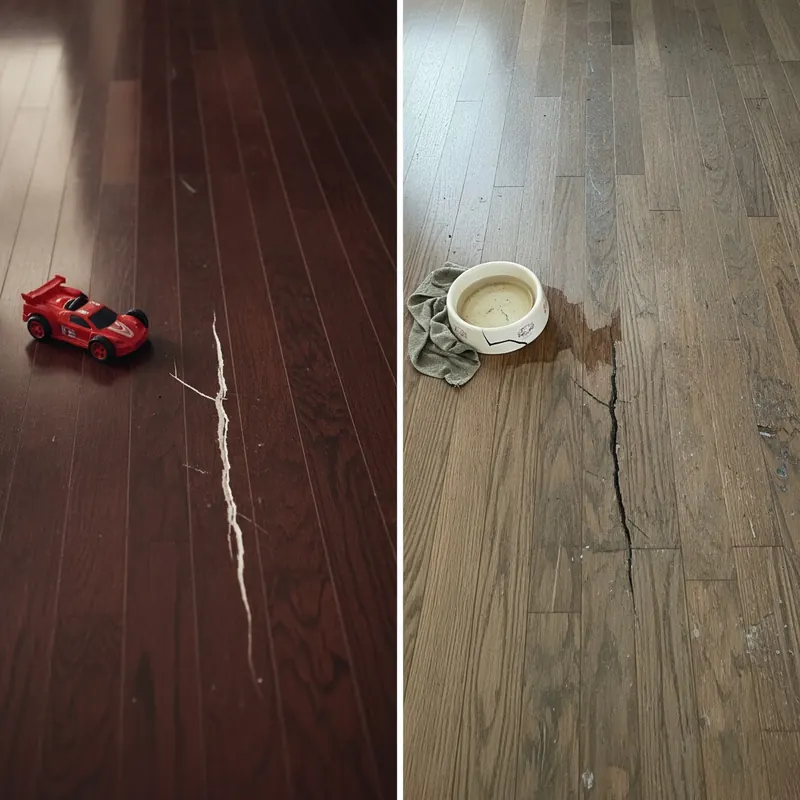
The sound is unmistakable: the scrape of a chair, the clatter of a dropped toy, the click-clack of pet nails. For many homeowners, these are the sounds of daily life, but they’re also the sounds of a floor slowly surrendering to wear and tear. You invested in beautiful new flooring, only to watch it accumulate a collection of scratches, scuffs, and dents that betray its age. This frustration is the costly reality of floors that lack true durability.
But what if you could choose a floor with the same confidence you choose a home’s foundation? The secret isn’t just about picking a “hard” material; it’s about understanding plank integrity—the core structural soundness that allows a floor to resist the relentless strain of daily life. This is where advanced technologies like Adamantine flooring enter the picture, engineered from the ground up to defy damage.
This is your Definitive Durability Playbook. Forget confusing marketing jargon and ambiguous claims. By the end of this guide, you will be transformed from a confused buyer into an informed expert, equipped with an engineer’s understanding of what makes a floor truly last.
- Understanding the Enemy: What Is Daily Strain & High-Traffic Wear and Tear?
- The Foundation of Durability: An Engineer’s Guide to Flooring Plank Integrity
- Spotlight: What is Adamantine Flooring Technology?
- The Durability Scorecard: Rating the Most Durable Flooring for Daily Use
- Your Lifetime Maintenance Playbook: How to Maintain Plank Integrity
- DIY Rescue: How to Replace Damaged Floor Planks
- Beyond the Living Room: Heavy-Duty Flooring for Your Toughest Spaces
- Your Path to a Worry-Free Floor
- References
Understanding the Enemy: What Is Daily Strain & High-Traffic Wear and Tear?
Before we can choose a solution, we must first define the problem. “Wear and tear” is a term used frequently, but its meaning can be vague, especially when it comes to flooring. In high-traffic areas like hallways, kitchens, and entryways, the cumulative effect of footsteps, dirt, and daily activity creates a unique set of challenges. Understanding the difference between expected, normal wear and actual, preventable damage is the first step toward protecting your investment.
Normal wear and tear is the gradual deterioration that occurs from regular, intended use. Damage, on the other hand, often results from accidents, neglect, or improper use. Property management resources often make this distinction clear in rental agreements, noting that minor scuffs from furniture are wear, while a deep gouge from dragging a heavy appliance is damage.[1]
To provide clarity, here is a visual guide to the most common flooring problems:
A Visual Guide to Flooring Wear vs. Damage
| Flooring Type | Normal Wear & Tear Examples | Examples of Damage |
|---|---|---|
| Luxury Vinyl Plank (LVP) | Faint surface-level scuffs in the finish; slight dulling of sheen in main walkways over many years. | Deep scratches that penetrate the wear layer into the print layer; chipped or broken plank corners; peeling or delaminating layers. |
| Laminate | Minor micro-scratches visible only in certain light; slight fading in areas with intense, direct sunlight exposure over time. | Swollen or buckled planks from excessive water exposure; deep gouges that expose the fiberboard core; broken locking mechanisms. |
| Engineered Hardwood | Minor surface scratches that haven’t broken the finish; slight color changes due to light exposure (patina). | Deep dents from dropped objects; long, deep scratches that penetrate to the bare wood; water stains or warping from spills left unattended. |
| Porcelain Tile | Dirty or slightly discolored grout lines; minor, hairline cracks in grout from house settling. | Chipped or cracked tiles; wide, crumbling grout lines; tiles that are loose or “tenting” due to subfloor issues. |
The Foundation of Durability: An Engineer’s Guide to Flooring Plank Integrity
Plank integrity is the single most important concept in the world of durable flooring. It refers to a plank’s ability to maintain its original shape, strength, and structural soundness when subjected to force, moisture, and temperature changes. A plank with high integrity won’t warp, crack, delaminate, or have its locking system fail under the pressures of a busy home.
To truly grasp this, imagine a cross-section of a modern, high-quality luxury vinyl plank. It isn’t a single piece of material but a layered marvel of engineering:
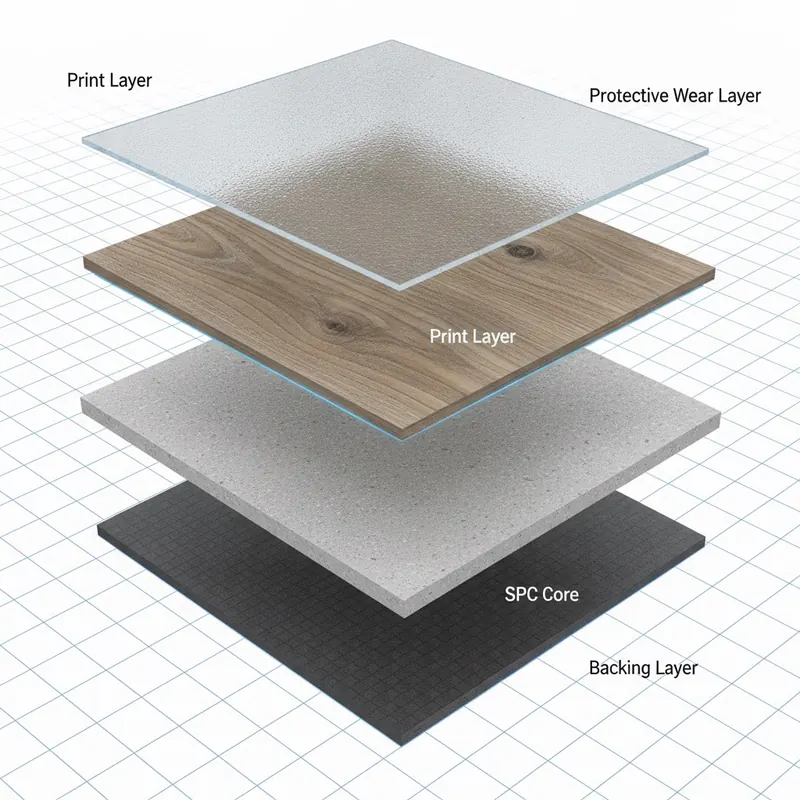
- Protective Finish/Wear Layer: This is the transparent top coat, often infused with materials like ceramic beads or aluminum oxide. It’s the first line of defense against scratches and stains.
- Print Layer: A high-resolution photographic layer that gives the plank its realistic wood or stone appearance.
- Core: The heart of the plank, providing its rigidity, stability, and impact resistance. This is where materials like SPC and WPC make a huge difference.
- Backing Layer: The bottom layer that provides additional stability and often includes an attached underlayment for sound absorption and comfort.
Each layer must work in harmony to ensure the plank’s long-term integrity. According to flooring inspectors, the most common causes of plank failure are not always visible on the surface; they are often due to a compromised core from moisture or a damaged locking system from improper installation.
Core Matters: The SPC vs. WPC Showdown
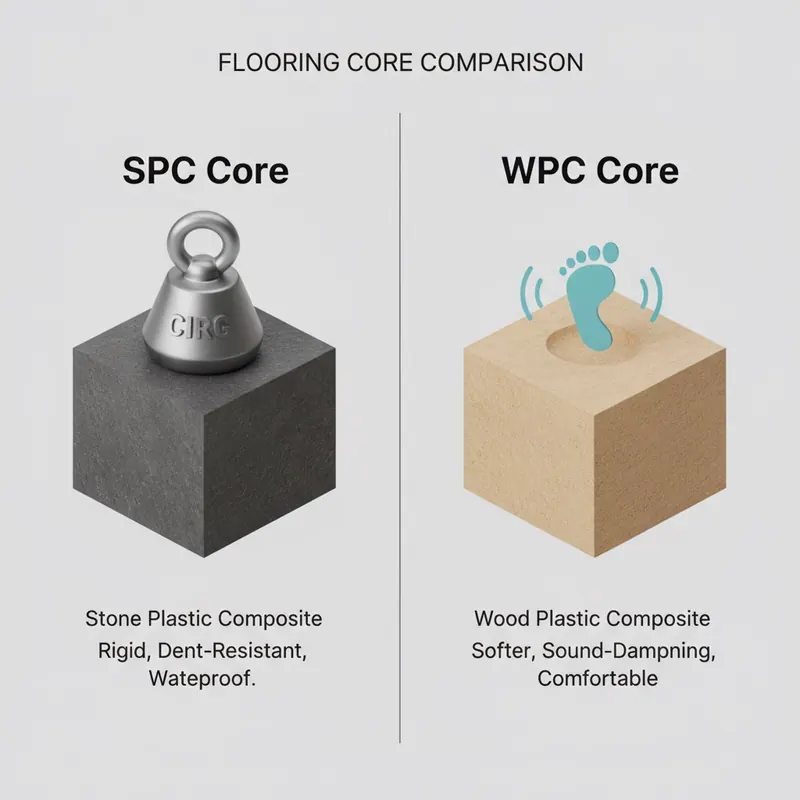
The core is the backbone of plank integrity, and in the world of luxury vinyl, the two dominant technologies are Stone Polymer Composite (SPC) and Wood Polymer Composite (WPC).
SPC (Stone Polymer Composite) is a rigid core made from a mixture of natural limestone powder, polyvinyl chloride, and stabilizers. Its high density is its superpower. In fact, premium LVP can contain nearly 70% limestone for increased resistance to cracks and dents.[2] This makes it exceptionally stable and less susceptible to expansion and contraction with temperature changes.
WPC (Wood Polymer Composite) has a core made from a blend of recycled wood pulp and plastic composites. This core is thicker and less dense than SPC, with foaming agents that create tiny air pockets. This results in a floor that feels warmer, quieter, and softer underfoot.
So, which one is better for plank integrity?
SPC vs. WPC: A Head-to-Head Comparison
| Feature | SPC (Stone Polymer Composite) | WPC (Wood Polymer Composite) |
|---|---|---|
| Dent Resistance | Excellent. The dense, stone-based core is highly resistant to impacts from dropped objects or heavy furniture. | Good. Softer and more prone to denting than SPC, but still more resilient than solid hardwood. |
| Stability | Excellent. Minimal expansion and contraction, making it ideal for large areas and rooms with temperature swings. | Good. More susceptible to temperature changes than SPC, requiring more careful attention to expansion gaps. |
| Comfort Underfoot | Good. Feels very solid and firm. Often paired with an attached pad to add cushioning. | Excellent. The aerated core provides more cushioning and feels warmer and softer to walk on. |
| Sound Insulation | Good. The dense core can be louder unless paired with a quality underlayment. | Excellent. The thicker, less dense core naturally absorbs more sound. |
| Best For | Kitchens, entryways, basements, homes with heavy furniture, and areas with direct sunlight. | Bedrooms, living rooms, and areas where comfort and quiet are the top priorities. |
The Unsung Hero: Why Locking Systems and Subfloors are Critical
Even the most advanced plank core can fail if its support system is weak. Plank integrity is a team effort, and the two most critical players are the locking system and the subfloor.
A floating floor’s locking mechanism—the tongue-and-groove system that clicks planks together—is a marvel of precision engineering. If damaged during installation, it creates a weak point that can lead to gapping, peaking, or squeaking over time.
The subfloor is the true foundation. An uneven, dirty, or moist subfloor will inevitably compromise the integrity of the flooring above it. Planks can flex over low spots, causing the locking systems to break, or they can trap moisture, leading to core damage.
Installer’s Corner Pro-Tip: “The number one mistake I see is rushing subfloor prep. People want to see the new floor go down, but they don’t realize that a 1/8-inch dip in the subfloor can cause a click-lock system to fail in a high-traffic area within a year. Take the extra day to level and clean the subfloor. It’s the cheapest insurance you can buy for your new floor.”
Subfloor Preparation Checklist
- Is it flat? Use a long, straight edge to check for dips and high spots. Most manufacturers require the subfloor to be flat within 3/16 of an inch over a 10-foot span.
- Is it clean? Scrape away all old adhesive, drywall mud, and debris. Sweep and vacuum thoroughly.
- Is it dry? Use a moisture meter to test concrete or wood subfloors. Ensure they are within the flooring manufacturer’s specified limits.
- Is it structurally sound? Check for squeaks, soft spots, or movement. Screw down any loose panels to eliminate vertical movement.
Spotlight: What is Adamantine Flooring Technology?
With a solid understanding of plank integrity, we can now examine a technology specifically engineered for it: Adamantine flooring. This isn’t a type of flooring, but rather a high-performance protective finish and construction system featured on specific product lines, such as those from TAS Flooring.[3] It represents a new benchmark for heavy-duty performance in both residential and commercial settings.
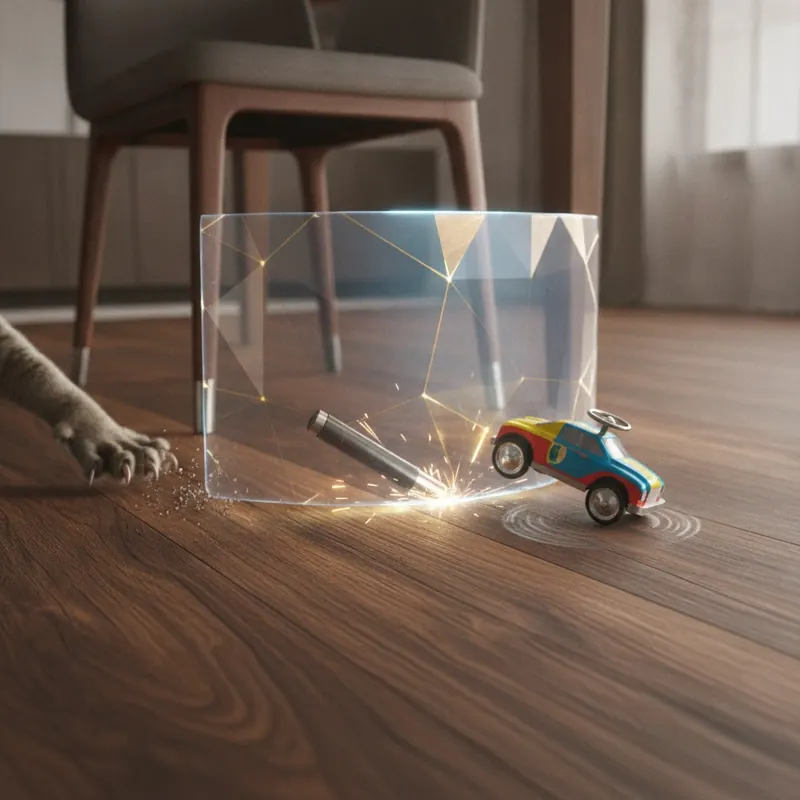
At its core, Adamantine Protection is designed to create a strain-resistant surface that maintains its look and structure through years of daily abuse. According to the manufacturer, the key technical specifications that deliver this performance are:
- Wear Layer: A robust 20 mil (0.5mm) top layer, which is the recommended thickness for heavy residential and light-to-medium commercial traffic.[4]
- Construction: An LSPC Hybrid – ABA Foam Rigid Core. This advanced construction sandwiches a rigid LSPC (Limestone-Plastic Composite) core between layers of vinyl and foam, providing the dent resistance of SPC with enhanced sound dampening and comfort.
- Seamless Installation: The stability of the core allows for installations of up to 66’ x 66’ without the need for transition strips, creating a monolithic, visually clean floor.
While independent third-party testing data is limited, the manufacturer’s specifications position Adamantine as a top-tier protective finish comparable to other ceramic bead or aluminum oxide-infused wear layers, but with the added benefit of an advanced hybrid core construction.
Adamantine vs. Traditional Finishes: A Comparative Look
How does a floor with Adamantine technology stack up against other durable options? Let’s compare it to a standard high-end LVT and a top-rated laminate.
Feature Comparison: Adamantine vs. The Competition
| Feature | Adamantine Flooring | High-End LVT (20 mil) | AC5 Laminate |
|---|---|---|---|
| Wear Layer | 20 mil with proprietary protective finish | 20 mil with aluminum oxide | AC5-rated melamine resin overlay |
| Core Type | LSPC Hybrid (Limestone-Plastic Composite) | SPC (Stone Polymer Composite) | HDF (High-Density Fiberboard) |
| Dent Resistance | Excellent | Excellent | Good |
| Water Resistance | 100% Waterproof | 100% Waterproof | Water-Resistant (Core is vulnerable) |
| Scratch Resistance | Excellent | Very Good | Excellent |
A commercial interior designer might choose a product with Adamantine specs for a space like a boutique hotel lobby or a modern doctor’s office. As one might say, “We need a floor that looks like authentic hardwood but can handle rolling luggage, constant foot traffic, and aggressive cleaning protocols without failing. A waterproof hybrid core with a 20 mil wear layer is non-negotiable for that kind of environment.”
The Durability Scorecard: Rating the Most Durable Flooring for Daily Use
While Adamantine technology is impressive, it’s part of a larger family of durable flooring options. Choosing the right one depends on your specific lifestyle, budget, and the room in question. To simplify this decision, we’ve created the Durability Scorecard.
This scorecard rates the top contenders on the metrics that matter most. We’ll also include our “Durability Decoder” to explain what these technical ratings mean for your home.
Durability Decoder:
- Wear Layer (LVP): Measured in mils. For most homes, 12 mil is good, but 20 mil or higher is recommended for maximum durability against scratches and wear, especially with pets and kids.[4]
- AC Rating (Laminate): An abrasion rating from AC1 to AC5. AC3 is for general residential use, but an AC4 or AC5 rating is advised for homes with heavy foot traffic.[5]
- PEI Rating (Porcelain Tile): The Porcelain Enamel Institute’s abrasion rating from 1 to 5. Look for a PEI rating of at least Class 3 for residential floors; Class 4 is ideal for high-traffic areas.[5]
The Durability Scorecard
| Flooring Type | Scratch Resistance | Dent Resistance | Water Resistance | Avg. Cost (Material) | Best For… |
|---|---|---|---|---|---|
| LVP (20 mil SPC) | ★★★★☆ | ★★★★★ | ★★★★★ | $3 – $7 / sq. ft. | Kitchens, bathrooms, basements, homes with pets. |
| Laminate (AC4/AC5) | ★★★★★ | ★★★☆☆ | ★★★☆☆ | $2 – $5 / sq. ft. | Living rooms, bedrooms, homes needing high scratch resistance on a budget. |
| Porcelain Tile | ★★★★★ | ★★★★★ | ★★★★★ | $2 – $10 / sq. ft. | Entryways, kitchens, bathrooms, sunrooms—anywhere needing ultimate durability. |
| Engineered Hardwood | ★★☆☆☆ | ★★☆☆☆ | ★☆☆☆☆ | $5 – $12 / sq. ft. | Living rooms and bedrooms where authentic wood is desired and care is taken. |
As trusted home improvement resources like Bob Vila often note, the “most durable” floor is the one that best matches the demands of the space.[5] For a wet, busy entryway, porcelain tile is king. For a family room with large dogs, a 20 mil SPC LVP or an AC5 laminate might be the smarter choice.
Your Lifetime Maintenance Playbook: How to Maintain Plank Integrity
Choosing a durable floor is only half the battle. Preserving its integrity and appearance for decades requires a proactive maintenance strategy. Proper care can easily be the difference between a floor that lasts 10 years and one that lasts 25.
Follow this seasonal checklist to keep your flooring in peak condition.
Seasonal Maintenance Checklist
- All Seasons (Daily/Weekly):
- Sweep or Dust Mop: Remove grit and dirt daily. These tiny particles act like sandpaper underfoot.
- Wipe Up Spills Immediately: Even on waterproof floors, standing liquid can damage the finish or seep into seams.
- Use Doormats: Place high-quality mats at all exterior doors to trap dirt, salt, and moisture.
- Spring (Deep Clean):
- Damp Mop: Use a flat microfiber mop with a pH-neutral cleaner designed for your flooring type. The mop should be lightly damp, never soaking wet.
- Check Furniture Pads: Inspect the felt pads on all furniture legs and replace any that are worn or embedded with grit.
- Summer (Humidity Control):
- Maintain Humidity: Use a dehumidifier or air conditioning to keep indoor humidity levels within the manufacturer’s recommended range (typically 35-55%) to prevent planks from expanding.
- Fall (Prepare for Winter):
- Clean Out Grout Lines: For tile floors, give grout a deep cleaning and check for any areas that need sealing before winter moisture is tracked in.
- Winter (Protect from Elements):
- Use Boot Trays: Keep salt, snow, and slush contained in trays near entryways.
- Monitor Humidity: Dry winter air can cause some floors to contract. Use a humidifier if indoor humidity drops below the recommended level.
What NOT To Do
According to maintenance experts at Family Handyman and professional cleaning solution providers like Nilfisk, these are the most common mistakes that destroy floors[6], [7]:
- Never use a steam mop on LVP or laminate. The intense heat and moisture can damage the core and cause the layers to delaminate.
- Never use abrasive cleaners, steel wool, or scouring powders. They will permanently dull and scratch the finish.
- Never use vinegar, ammonia, or oil-based soaps. These can damage the protective wear layer and leave a residue that attracts dirt.
- Never flood the floor with water when mopping. Less is more.
DIY Rescue: How to Replace Damaged Floor Planks
Despite our best efforts, accidents happen. A dropped cast-iron skillet or a deep gouge from moving furniture can ruin a single plank. The good news is that on most modern floating floors, you don’t have to replace the entire floor. With a few tools and some patience, you can replace a damaged plank in the middle of the room.
This process, often detailed by DIY authorities like Family Handyman, is manageable for a handy homeowner.[6] For severe, widespread issues like water damage, it’s always best to consult a professional restoration service like SERVPRO.[8]
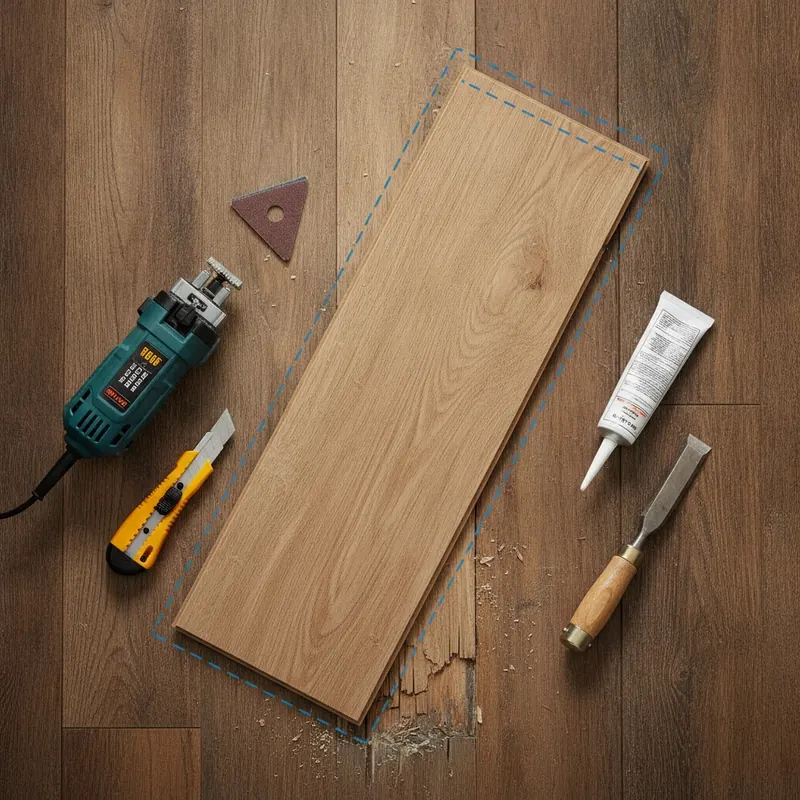
Tools & Materials Checklist
- Replacement Plank
- Oscillating Multi-Tool with a plunge-cut blade
- Drill and 1-inch spade bit
- Straightedge or Speed Square
- Utility Knife
- Chisel and Hammer
- Shop Vacuum
- Construction Adhesive (high-quality polyurethane-based)
- Painter’s Tape
- A heavy weight (e.g., a box of books)
Step-by-Step Replacement Guide
- Step 1: Outline the Plank. Use painter’s tape to clearly mark the perimeter of the damaged plank. This prevents you from accidentally cutting into adjacent planks.
- Step 2: Make Plunge Cuts. Set the blade of your oscillating multi-tool to the thickness of the plank. Make long plunge cuts about one inch inside the seams on all four sides of the damaged plank. Do not cut all the way to the corners.
- Step 3: Drill Relief Holes. Use a drill with a spade bit to drill a hole inside each corner of your cut lines. This relieves pressure and makes the center piece easier to remove.
- Step 4: Remove the Center. Connect the corner holes to your cut lines with the multi-tool. Use a chisel to carefully pry out and remove the center section of the plank.
- Step 5: Remove the Edges. With the center gone, you can now carefully collapse the remaining tongue-and-groove edges inward and remove them from the surrounding planks. Vacuum the entire opening to remove all debris.
- Step 6: Prepare the New Plank. Using a utility knife, carefully cut off the tongue portion of the locking system on the long side and short side of the new plank. Leave the groove sides intact. Do a “dry fit” to ensure the plank sits perfectly.
- Step 7: Glue and Set the Plank. Apply a thin bead of construction adhesive to the subfloor and to the groove edges of the surrounding planks. Carefully insert the modified tongue-less edge of the new plank into the groove of the existing floor first, then lower the rest of the plank into place.
- Step 8: Clean and Weigh Down. Immediately wipe away any excess adhesive that squeezes out. Place a heavy weight on top of the new plank and use painter’s tape to hold it tight to the adjacent planks while the adhesive cures (usually 24 hours).
Pro-Tip from an Installer: “When you cut the tongue off the new plank, slightly angle your utility knife to create a small ‘back-cut’ or bevel. This makes it much easier to slip the plank into place without fighting it.”
Beyond the Living Room: Heavy-Duty Flooring for Your Toughest Spaces
For some areas of a home—garages, workshops, home gyms—even the most durable residential flooring isn’t enough. These spaces demand heavy-duty performance flooring, borrowing technology from industrial and commercial settings to provide ultimate resistance to chemicals, impacts, and abrasion.
The two leading options in this category are epoxy coatings and polyurethane cement. These are not planks but seamless, resinous systems applied directly over concrete. Authorities in industrial coatings like Sherwin-Williams detail their distinct advantages.[9]
Heavy-Duty Flooring Comparison
| Feature | Epoxy Floor Coating | Polyurethane (PU) Cement |
|---|---|---|
| Durability | Very Good. Creates a hard, thick, and durable surface that resists abrasion and chemicals. Can be brittle. | Excellent. More flexible than epoxy, giving it superior impact and thermal shock resistance (e.g., from hot tires). |
| Chemical Resistance | Excellent. Highly resistant to battery acid, oil, and other common garage chemicals. | Good. Resistant to most chemicals, but slightly less so than high-grade epoxy. |
| Application | DIY-Friendly. Many kits are available for homeowners. Requires meticulous prep but is a manageable project. | Pro-Install Recommended. A more complex, multi-component system that requires professional equipment and expertise. |
| Ideal Use Case | Residential garages, basements, and workshops needing a clean, durable, and chemical-resistant surface. | Commercial kitchens, manufacturing facilities, or high-end garages where impact and temperature swings are a major concern. |
These systems transform a dusty concrete slab into a finished, high-performance surface that can withstand almost anything you throw at it, proving that true durability has a solution for every room in the house.
Your Path to a Worry-Free Floor
The journey to a long-lasting floor begins not in the showroom, but with knowledge. You are now armed with an understanding of what truly matters: the engineering behind plank integrity. You know that the core composition—like the limestone-rich heart of an SPC plank—is the foundation of dent resistance and stability. You can see that a 20 mil wear layer, especially one enhanced by technologies like Adamantine Protection, is the shield that guards against the daily onslaught of scratches and scuffs.
Most importantly, you recognize that your role doesn’t end after installation. Through proactive, mindful maintenance, you can preserve that integrity for decades, ensuring your floor remains a source of pride, not frustration. You are now fully equipped to select, install, and maintain a truly “worry-free” floor that will stand up to years of daily strain and continue to look beautiful.
Ready to find your perfect floor? Download our free ‘Flooring Maintenance Checklist’ to keep your investment looking new for years to come.
This article discusses specific branded products. While based on publicly available data, performance can vary. For DIY repairs, always follow safety precautions and consult a professional if unsure. This post may contain affiliate links.
References
- Avail. (N.D.). What Is Normal Wear and Tear in a Rental Property?. Retrieved from https://www.avail.com/education/articles/wear-and-tear-what-is-fair
- Giant Floor. (N.D.). Top 5 Most Durable Floors for Busy Households. Retrieved from https://giantfloor.com/blogs/news/top-5-most-durable-floors-for-busy-households
- TAS Flooring. (N.D.). Ambiance Collection. Retrieved from https://www.tasflooring.com/product/ambiance-collection
- Flooring America. (N.D.). The Most Durable Flooring Options. Retrieved from https://www.flooringamerica.com/blog/most-durable-flooring-options
- Bob Vila. (N.D.). The Best Flooring Options for a Look That Lasts. Retrieved from https://www.bobvila.com/interior/ultra-durable-flooring-options
- Family Handyman. (N.D.). How to Repair Vinyl Plank Flooring. Retrieved from https://www.familyhandyman.com/project/how-to-repair-vinyl-plank-flooring
- Nilfisk. (N.D.). How to Care for Vinyl Plank Flooring. Retrieved from https://www.nilfisk.com/en-us/professional/news-and-articles/how-to-care-for-vinyl-plank-flooring
- SERVPRO. (N.D.). How to Repair Laminate Floor Water Damage. Retrieved from https://www.servpro.com/resources/water-damage/how-to-repair-laminate-floor-water-damage
- Sherwin-Williams Industrial. (N.D.). The Best Heavy-Duty Flooring for Industrial and Manufacturing Facilities. Retrieved from https://industrial.sherwin-williams.com/emeai/gb/en/resin-flooring/media-center/articles/the-best-heavy-duty-flooring-for-industrial-and-manufacturing-facilities.html