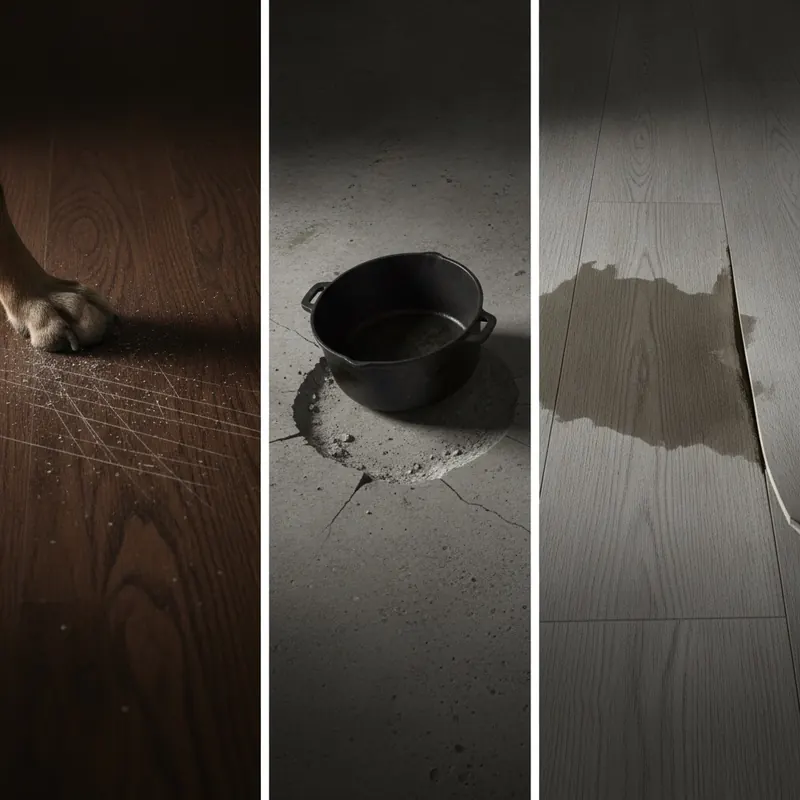
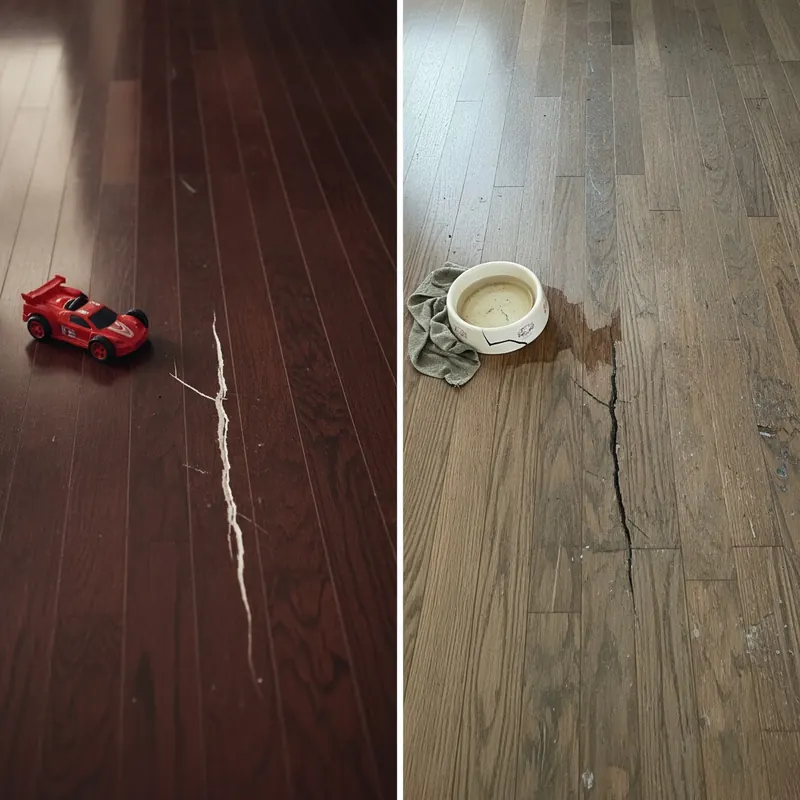
That heart-sinking skitter of claws as the dog rounds the kitchen corner. The scrape of a dining chair pushed back one too many times. The tell-tale chip in a brand-new tile or the deep scratch across a pristine wood plank. For any homeowner, especially those with busy families, pets, and active lives, the fear of damaging expensive floors is a constant source of stress. You invest in your home, hoping for beauty and longevity, only to find yourself worrying about every dropped toy and spilled drink.
What if there was a floor that promised to stand up to the chaos of real life? You may have heard of Adamantine flooring, a name that suggests diamond-like hardness, and wondered if it’s the solution to your flooring woes.
This is more than just a review. This is The Indestructible Floor Playbook—your complete, lifecycle guide to choosing flooring that lasts, protecting your investment, and fixing damage like a pro. We’ll start with a deep dive into Adamantine flooring, but we won’t stop there. We’ll arm you with our exclusive “Family-Proof Scorecard” to compare all the top durable options, teach you the science of chip-resistance, and provide step-by-step guides to make your floors look new for years to come. This is the last guide you’ll ever need on durable home floors.
- What is Adamantine Flooring? An Unbiased Review
- The Science of a Chip-Proof Floor: Understanding Durability Ratings
- The Family-Proof Flooring Scorecard: Choosing the Best Option for Your Home
- The Proactive Protection Playbook: Making Your Floors Last a Lifetime
- The Damage Repair Guide: Fixing Chips and Scratches Like a Pro
- Frequently Asked Questions (FAQ)
- Your Playbook for a Worry-Free Floor
- References
What is Adamantine Flooring? An Unbiased Review
Before we can compare it to other options, we need to understand exactly what Adamantine flooring is and what it claims to offer. This section cuts through the marketing to provide a clear, balanced look at its composition, real-world performance, and cost, helping you move from simple awareness to informed consideration.
(This review was last updated in July 2026 to reflect current market pricing and product specifications.)
Composition and Technology: What Is It Made Of?
Adamantine flooring is a type of resilient flooring, typically built on a Stone Polymer Composite (SPC) core. This is a crucial detail, as an SPC core is known for its exceptional rigidity and density, which are the primary sources of its impact and dent resistance. Unlike more flexible flooring, an SPC plank is less likely to compress when something heavy is dropped on it.
A typical Adamantine plank is constructed in multiple layers:
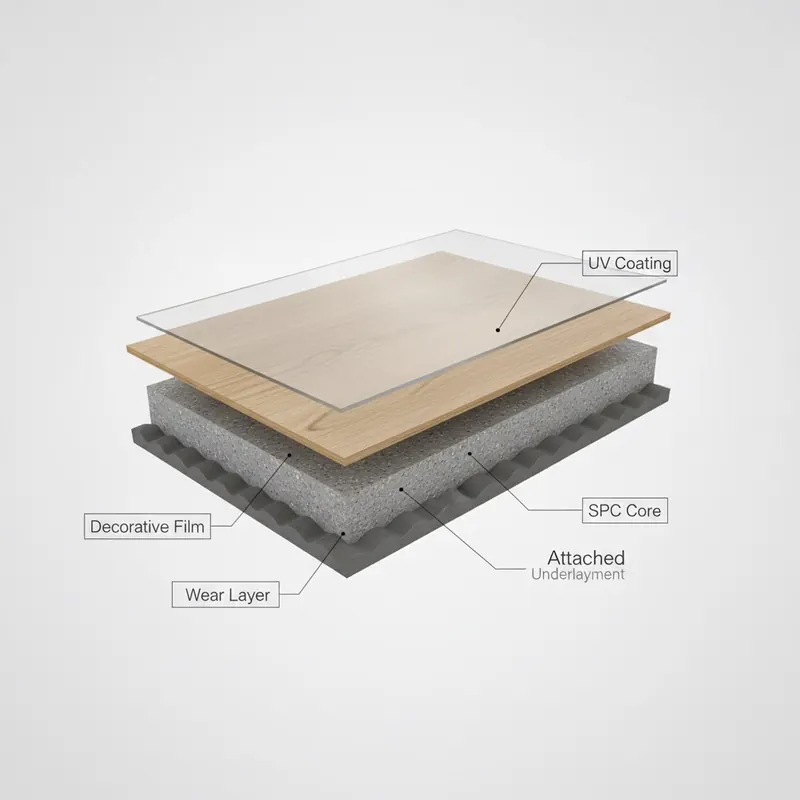
- UV Coating: The topmost layer provides a durable, easy-to-clean surface that resists fading from sunlight and provides initial stain protection.
- Wear Layer: This is arguably the most important layer for long-term durability. It’s a clear, tough coating that protects the printed design from scratches, scuffs, and foot traffic. Its thickness is a key indicator of quality.
- Decorative Film: This is the high-resolution printed layer that gives the plank its appearance, whether it’s a realistic wood grain, stone pattern, or other design.
- SPC Core: The heart of the plank. It’s a dense, waterproof composite of natural limestone powder, polyvinyl chloride, and stabilizers. This core provides the plank’s structural integrity and dimensional stability, preventing it from expanding and contracting with temperature changes.
- Attached Underlayment: Most Adamantine products come with a pre-attached pad, often made of cork or foam. This layer provides sound dampening, adds comfort underfoot, and simplifies the installation process.
This multi-layer construction is specifically engineered to create a product that is not only chip-resistant but also 100% waterproof and stable enough for nearly any room in the house.
Adamantine Flooring Reviews: Pros vs. Cons
No product is perfect. To provide a truly unbiased review, we’ve aggregated feedback from distributor sites, customer testimonials, and professional installers to create a balanced picture of Adamantine flooring’s real-world performance.
Pros vs. Cons of Adamantine Flooring
| Pros | Cons |
|---|---|
| Exceptional Durability: The dense SPC core offers excellent resistance to dents and impacts from dropped items. | Hardness Underfoot: The same rigidity that makes it durable can feel harder and less forgiving underfoot than WPC vinyl or cork. |
| 100% Waterproof: The core materials are impervious to water, making it a top choice for kitchens, bathrooms, and basements. | Subfloor Intolerance: The rigid core requires a very flat subfloor. Imperfections can cause planks to click or even break over time. |
| High-Definition Visuals: Modern printing technology allows for very realistic wood and stone looks. | Higher Price Point: It often costs more than traditional laminate and some other luxury vinyl tile (LVT) products. |
| Easy Maintenance: The non-porous surface is simple to clean and doesn’t require sealing or special treatments. | Potential for Scratches: While highly dent-resistant, the wear layer can still be scratched by sharp objects, just like any resilient floor. |
| DIY-Friendly Installation: The click-lock system makes it a viable project for experienced DIYers. | Limited Brand Recognition: As a newer or less common brand, it may have fewer reviews and less availability than industry giants. |
The most common praise focuses on its performance in high-traffic, high-risk areas like kitchens. Homeowners love the peace of mind that comes with a waterproof and impact-resistant floor. Conversely, the most frequent complaint relates to installation challenges if the subfloor isn’t perfectly level, highlighting the importance of proper preparation.
Cost Analysis: How Much Does Adamantine Flooring Cost?
Adamantine flooring typically falls into the mid-to-high range for resilient flooring.
- Material Cost: Expect to pay between $4.00 and $7.00 per square foot for the planks alone.
- Professional Installation: Installation costs generally add $2.00 to $5.00 per square foot, depending on your location and the complexity of the job.
The total cost of ownership is influenced by several factors:
- Subfloor Preparation: If your subfloor needs significant leveling, this can add considerable cost.
- Removal of Old Flooring: Tearing out and disposing of existing carpet, tile, or wood will be an additional charge.
- Layout Complexity: Rooms with many angles, closets, or stairs will increase labor costs.
While the upfront cost may be higher than some laminates, its long-term value comes from its resistance to water damage and impacts, potentially saving you from a costly replacement down the line.
Brand Showdown: Adamantine vs. Coretec vs. Pergo
To put Adamantine in context, it’s helpful to compare it directly to well-established industry leaders like Coretec (a pioneer in WPC/SPC vinyl) and Pergo (a leader in laminate).
| Feature | Adamantine Flooring | Coretec | Pergo (Laminate) |
|---|---|---|---|
| Core Technology | Typically SPC (Stone Polymer Composite) | WPC (Wood Polymer Composite) or SPC | HDF (High-Density Fiberboard) |
| Water Resistance | 100% Waterproof | 100% Waterproof (for vinyl products) | Water-Resistant (not waterproof); core can swell with prolonged exposure |
| Impact Resistance | Excellent (due to dense SPC core) | Good to Excellent (SPC is more dent-resistant than WPC) | Fair to Good; can chip or dent under heavy impact |
| Price per sq. ft. | $4.00 – $7.00 | $5.00 – $9.00 | $2.50 – $5.00 |
| Warranty | Typically Limited Lifetime Residential | Typically Limited Lifetime Residential | Typically Limited Lifetime Residential |
This comparison shows that Adamantine flooring competes directly with the high-performance SPC products from major brands like Coretec. Its primary advantage over a laminate like Pergo is its fully waterproof construction, making it a more versatile and worry-free option for any room in the house.
The Science of a Chip-Proof Floor: Understanding Durability Ratings
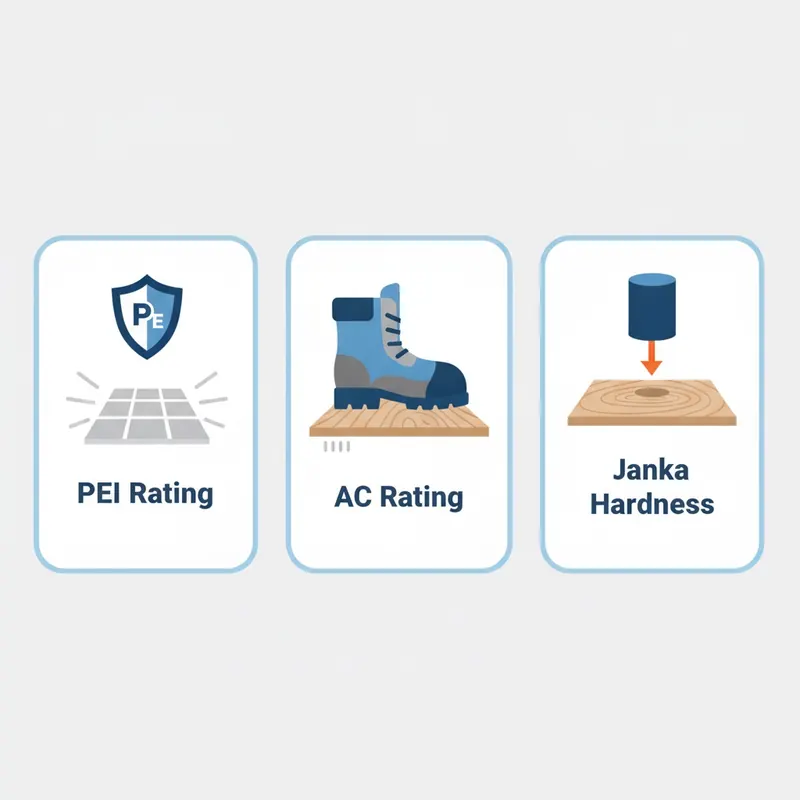
To move beyond brand names and truly choose a durable floor, you need to speak the language of the industry. Manufacturers use standardized tests to rate their products, and understanding these ratings is the key to making an informed decision. This section demystifies the technical jargon and turns you into a savvy flooring shopper.
For Tile: What is the PEI Rating and Why Does It Matter?
When it comes to ceramic and porcelain tile, the most important rating for durability is the PEI (Porcelain Enamel Institute) rating. This scale measures the abrasion resistance of the tile’s glaze—its ability to withstand wear and tear without showing damage.
According to the Tile Council of North America (TCNA), the industry authority on standards, the PEI scale is as follows[1]:
- PEI 1: Suitable for walls only. Not for foot traffic.
- PEI 2: Light traffic areas, like residential bathrooms.
- PEI 3: Light to moderate traffic, suitable for most residential applications.
- PEI 4: Moderate to heavy traffic. Recommended for all residential areas and light commercial use.
- PEI 5: Heavy to extra-heavy traffic. Suitable for all residential and most commercial applications.
For a chip-resistant floor in a high-impact area like a kitchen, a PEI rating of 4 or 5 is strongly recommended[1]. Furthermore, porcelain tile is inherently more chip-resistant than standard ceramic because its dense body has a water absorption rate of 0.5% or less, making it harder and more durable throughout[1].
For Laminate: Decoding the Abrasion Class (AC) Rating
Laminate flooring uses a different system called the Abrasion Class (AC) rating. This rating measures the floor’s resistance to abrasion, impact, stains, and even cigarette burns. It’s a comprehensive test of its overall toughness.
The ratings are straightforward:
- AC1: Light residential use (e.g., bedrooms).
- AC2: General residential use (e.g., living rooms).
- AC3: Heavy residential use and light commercial use.
- AC4: General commercial use (e.g., small offices, cafes).
- AC5: Heavy commercial use (e.g., public buildings, department stores).
For a busy family home, you should look for a laminate with a rating of at least AC3. However, for maximum durability in high-traffic areas like hallways and kitchens, AC4 and AC5 are suitable for heavy residential and light commercial traffic, offering the best long-term performance[2].
For Wood: The Janka Hardness Test Explained
For solid and engineered hardwood, the key metric for dent and ding resistance is the Janka Hardness Test. This test measures the force required to embed a 0.444-inch steel ball halfway into a piece of wood. The higher the number, the harder and more resistant the wood is to denting.
The National Wood Flooring Association (NWFA) recognizes this as the industry standard[3]. The scale can be dramatic:
- Red Oak (the industry benchmark): 1290
- Hickory: 1820
- Brazilian Cherry: 2350
- Brazilian Walnut (Ipe): 3684
A harder wood like Brazilian Walnut is nearly three times more resistant to denting from a dropped object than Red Oak[3]. However, it’s crucial to remember that the Janka rating only measures dent resistance. Scratch resistance is primarily determined by the quality and type of the factory-applied finish.
The Family-Proof Flooring Scorecard: Choosing the Best Option for Your Home
Now that you understand the technical ratings, it’s time to put it all together. As a flooring professional, I know that choosing a floor isn’t just about numbers; it’s about how a material performs in the real world of spills, toys, and pets. That’s why we created the Family-Proof Flooring Scorecard. This unique framework rates the top contenders on the criteria that matter most to busy households.

Top Contenders Rated: LVT vs. Laminate vs. Porcelain vs. Engineered Hardwood
We’ve rated each flooring type on a scale of 1 to 10 (where 10 is the best) across five key categories.
The Family-Proof Flooring Scorecard
| Criteria | Luxury Vinyl (SPC) | Laminate (AC4+) | Porcelain Tile (PEI 4+) | Engineered Hardwood |
|---|---|---|---|---|
| Chip & Dent Resistance | 9/10 | 7/10 | 8/10 | 6/10 |
| Scratch Resistance | 8/10 | 9/10 | 10/10 | 5/10 |
| Water Resistance | 10/10 | 6/10 | 10/10 | 4/10 |
| Stain Resistance | 9/10 | 8/10 | 10/10 | 6/10 |
| Sound Dampening | 7/10 | 6/10 | 4/10 | 5/10 |
| Overall Family Score | 8.6 | 7.2 | 8.4 | 5.2 |
- Luxury Vinyl (SPC): The all-around champion for family life. Its rigid SPC core provides superior dent resistance, and its construction is often 100% waterproof, making spills a non-issue. With a quality wear layer and attached pad, it balances durability, water protection, and reasonable acoustics.
- Porcelain Tile: The king of scratch and stain resistance. A high-quality porcelain tile is nearly indestructible in terms of surface wear. Its main vulnerability is chipping from a very heavy, sharp impact, and its hardness can be unforgiving. It also scores lowest on sound dampening, often creating an echoey environment without area rugs.
- Laminate (AC4+): An excellent value proposition, offering some of the best scratch resistance on the market thanks to its tough top layer. However, its wood-based core remains its Achilles’ heel when it comes to water, making it only water-resistant, not waterproof.
- Engineered Hardwood: Unbeatable for authentic beauty and warmth. While a hard species (high Janka rating) and a durable finish help, it remains the most susceptible to dents, scratches, and water damage of the group, requiring more care and attention in a busy home.
Special Considerations for Kids and Pets: Safety and Maintenance
Durability isn’t just about damage; it’s also about creating a healthy and safe environment for your family.
- Indoor Air Quality: Look for flooring with FloorScore® certification. This independent program tests for volatile organic compound (VOC) emissions, ensuring the product contributes to healthier indoor air for your children and pets[4].
- Antimicrobial Properties: Some flooring options, like cork (a type of resilient flooring), are naturally antimicrobial and resist the growth of mold and mildew.
- Ease of Cleaning: Non-porous surfaces like vinyl and porcelain are the easiest to clean and sanitize, a major plus for homes with pets and crawling toddlers.
- Traction: While smooth floors are easy to clean, consider textured options (like embossed-in-register vinyl or matte-finish tile) to provide better traction for running kids and pets. The Resilient Floor Covering Institute (RFCI) provides guidance on the safety and performance of these surfaces[5].
The Proactive Protection Playbook: Making Your Floors Last a Lifetime
Choosing the right material is only half the battle. The true secret to a long-lasting floor lies in what happens before, during, and after installation. This playbook shifts your focus from selection to preservation, ensuring your investment stands the test of time.
Before You Install: The Critical Role of Subfloor and Underlayment
Many homeowners don’t realize that the most beautiful, durable flooring in the world can fail if the foundation beneath it is flawed. According to flooring inspectors, over 30% of tile failures are due to subfloor movement or imperfections.
- A Flat Subfloor is Non-Negotiable: For rigid products like LVT, laminate, and tile, the subfloor must be perfectly flat. High spots create stress points, while low spots allow the flooring to flex, which can lead to broken tile grout, cracked tiles, or damaged click-lock joints.
- Underlayment is Your Insurance Policy: A quality underlayment does more than just quiet footsteps. It absorbs impact from dropped objects, protecting the planks or tiles above. For tile installations over wood subfloors, an “uncoupling membrane” is essential. As recommended by the TCNA, this layer moves independently of the subfloor, preventing cracks from transferring to the tile[1]. Following the installation standards set by organizations like the Certified Floorcovering Installers Association (CFI) is crucial for longevity[6].
A Guide to Understanding and Maximizing Your Flooring Warranty
A “Lifetime Residential Warranty” sounds great, but the fine print matters. Understanding what is—and isn’t—covered is key to protecting your investment.
Common Warranty Pitfalls:
- Improper Installation: This is the #1 reason for denied claims. Most manufacturers require installation to follow their specific guidelines and industry standards (like those from the CFI[6]). Using a certified professional is often your best protection.
- Subfloor Issues: Warranties do not cover damage caused by an uneven or unstable subfloor.
- Incorrect Maintenance: Using the wrong cleaning products (like steam mops on laminate or vinyl, or acidic cleaners on tile) can damage the finish and void the warranty.
- Normal Wear and Tear: Warranties cover manufacturing defects, not scratches, dents, or dulling that occurs from normal household use.
To maximize your warranty, keep all your paperwork, use only manufacturer-recommended cleaning products, and address any installation concerns with your contractor immediately.
The Damage Repair Guide: Fixing Chips and Scratches Like a Pro
Even the toughest floors can suffer an accident. But a single chip or scratch doesn’t have to mean a ruined floor. This guide provides actionable, step-by-step solutions for the most common types of damage, empowering you to perform invisible repairs.
Fixing Chipped Floor Tiles: A Step-by-Step Guide
A chip in a prominent tile can be an eyesore. Before you call a professional, you can often repair it yourself using a color-matched epoxy kit.
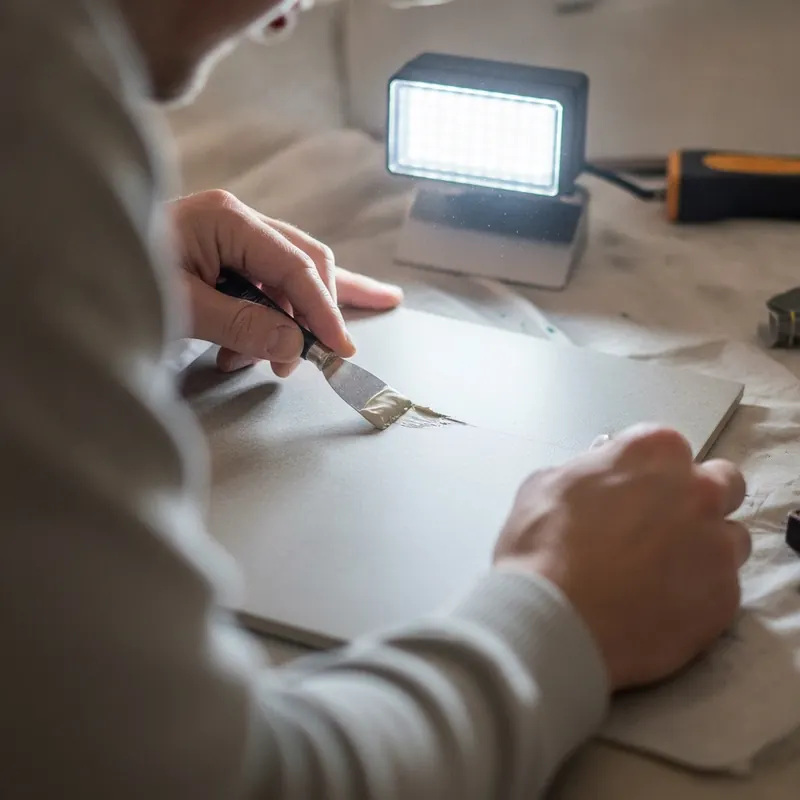
- Diagnose the Chip. Is it a small surface chip from a dropped glass, or a deep crack extending through the tile? Small impact chips are ideal for repair. Stress cracks may indicate a larger subfloor issue.
- Clean and Prepare the Area. Thoroughly clean the chip and the surrounding area with rubbing alcohol to remove any dirt, grease, or debris. Allow it to dry completely.
- Mix the Epoxy. Following the kit’s instructions, mix the two parts of the epoxy filler. This is the most critical step: add tiny amounts of the included color tints to the epoxy until you have a perfect match for your tile. Test the color on a hidden area or a spare tile. This is the key to an invisible repair.
- Fill the Chip. Use a small putty knife or razor blade to carefully apply the mixed epoxy into the chip. Overfill it slightly, as it may shrink as it dries.
- Level the Repair. Scrape the surface with the edge of the putty knife to make it perfectly flush with the rest of the tile. Wipe away any excess immediately with a cloth dampened with alcohol.
- Cure. Allow the epoxy to cure for the time specified in the instructions, typically 24 hours. During this time, do not touch the area or allow it to get wet. For large-scale damage, replacing the tile following the TCNA Handbook is the best course of action[1].
Repairing Scratched Hardwood: From Surface Scuffs to Deep Gouges
The key to fixing a scratched hardwood floor is correctly identifying the severity of the damage. Our Scratch Severity Scale will help you choose the right solution.
- Level 1: Surface Scuff (Finish Only). This is a light scratch in the top polyurethane layer that hasn’t reached the wood.
- Solution: A simple polish or a “screen and recoat” by a professional.
- DIY Fix: Use a high-quality hardwood floor polish and a microfiber cloth to buff out the scratch.
- Level 2: Minor Scratch (Into the Wood). The scratch has broken through the finish and lightly scraped the wood itself.
- Solution: A wax stick or stain-matching repair marker.
- DIY Fix: Choose a wax stick that matches your floor’s color. Rub it over the scratch, then buff away the excess with a soft cloth.
- Level 3: Deep Scratch or Gouge. A significant scratch that has removed wood and is highly visible.
- Solution: Wood filler and a finish touch-up.
- DIY Fix: Clean the gouge. Apply a color-matched, stainable wood filler. Once dry, sand it smooth, apply a matching stain, and then carefully apply a matching topcoat finish. Crucially, you must match the sheen (matte, satin, or gloss) of your floor for the repair to blend in.
- Level 4-5: Widespread or Deep Damage. Multiple deep scratches across a large area.
- Solution: Professional refinishing. A pro will sand the entire floor down to bare wood, removing all damage, and then apply new stain and finish. This is the only way to truly restore a heavily damaged floor. According to the NWFA, a professional screen and recoat can cost $1-$2 per square foot, while a full refinishing for deep scratches costs $3-$8 per square foot[3].
Frequently Asked Questions (FAQ)
What is the difference between resilient flooring and laminate?
This is a common point of confusion. The key difference is the core material. Resilient flooring, as defined by the RFCI, has a core made of waterproof materials like vinyl, cork, or rubber[5]. Laminate flooring has a core made of high-density fiberboard (HDF), which is essentially wood fiber. This makes laminate highly susceptible to swelling and permanent damage from water, whereas resilient flooring is typically 100% waterproof.
Is waterproof flooring really worth the investment for a family?
Absolutely. For high-risk areas like kitchens, bathrooms, laundry rooms, and basements, it’s one of the smartest investments you can make. A single dishwasher leak or overflowing bathtub can completely destroy a water-resistant laminate or hardwood floor, requiring a full replacement and potentially causing subfloor damage. A 100% waterproof floor like LVT or porcelain tile contains the spill on the surface, saving you thousands in potential repairs and providing invaluable peace of mind.
How does impact resistance differ from scratch resistance?
This is a critical trade-off to understand. The two properties are not the same and are often inversely related.
- Impact Resistance is a material’s ability to absorb force without denting or chipping. Softer, more flexible materials (like rubber or WPC vinyl) are excellent at this.
- Scratch Resistance is a material’s ability to resist abrasion from sharp objects. Harder, denser surfaces (like porcelain tile or the aluminum oxide finish on laminate) excel here.
Think of a rubber gym floor: you can drop a heavy weight on it without leaving a dent (high impact resistance), but you could easily cut it with a utility knife (low scratch resistance). Conversely, a porcelain tile is very difficult to scratch (high scratch resistance), but a sharp impact from a dropped hammer can chip it (lower impact resistance). Understanding this helps you choose the right material for the right room, and it’s why organizations like ASTM International have separate, specific tests for each property[8].
Your Playbook for a Worry-Free Floor
Choosing a floor for your home shouldn’t be a gamble. By moving beyond marketing claims and arming yourself with the right knowledge, you can select a floor that truly fits the demands of your life. The Indestructible Floor Playbook is about making a smart choice upfront using data-driven tools like our Family-Proof Scorecard, understanding how to proactively protect that investment through proper installation and care, and having the confidence to tackle common repairs yourself.
A truly durable floor is more than just a surface; it’s a long-term asset that provides a beautiful, resilient foundation for your family’s life, giving you peace of mind for years to come.
Feeling confident? Explore our detailed guides on specific flooring types or, if you need professional help, use our checklist to find a certified flooring installer in your area.
This article may contain affiliate links. All DIY repair guides should be followed with caution; please adhere to all manufacturer safety guidelines for tools and materials.
References
- Tile Council of North America. (N.D.). TCNA Handbook for Ceramic, Glass, and Stone Tile Installation. TCNA Publications.
- Floor Covering Institute. (N.D.). Understanding Laminate Flooring Standards. Retrieved from industry publications.
- National Wood Flooring Association. (N.D.). Official Flooring Guidelines. NWFA Publications.
- SCS Global Services. (N.D.). FloorScore® Certified Products. Retrieved from https://www.scsglobalservices.com/services/floorscore
- Resilient Floor Covering Institute. (N.D.). Defining Resilient Flooring. Retrieved from RFCI official website.
- Certified Floorcovering Installers Association. (N.D.). Installation Standards and Certification. Retrieved from CFI official website.
- ASTM International. (N.D.). Standard Test Methods for Flooring Materials. Retrieved from https://www.astm.org/